
Luftwaffe Lockdown
Wisdom from the Alpha: By Corp.Shephard
Oberkommando West Build Order Guide
At-a-glance overview


Introduction
This is a defensive build that I developed during the Alpha. The goal of the build is to situate yourself on the map using the "Battlegruppe Headquarters" truck and then fast tech into Obersoldaten. Obersoldaten are unmatched elite infantry that squash enemy infantry when used correctly. Their only weakness is enemy armor. If you get them early enough then you can crush the enemy's infantry early game!
To stop enemy armor we will rely on Panzerschrecks, AT guns and the deadly Jadgpanzer tank destroyer.
We will use the Luftwaffe Ground Forces doctrine to support this strategy. I also believe that the Fortification doctrine, a premium doctrine, is a valid choice as well. I will focus on the Luftwaffe version.
Let us review what Luftwaffe Ground Forces offers us.
Luftwaffe Ground Forces Doctrine
MG-34 Squad
Unlocks at CP 1
Pros
- Only costs 210 manpower.
- Wide firing arc.
- Strong suppression.
- Incendiary AP rounds ability at veteran level 1.
Cons
- Low damage.
- Fragile 4-man squad.
The MG-34 is a cheaper MG-42 that has less damage. There's not much else to say. It scales a little better thanks to 5 veteran levels.
Our strategy leaves us a little weak early game so the MG-34 will keep us safe.
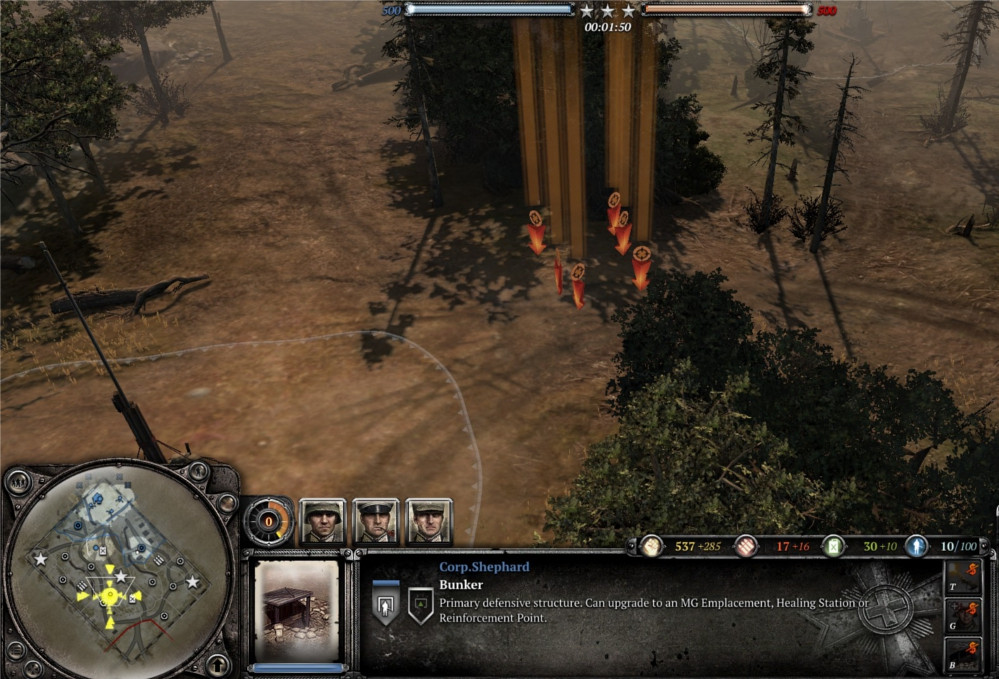
Battlefield Fortifications
Unlocks at CP 2
Pros
- Passive ability.
- Enables Sturmpioneers to build new defensive structures: Flak Emplacements, Bunkers, Trenches.
Cons
- Flak Emplacement is easily de-crewed and turned against you.
- Flak Emplacement costs 25 fuel.
An interesting power. Personally? I have never used this power once. I don't like static defenses much and the most interesting one is the Flak Emplacement. The reduced income of Oberkommando West makes this too costly to consider. The emplacement is also weak. It has only a small amount of health so it can be completely destroyed pretty easily. It can also be de-crewed and stolen!
I believe this power has potential but I have not found it yet.
Fallschirmjäger Squad
Unlocks at CP 3
Pros
- Squad can uniquely be deployed from any neutral building instantaneously. It can even be deployed from buildings in the fog of war and in enemy territory.
- Wields the deadly FG-42 without needing upgrades. Effective at every range.
- Can throw Bundled Grenades
- Can fire a Panzerfaust
Cons
- Despite having a small amount of "armor" this 4-man squad is fragile.
- Extremely expensive. 440 manpower per squad.
- Costs 45 manpower to reinforce members (acts as if it was a 360 manpower squad for reinforcement).
Fallschirmjägers are very effective elite troops that hit the field early. They are generalists that are effective at all ranges and have abilities to help them deal with any situation. Be careful about when and where you call them in though. Their ability to appear from any building is quite nice but deploying them into a battle that is already underway is very dangerous if they are behind enemy lines. They can die quickly.
Valiant Assault
Unlocks at CP 6
Pros
- This power boosts the movement and damage of all infantry after it is activated.
- Lasts for roughly half a minute.
- Good bonuses.
Cons
- Expensive at 100 munitions per activation.
Valiant Assault is actually quite good. It is pricy for a side that doesn't get as many munitions as other sides but it is essentially Counterattack Tactic's "For the Motherland!" power without a disadvantage.
Use this power to chase enemy tanks with Panzerschrecks and finish them off or to unexpectedly rush artillery units or vulnerable positions with infantry.
I have had this used against me a few times to finish off my vehicles. It can be good.
Airborne Assault
CP 10
Pros
- Targets a sector.
- Multiple planes will strafe the sector pinning and killing all infantry nearby.
- After the initial strafing run a Fallscrimjager squad will drop down from the sky under your control.
Cons
- Expensive. 250 munitions.
- No anti-tank potential.
- Can only target enemy sectors. Targeting sectors is awkward.
A very interesting power. This is one of the few powers that actually lets you trade munitions for manpower in the form of Fallscrimjagers infantry. Airborne Assault is actually quite incredible. The strafing runs do really good damage and pin everything in/near the sector's capture point. Fallscrimjagers fall from the sky shortly after and can easily finish off any troops who stuck around. It is great to soften up a position before an assault or to back-cap a victory point in a dire circumstance.
If you use Airborne Assault while at 91+ pop cap (Fallscrimjagers take 10 population) then you will not receive Fallscrimjagers after the first strafing run. Beware.
The Build
Early Game
Use your truck to scout enemy movements while you buy your three Volks.
Early deployment of troops is key. Keep your Sturmpioneers and your Volksgrenadiers close together to secure a specific area of the map. This area will be where you put your Battlegruppge Headquarters. Start upgrading your truck very early. Keep your Sturmpioneers capturing points close to the truck. Riflemen and Conscripts can kill the truck solo if they find it setting up. The only unit that poses enough of a threat to stop them quick enough is your first Sturmpioneer.
When capturing territories with your Volksgrenadiers always build some sandbag walls while you're idling. Green cover is good for Volks as it makes them difficult to rush. They are best at long range.
Where do I set up my Battlegruppe HQ Truck?
Truck placement is key. This will be your forward reinforcement point. Inevitably you will use it as your retreat point as well.
Here are the things you should look for when assessing truck positions.
Let me provide some example locations.
Here are the things you should look for when assessing truck positions.
- The HQ needs hedgerows or buildings that will shield it from enemy AT weapons.
- The HQ needs to be close to your cut off.
- The HQ should be close to your fuel
- The HQ should offer a clear attack path to the enemy cut-off position.
- The HQ should let you threaten/control two victory points easily.
Let me provide some example locations.
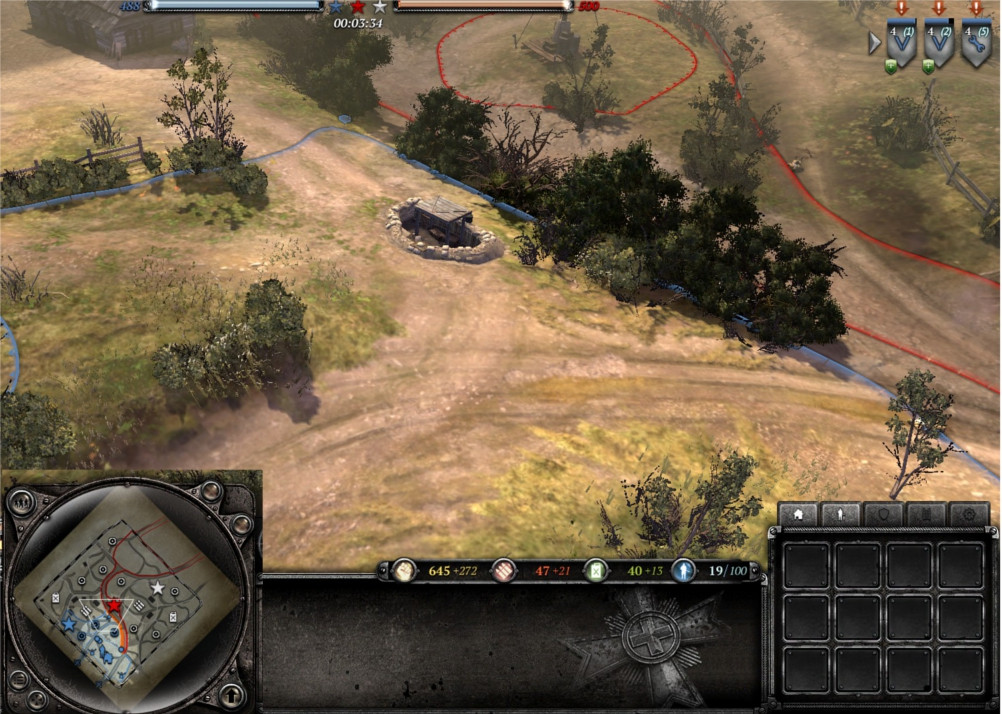
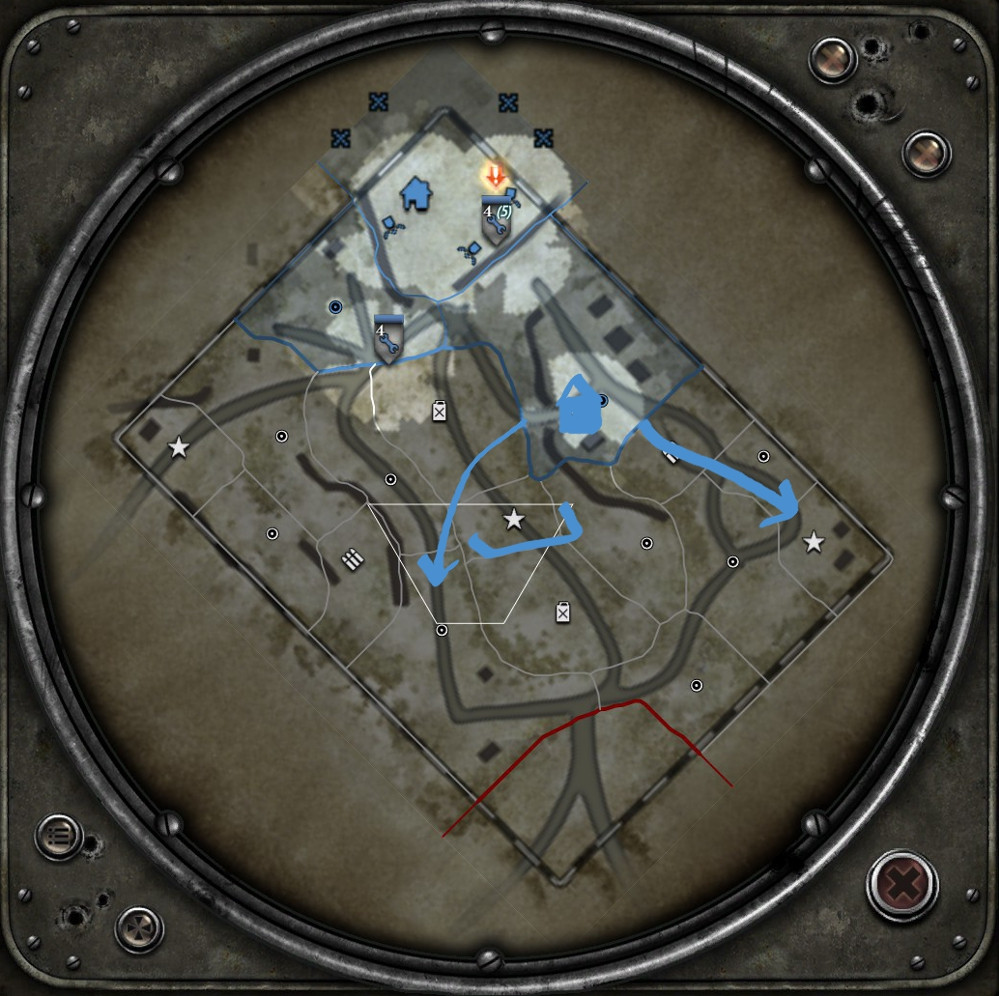
Kholodny Ferma
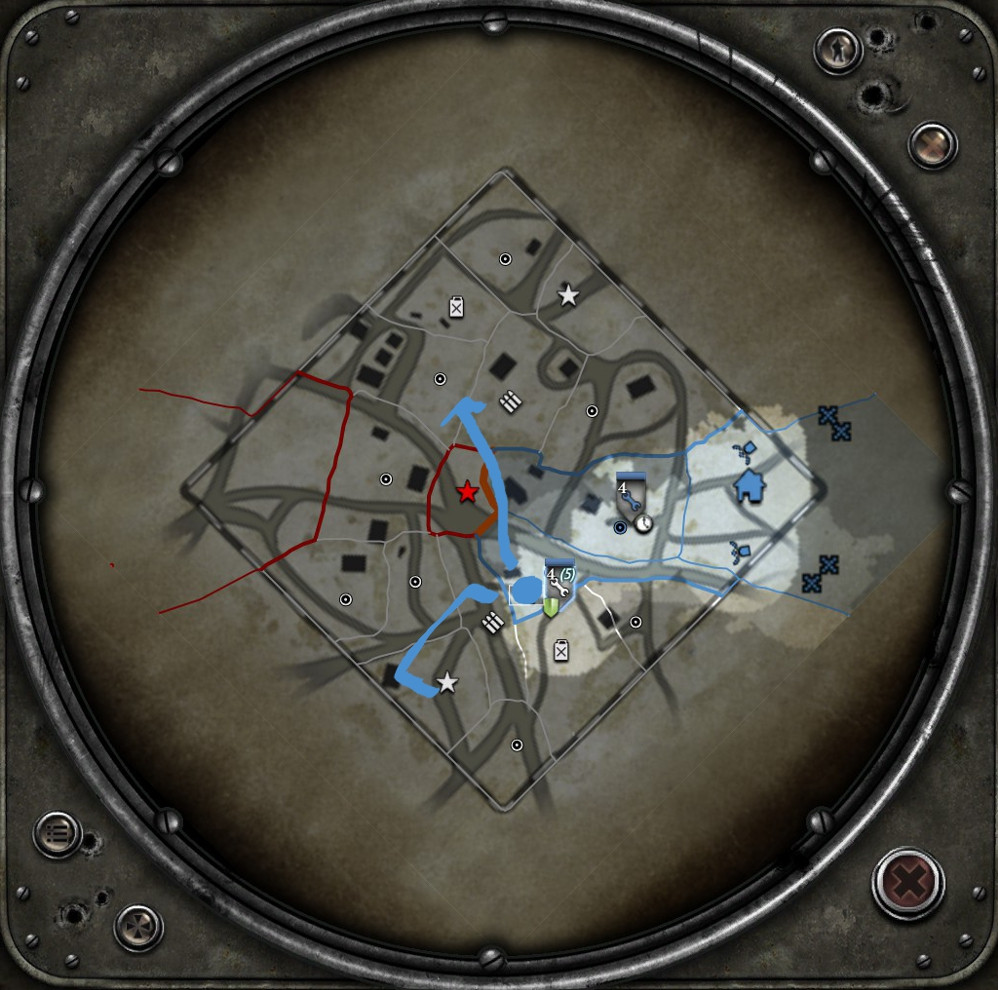
I have marked the ideal truck location with a blue dot and a bunker respectively. Notice how the truck is on my cutoff which gives me a huge home-field advantage when protecting my own resources. Two victory points are easily in striking distance. AT guns cannot attack me easily because of a hedgerow and building to my west and north. If I cut across the center I can cutoff the enemy's access to all of the northern map. I will control the south easily with my HQ advantage so I only need to focus on ruining his resources.
You must wrap your head around the economy of Oberkommando West. You get less resources than the other player. This means that capturing the map is not as valuable as denying the map from the enemy. Decapturing an enemy point actually helps you more than capturing a neutral point.
You will need territories, of course, and some enemies will be too strong to attack and cut-off directly. Always keep this advice in mind though when you move to capitalize on a victory. Cut-offs and de-captures are more valuable than captures.
Let us look at some other maps and possible locations.
Langreskaya, south

I have marked the HQ location with a drawing of a house and a bunker respectively. It is incredibly easy for me to threaten his cut-off with a forward retreat point. The western part of the map is easily secured. I can drag the game out by controlling two victory points. It is hard to get around the hedgerow and kill my truck.
Minsk Pocket, north
Once again, locations are marked with a drawing of a house and a bunker. It is easy to contest both fuels with a retreat point here. The walled compound offers good protection for my retreating troops. I can cross the middle to cutoff the north part of the map that is hard for me to control.
Minsk Pocket, south
Defending my fuel is trivial. I can reinforce units right next to the fuel point. I can assert control over the center VP easy and threaten his fuel constantly. The hedgerow protecting my truck is thin but good enough to protect me from most angles.
Not all maps will have good truck positions. Langreskaya North does not have as good of an aggressive HQ position. You have to either open your truck to AT gun fire or position it behind buildings in the east which puts you far from the enemy's cutoff and leaves your own cutoff vulnerable. You will need to improvise. You will need to sacrifice advantages and learn to make the best of what you chose.
Let us move on with the build.
Early Game, Part 2 (After Battlegruppe HQ)
You get command point experience from building a Battlegruppe HQ truck. This should put you very close to CP1. When you get CP1 get two MG-34s back to back. If the enemy won't engage you early then spend excess manpower on an additional Volks squad while you wait.
Let's talk some basic tactics with your early units. Try to keep them together and use green cover constantly. Sturmpioneers are crucial to your early game. Keep them safe at all costs! Keep them reinforced at the HQ and heal them up as well. They are expensive as hell to reinforce! Build sandbags everywhere and hide behind them. Volksgrenadiers assure you victory at long range. Sturmpioneers assure you victory at medium and short range if the enemy charges. As your MG-34s start to hit the field your defensive advantage grows. Creep up on the enemy with MG-34 support. Screen every flank with Volksgrenadiers. They're cheap fodder that reinforces quickly.
Look for opportunities to strike into enemy territory and decapture crucial points. Don't risk your MG-34s frivolously! You need them alive and well.
As Oberkommando West you must manage all of your resources carefully. Repeat after me.
I will not throw a grenade until my second Panzerschreck.
There. That was easy! The Panzerschreck is crucially important anti-tank for OKW. Every scrap of early game munitions should be saved up for Panzerschrecks. They are your best counter to light armor. They are the only way your Volks will scale up into the late game.
While your munitions are slowly coming in and securing your future against armored threat we need to spend more manpower.
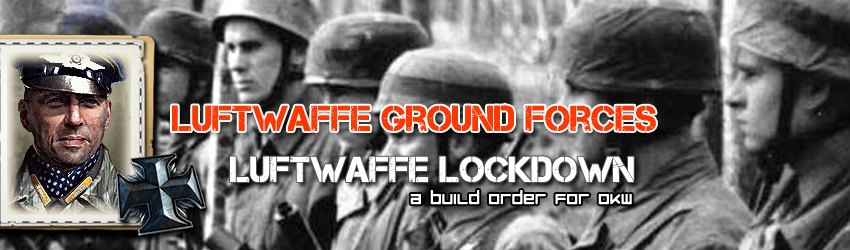
The Infantry Support Gun is an excellent choice. This solidifies our defensive position. This indirect fire weapon can inflict massive casualties with a little micro and luck. Try to keep it somewhat close to the enemy to improve its accuracy. Use the barrage power often but not when you can see the enemy. It is quite good but takes some getting used to.
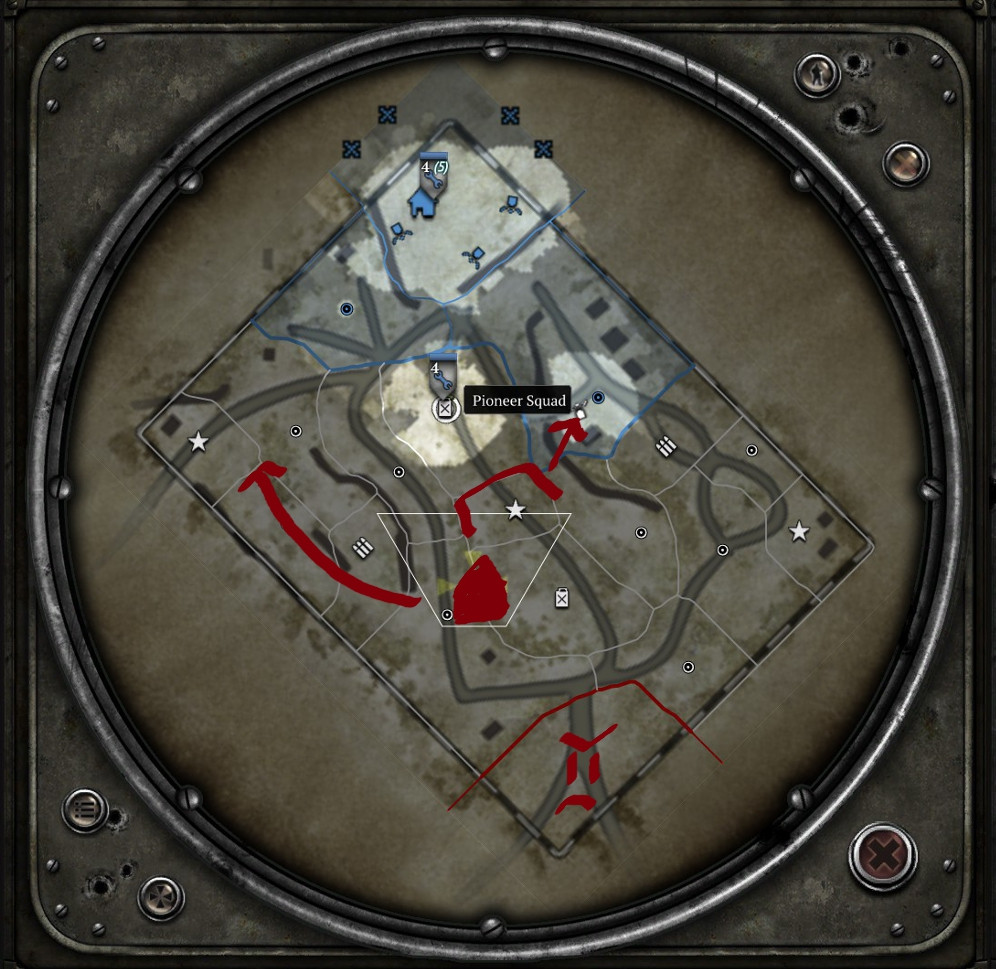
If you hit CP3 before you get 80 fuel then feel free to add in a Fallschirmjäger squad. Deploy this squad with care. Fallschirmjägers are vulnerable while they are deploying. Good deployment opportunities:
- When the enemy is about to flank an MG-34 with a lone squad, deploy from a nearby building and stop the flank.
- When your MG-34 has just suppressed a squad you can deploy to prey on them.
- When you have just caused him to retreat most of his forces you can deploy at his cutoff point to crush his resource income.
- When the enemy is using an early vehicle for a risky assault deploy and hit them with a Panzerfaust if you have other AT weapons nearby.
If you can avoid building a Fallschirmjäger and get an Obersoldaten then you should. Obersoldaten are better than Fallschirmjägers at anti-infantry and that's what we want from both of these squads. The Panzerfaust ability on the Fallschirmjäger is neat but largely useless because the squad is too fragile to get close to enemy tanks.
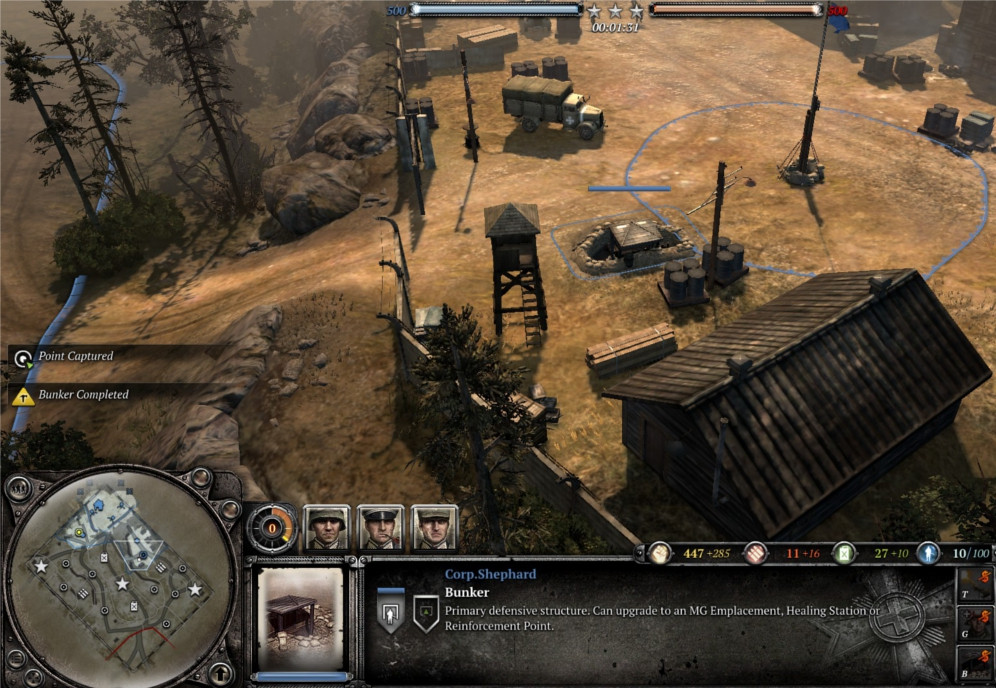
At 80 fuel you should build your next HQ truck: the Panzer Schwerer Command. This truck comes with a Flak Cannon on the top that is a legitimate threat to light armor and somewhat dangerous to enemy infantry.
Deploy it behind your Battlegruppe HQ.
This truck is expensive and actually sort of easy to kill. We want to use it as a defensive cushion rather than a spearhead defense. Losing this truck loses you 80 fuel and access to your best tanks. Ironic as it may be you must defend it.
While you wait for your Panzer Schwerer HQ to go up you should get some anti-tank insurance.
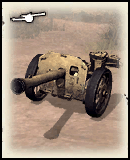
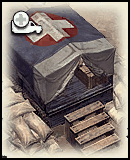
The Raketenwerfer is, frankly, a terrible AT gun. It has poor accuracy and abysmal range tempered by a fast rate of fire. It can retreat and garrison though so it does have some unique advantages. If you can get it up to veteran level 5 it actually becomes a terror to behold: vastly increased range, camouflages in cover and does nearly triple damage with its first shot out of camouflage. The baseline gun should only be purchased to save yourself from things like dual T-34/85 call-ins.
If you have the munitions I would avoid getting a Raketenwerfer AT gun and get more Volksgrenadiers and upgrade them with Panzerschrecks. If you have 3 or 4 Panzerschreck squads in the late game you have a very capable anti-tank force.
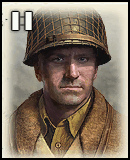
At last! The Obersoldaten. The Omega of infantry vs infantry combat. Obersoldaten shatter many rules of the game.
- Obersoldaten get a bonus that partially negates enemy retreat modifiers.
- Obersoldaten can fire their handheld M-34 LMG on the move.
- They have insane long range DPS.
They have no anti-tank weapons though. Never move your Obersoldaten out alone. Always keep Volksgrenadiers with Panzerschrecks defending them from tanks. Obersoldaten are incredible but they are also 400 manpower to buy and 50 manpower each to reinforce. Throw Volks up front to eat enemy fire and let your Obersoldaten annihilate enemies from the back.
Protect your Obersoldaten from snipers and tanks and they can carry you to victory. Consider a second Obersoldaten squad when/if you can afford it.
There's one missing piece and that's the Retreat Point for our Battlegruppe truck. The retreat point is massively valuable and helps keep your manpower costs low by allowing quick and easy retreats.
Sadly I feel that it's a luxury at the moment with how difficult the early game is right now. You should fit the retreat point in whenever you can. The best timing would be after the Obersoldaten but manpower is so scarce. Remember to activate the retreat point after you buy it.
If the enemy ever throws artillery at your retreat point you should deactivate the point and mass-retreat back to your original HQ. This can save your healing troops from being killed.
Late Game
You now have access to a manpower-only unit that can handle anything.
Your anti-tank situation is fragile however. We will address that with our next fuel pickup. The question you need to ask is: do you feel lucky, punk?
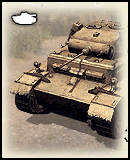
The Jagdpanzer IV is the safe choice. Deploy it from the Battlegruppe HQ for 130 fuel. It is a potent 60-range tank destroyer that is utterly useless against infantry. It is basically an SU-85 with better armor and penetration.
The Panther is the riskier choice. It is exceptionally more expensive at 175 fuel but it is a more well rounded tank that can carry you to victory. I suggest picking up a Jagdpanzer IV and then saving up for a Panther later.
Whichever you choose you should get your final truck next, unless you lose your Jagdpanther or Panther and need to replace it ASAP.
The Mechanized HQ truck gives you free repairs for tanks around it and allows you to convert fuel into munitions or munitions into fuel.
This is extremely powerful strategic flexibility.
If you need more anti-tank power then convert into fuel. This will let you get more Panthers and Jadgpazer IVs.
If you need more anti-infantry and capping power then convert into munitions. You will have unlocked Luftwaffe's ultimate power by now: Airborne Assault. Save up your munitions and deploy this power carefully. It will give you Fallscrimjäger troops and a massive advantage in battles for only munitions. It is exceptionally powerful as manpower can be scarce late game.
If you are comfortable with your army don't convert into anything. Conversion is a sacrifice and gives you fewer overall resources.
- Obersoldaten for killing infantry.
- Volks + Panzerschreck / Racketenwerfer AT guns for killing tanks.
- Infantry Support Gun for killing static weapon teams.
Your anti-tank situation is fragile however. We will address that with our next fuel pickup. The question you need to ask is: do you feel lucky, punk?
The Jagdpanzer IV is the safe choice. Deploy it from the Battlegruppe HQ for 130 fuel. It is a potent 60-range tank destroyer that is utterly useless against infantry. It is basically an SU-85 with better armor and penetration.
The Panther is the riskier choice. It is exceptionally more expensive at 175 fuel but it is a more well rounded tank that can carry you to victory. I suggest picking up a Jagdpanzer IV and then saving up for a Panther later.
Whichever you choose you should get your final truck next, unless you lose your Jagdpanther or Panther and need to replace it ASAP.
The Mechanized HQ truck gives you free repairs for tanks around it and allows you to convert fuel into munitions or munitions into fuel.
This is extremely powerful strategic flexibility.
If you need more anti-tank power then convert into fuel. This will let you get more Panthers and Jadgpazer IVs.
If you need more anti-infantry and capping power then convert into munitions. You will have unlocked Luftwaffe's ultimate power by now: Airborne Assault. Save up your munitions and deploy this power carefully. It will give you Fallscrimjäger troops and a massive advantage in battles for only munitions. It is exceptionally powerful as manpower can be scarce late game.
If you are comfortable with your army don't convert into anything. Conversion is a sacrifice and gives you fewer overall resources.
Countering Specific Strategies
This is a very general build. You'll need to adapt the strategy to what the enemy is doing.
Fighting US: Mid Game BARs and Lieutenant Tech
Often you'll see US players pour resources into BARs and pull out a Lieutenant early. The overwhelming anti-infantry firepower will cause you to play defensively.
The best counter you have early game is your overlapping MG-34s. Lock down as much map as you can and protect your flanks. He's slowed down his teching for more anti-infantry power so we'll do the same.
Aim for this unit after your first Obersoldaten. The Panzer II "Luchs" is a really solid light tank that can punish infantry heavy strategies like this. It is good against enemy infantry at all ranges. As soon as you get the tank you should use it aggressively to inspire fear and inflict causalities. As the enemy develops AT weapons you should use it defensively or to back up Volksgrenadiers with Panzerschrecks.
Two units will be a "red flag" for this unit. Play defensively the moment you see a M15 AA Half-track or a Captain.

The M15 AA Half-track is dangerous because of the 37mm auto-cannon. If it is stationary it can kill your Panzer II pretty quickly! It's super fragile though so weaken it with a Panzerschreck and then chase it down with the Panzer II. You just need to approach it as a threat and not get overconfident.
The Captain himself is not a huge issue. His dual Bazookas are a threat but he's much scarier because 57mm AT guns could be out on the field already. The Panzer II can't take much AT gun fire so you'll need to play it defensively now. Push forward with infantry and keep the Panzer II in the back. It offers good anti-infantry fire support from long range.
Always keep Panzerschrecks nearby! If you see an enemy Stuart Light Tank then you need to kill it quickly! The Stuart Light tank has a Shell Shock power that can stun your light armor. It will kill the Panzer II without even taking a scratch.
You often see both Lieutenant and Captain tech when facing Armored Company. Beware of the M10 Tank Destroyer. It's super fragile so scaring it should be easy.
The best counter you have early game is your overlapping MG-34s. Lock down as much map as you can and protect your flanks. He's slowed down his teching for more anti-infantry power so we'll do the same.
Aim for this unit after your first Obersoldaten. The Panzer II "Luchs" is a really solid light tank that can punish infantry heavy strategies like this. It is good against enemy infantry at all ranges. As soon as you get the tank you should use it aggressively to inspire fear and inflict causalities. As the enemy develops AT weapons you should use it defensively or to back up Volksgrenadiers with Panzerschrecks.
Two units will be a "red flag" for this unit. Play defensively the moment you see a M15 AA Half-track or a Captain.
The M15 AA Half-track is dangerous because of the 37mm auto-cannon. If it is stationary it can kill your Panzer II pretty quickly! It's super fragile though so weaken it with a Panzerschreck and then chase it down with the Panzer II. You just need to approach it as a threat and not get overconfident.
The Captain himself is not a huge issue. His dual Bazookas are a threat but he's much scarier because 57mm AT guns could be out on the field already. The Panzer II can't take much AT gun fire so you'll need to play it defensively now. Push forward with infantry and keep the Panzer II in the back. It offers good anti-infantry fire support from long range.
Always keep Panzerschrecks nearby! If you see an enemy Stuart Light Tank then you need to kill it quickly! The Stuart Light tank has a Shell Shock power that can stun your light armor. It will kill the Panzer II without even taking a scratch.
You often see both Lieutenant and Captain tech when facing Armored Company. Beware of the M10 Tank Destroyer. It's super fragile so scaring it should be easy.
Fighting US: Fast Captain
Sometimes you'll see players rush out a Captain. This is a build that I suggest in my other guide for US forces. This almost always means a fast Stuart Light Tank.
Your best bet against a Stuart is more Panzerschreck Volks or an additional Raketenwerfer 43 AT gun. The Stuart is decent against enemy infantry but it can't go toe-to-toe with AT infantry for very long. The Raketenwerfer will actually kill it in 2-shots but its terrible range and accuracy makes this difficult. Lure it into a Raketenwerfer shot and try to finish it with two Panzerschreck hits.
Accelerate production of your Jagdpanzer IV. This unit can do extreme damage to the Stuart at long range. Always support it with at least one Panzerschreck Volks though. The Stuart can and will kill it if it gets rear armor shots. Fast Captain can also mean that he's going for tanks quickly and he's going to stall you with AT guns. The Jagdpanzer helps against that too!
Fighting Soviets: Tier 1
The nightmare of M3A1s has begun. Soviets are really good against OKW right now so don't expect a walk in the park.
This build prioritizes two Panzerschrecks on Volksgrenadiers ASAP. This will be your go-to M3A1 counter. Keep your units together and try to force the M3A1 back with Sturmpioneer fire. You will have to play this like an Ostheer player. Your MG-34s will help keep the M3A1 at bay from long range. Your Sturmpioneers will threaten it at close range. Stall him until you get Panzerschrecks with a tight defensive formation! The Soviet player sacrifices his own ability to capture the map quickly when he uses the M3A1 and Combat engineer in tandum so it is okay if you have to sacrifice some of your own.
If you see multiple M3A1s then you need to get a Racketenwerfer ASAP! Keep it safe and try to snipe one early with it.
Snipers are another issue that comes out of Tier 1. Your best bet is to hope that you're playing on an Urban map and to use Fallscrimjager infiltration aggressively. Wait until his lines are weak but his snipers are still on the field and then appear behind him by deploying out of a building. Pincer his snipers and cut them down with FG-42 fire.
If the enemy does not follow Tier 1 with Tier 2 then you should consider the Panzer II "Luchs".
The Luchs can operate at long range without fearing sniper fire. It can weaken/clear Conscripts and Guards who often protect this strategy. Guards are dangerous to it so keep your distance and use your Infantry Support Gun to finish them off.
Fighting Soviets: Tier 2
The Maxims are coming! This is also a difficult strategy to fight at the very start of the game. Use sandbag walls and buildings to stall out the enemy Maxim push. Volksgrenadiers can survive against Maxims and sometimes fight back with good cover. You should be able to get your MG-34s up quickly and this will stall his advance. MG-34 vs Maxim is not a great fight but neither unit can really advance on the other one. Your Infantry Support Gun will make this stalemate into an advantage.
Your Sturmpioneers are crucial. This is the only unit that can kill Maxims well with a flank. Hide them in ambush positions or use buildings to fight Maxims. A good Sturmpioneer flank at the start of the game can ruin his formation and give you a free Maxim.
The hidden danger here is the Soviet Mortar team. These can really get out of hand if you don't deal with them. Your Infantry Support Gun can try to counter them but at long range it will never kill the 6-man squad easily. Probe flanks and threaten them with Fallscrimjägers. They can be brutal against this defensive strategy.
At CP 3 you can abuse the ability to infiltrate Fallscrimjägers from buildings to flank enemy positions. Remember my guidelines from above. Risky flanks are useless flanks.
When your Obersoldaten come out the game will hopefully get easier. Obersoldaten have really good long range DPS and a bonus against retreating units. No unit is worse at retreating than the Maxim. Flank a maxim with an Obersoldaten and it will never escape alive.
Soviet Tier 2 doesn't spend much fuel so expect tanks early. Your Jagdpanzer and additional Panzerschrecks are a priority! If munitions are short then consider the Raketenwerfer AT gun.
Recap
The build in rough order is as follows:
I will post replays in the comments of this guide to help show people the strategy! If you're looking for the build in action look there!
Good luck and I hope you enjoyed this guide! Contact me on COH2.ORG, post comments on this thread, or find me on Steam!
- Volksgrenadier (upgrade with Panzerschreck ASAP)
- Volksgrenadier (upgrade with Panzerschreck ASAP)
- Volksgrenadier
- Battlegruppe HQ Truck
- MG-34
- MG-34
- Infantry Support Gun
- Fallscrimjäger
- Panzer Schwerer HQ Truck
- Racketenwerfer 43 AT Gun
- Obersoldaten
- Jagdpanzer IV
- Mechanized Reigment HQ Truck
- Obersoldaten
- Panther V Tank
I will post replays in the comments of this guide to help show people the strategy! If you're looking for the build in action look there!
Good luck and I hope you enjoyed this guide! Contact me on COH2.ORG, post comments on this thread, or find me on Steam!
 Corp.Shephard
  Ohme
Ohme  computerheat