In Before the Blitz
Wisdom from the Alpha: By Corp.Shephard
US Forces: Airborne Company Build Order Guide
Early Game


Late Game

Airborne Company
This is a strategy that I developed in the Alpha that takes full advantage of the Airborne Company's abilities. Airborne Company offers excellent ways to diversify our force without relying on the Lieutenant tech level (Tier 2). This allows us to get out the most relevant armor on the field without sacrificing early game power.
Let's go over Airborne Company powers in brief and analyze them.
Let's go over Airborne Company powers in brief and analyze them.
Pathfinders

Unlocks at CP 1
Pros
- 4-man squad with good long range damage.
- Exceptional scouting unit. Excellent vision range.
- Can place up to three beacons for free at any time. Setup is quick. Paratrooper squads can reinforce near these beacons.
- Automatically camouflage in cover. Can use "Hold Fire" command to remain hidden.
Cons
- Fragile
- Need to stay behind Riflemen in fights.
- Expensive at 290 manpower.
What should your Pathfinders do?
- Stay behind Riflemen in any fight. Pathfinders are good at long range.
- Jump in and out of buildings to scout the map quickly and safely.
- Stay next to your 57mm AT gun and .50 Cal HMG so that they can fire at maximum range.
- Late game, they can cloak in cover near areas that are "no man's land" and offer crucial intel on enemy movements.
Pathfinders should rarely go off on their own. They are fragile and bad against troops who close quickly.
.50 Caliber HMG Airdrop

Unlocks at CP 2
Pros
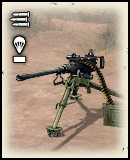
- Drop a .50 Caliber Machine Gun anywhere, any time.
- .50 Caliber HMG is the best MG in the game currently.
Cons
- Scatters based on Airdrop factors.
- Does not come with a crew! Can be stolen!
- Slow to drop down; cannot be used to quickly change a fight.
The .50 Caliber HMG is an exceptional MG and we will use it in this build.
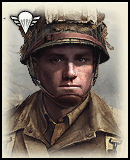
Paratroopers Squad Airdrop
Unlocks at CP 3
Pros
- Durable 6-man squad.
- Can reinforce on the field as long as they are near a beacon.
- Reinforcement cost is only 28 (same as Riflemen).
- Can be equipped with Thompson SMGs or M1918 LMGs. Once geared up they are the best anti-infantry squad that the US forces have.
- Has access to grenades.
Cons
- Scatters based on Airdrop factors.
- Requires heavy munitions investment to be effective.
- Slow to drop down; cannot be used to quickly react to enemy flank.
- Expensive to call in. 380 manpower for initial drop.
The best anti-infantry squad that the US Forces get. This build is sadly strapped for manpower but I suggest getting this unit to replace any lost Riflemen squads when resources are available. Be careful when you drop these guys onto the battlefield. They have a "drop radius" and any troops who fall onto impassible terrain will die on landing. The area that Paratroopers will be dropped in is increased by:
- Blizzards
- Not having vision of the drop zone with friendly forces
- Not having a beacon nearby
If you try to drop blind during a blizzard the drop area will rival the size of your screen. Be wary.
57mm AT Gun Airdrop

Unlocks at CP 4
Pros
- Drop an AT gun anywhere, any time.
Cons
- Scatters based on Airdrop factors.
- Does not come with a crew!
- Slow to drop down; cannot be used to quickly react to armor.
Avoid using this power unless tactically necessary. Just building an AT gun from the base costs just as much and comes with troops manning the gun.
P-47 Thunderbolt Rocket Strafe
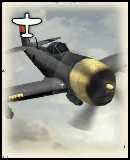
Unlocks at CP 12
Pros
- The Thunderbolt is fast and comes into to strafe the target quickly.
- Extremely powerful rockets that will tear even King Tigers apart.
- The Thunderbolt will strafe the target location multiple times unless shot down.
- The Thunderbolt will automatically acquire targets the the area similar to how the Ostheer JU-87 Strafing Run works. Enemies cannot move away from the "red smoke" and be safe.
Cons
- Extremely expensive at 240 munitions
- Only targets vehicles and tanks!
- Somewhat inaccurate against smaller tanks.
This power is an incredible tool against heavy German armor. The US forces is plagued by fragile tank destroyers and AT guns that have sub-par penetration. They also cannot inflict engine damage as easily as Ostheer and Soviet forces can. Finishing off tanks is hard. The P-47 helps with this considerably. Use it when an enemy tank has fully committed to the fight as the plane is quite fast. It scouts out the area automatically so it can also be used to chase tanks that look like they want to flee. It is reliable anti-tank damage that you can call in very quickly.
The price is high. Use it wisely.
The Build
Early Game


Start with three Riflemen. Nearly every US build will start like this.

You first fuel expenditure will be on an Ambulance. The Ambulance is an incredible unit that must be used carefully. When stationary in allied territory it will allow you to reinforce troops. The Ambulance is incredibly vulnerable to small arms fire. Keep it away from combat at all costs. Throw it behind buildings and hedgerows so you can reinforce and stay active on the map.
Ambulance crews can disembark. This will give you Medics. Medics are non-combatants who will automatically heal units. If you have bad micro and want troops who retreat to heal automatically then consider taking the Medics out of your Ambulance. Replace them with your Rear Echelon squad. You get the best of both worlds this way: forward reinforcement and automatic healing at base. The Rear Echelon squad is valuable so don't throw it away lightly.
Try to stay as active on the map as you can. Avoid retreating and just walk back to the ambulance to heal and reinforce.

As soon as you get CP 1 you should get Pathfinders. Keep them behind Riflemen at all times and they will serve you well.


Your next expenditures will often fight for manpower. When you get CP 2 you will want to airdrop a HMG onto the battlefield. It has the set-up time of a Maxim, the suppression and killing power of the DshK (very good), and a large arc in which to ensnare troops.
We will need this gun. This gun will let you pin enemy Oberkommando West (OKW) Troops that are defending their HQ trucks on the map. It will let you fight the elite infantry that OKW will inevitably bring out that normally chews Riflemen to pieces. It will let you fight Ostheer Grenadiers with LMG42s without buying BAR research. It is an essential early game tool.
Remember that the airdropped HMG does not come with a crew. Drop it near your ambulance and use your Rear Echelon Troops to crew the gun. They are the cheapest to reinforce.

We also need to get our Captain ASAP. He costs 200 manpower and 80 fuel: this means you will have the fuel necessary for him around CP 2. He is strong unit in his own right. He comes with two bazookas so he can tackle light armor rather well. He also has a Thompson sub-machine gun so he is a shockingly good close quarters unit. Do not charge enemies in cover with your Captain though. He is good at flanking weak positions and protecting your troops from enemy charges. He is not durable enough to try and stage an assault on his own.
All US Officers gain experience automaitcally when allied units get experience around them. This lets officers get "free" experience and level up quickly. Keep him near allies.
The Captain also has the "On Me!" special power. This power:
- It hits a wide area: almost an entire screen around the Captain
- All troops hit will sprint to the Captain ASAP
- It breaks suppression
- They get a weapon damage bonus
- They get a defensive bonus
Keep in mind that this power doesn't give suppression immunity. It will only break it for a split second. If the MG is still firing on you then you will get suppressed again!
Take care with the On Me! power. It automatically bunches all of your troops up in the area.
Finally, the Captain also has the Supervise Production. American Tanks have an ungodly high build time (~90 seconds). The Captain can go back to base an shorten that to ~15-20 seconds by using this power on the building making the tank. This takes some work but your micro will be rewarded with a tank that comes over a minute earlier.


Finally we will round out the build with an AT gun and a Stuart Light Tank. If you are facing an Ostheer player who went heavy Tier 2 then consider replacing the AT temporarily with a Paratrooper Squad. The AT is always valuable against Oberkommando players because it lets you kill their deployed trucks in the field. If the Ostheer player slows down for Tier 2 though you should slow down and get better anti-infantry on the field.
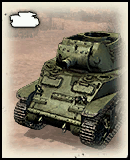
The Stuart Light Tank is key to this build! We are rushing this unit ASAP (aside from the ambulance). It is the best light tank in the game!
The Stuart:
- Can repair itself thanks to US vehicle crews
- Is really good at killing infantry
- Fears no enemy light armor because of its "Stun Barrage" attack.
- Scales up into the late game because it can reliably blind and stun any enemy armor.
This tank is incredible! The Shell Shock power lets the Stuart fire three shots in rapid succession. If the shots penetrate the enemy's armor then they are automatically stunned for several seconds. If it fails to penetrate then it will blind the enemy tank. This power lets the Stuart fight with Pumas on even footing: a valuable thing against OKW.
Keep active with your Stuart. Let it flank around and pressure enemy lines at all times. It has very little down-time when damaged because it can just reverse and repair in a matter of seconds.
Early Game Against Oberkommando West
Keep your early game units close to each other. Use the buddy system. Sturmpioneers are exceptionally dangerous early game. If a solo Rifleman squad is caught alone against Sturmpioneers you will lose that fight. Ironically Rear Echelon (RE) squads can fight and kill Sturmpioneers who charge them if they are in cover and use their Volley Fire ability. Volley fire suppresses units and becomes stronger the closer the enemy is to the RE squad. Rear Echelon squads can pin Sturmpioneers who charge them with this power. Use it wisely.
Gather map control with the buddy system. Every unit should have another to help it out nearby. Oberkommando players generally have two strategies early game depending on what tech path they chose. Scout and find their truck ASAP to discover their plans.
Gather map control with the buddy system. Every unit should have another to help it out nearby. Oberkommando players generally have two strategies early game depending on what tech path they chose. Scout and find their truck ASAP to discover their plans.
Against Battlegruppe Headquarters
The Battlegroup HQ is a clear sign of an Oberkommando player who is going to play the game more defensively. They will try to lock down the map with suppression units like the Kubelwagon and MG34 and then deploy their Infantry Support Gun to offer indirect fire support.
Keep spreading out and try to pressure as many parts of the map as possible. This strategy is weak to flanking. Do not try to engage the enemy around their HQ truck! They will just reinforce until you have to die/quit. You can get into some hilarious fights where both sides are reinforcing off of their "Ambulance" unit. This is dangerous to do though as the Oberkommando player will have the advantage until you can drop in your .50 caliber Machine Gun.
When you get your Stuart out then you should aggressively push to take him off the map. Every unit you have built is made for this purpose.
It is almost always worth trying this assault as soon as the Stuart hits the field. It will often force mistakes from the enemy. If it works out completely then you have nearly won the game by killing their expensive HQ truck.
Keep spreading out and try to pressure as many parts of the map as possible. This strategy is weak to flanking. Do not try to engage the enemy around their HQ truck! They will just reinforce until you have to die/quit. You can get into some hilarious fights where both sides are reinforcing off of their "Ambulance" unit. This is dangerous to do though as the Oberkommando player will have the advantage until you can drop in your .50 caliber Machine Gun.
When you get your Stuart out then you should aggressively push to take him off the map. Every unit you have built is made for this purpose.
- Pathfinders will spot for your AT gun and HMG
- The Ambulance will keep your line from suffering attrition
- Riflemen will provide a sturdy front line
- Stuart will allow you to stun any armor that tries to break your line and will snipe away at infantry
- Your HMG will suppress the enemy and stop them from defending their truck
- While everything else holds a line the AT gun will grind the truck to dust from a safe range.
It is almost always worth trying this assault as soon as the Stuart hits the field. It will often force mistakes from the enemy. If it works out completely then you have nearly won the game by killing their expensive HQ truck.
Against Mechanized Regiment HQ
So you found a Mechanized Regiment HQ, huh? This thing can pump out light vehicles fast. Light vehicles can hit as quickly as 4-5 minutes into the game. It's scary! The enemy will be able to bully you with this armor. Get your Ambulance to safety. A wise player will try to hunt it down. If it gets caught then consider getting the medics out and finishing the empty ambulance yourself.
Avoid the armor as much as possible.
Fighting the Puma
Avoid it until you get your Captain and AT gun out. The Captain and 57mm can scare it away from your troops and buy time. When your Stuart hits the field you'll have a chance to kill it. Stun it with your Stuart and then finish it with your AT gun. The Puma will beat the Stuart in a fair fight. Don't give it one! It has better range than the Stuart too. Ambush the Puma behind buildings and terrain and you'll get your kill.
Fighting the AA Halftrack
The same advice applies to the Anti-Air Halftrack but this thing is scarier early game. It is vulnerable: it requires setup time and "un-setup" time. If you catch it with your AT gun it is dead. You have to make it there without losing too much though! Avoid contact and spread out.
It is possible to kill this Halftrack with small arms fire. Riflemen at veteran level 1 get an Anti-Tank Rifle Grenade power that can threaten light armor. The biggest issue is that the OKW AA Halftrack suppresses troops and does significant damage. If he gets too bold with his Half-track you may be able to kill with with the right concentration of veteran troops. The best strategy remains to stall the game and avoid fighting this unit.
Early Game Against Ostheer
This battle is actually quite similiar to COH1 Germans vs Americans. The Rifleman squad is better than the Grenadier squad in every fight except for long range. However the Germans have the MG42 which turns battles quickly and locks down areas of the map. The solution is much as it always has been: spread out and flank everything! You beat him in most 1v1 fights unless you make a mistake. Spread out and take those fights whenever you can. Your early Pathfinders will help you avoid bad fights.
The early Captain and .50 caliber machine gun will protect you from 222 Scout Car rushes. The 222 is scrap as soon as the Stuart hits the field but you have tools to deal with it before then.
A fast Ostwind is always a danger but you have an AT gun and you have the Stuart. The Ostwind's lighter armor means that it is easier to stun with the Stuart. Circle around to his rear armor and you have a 90% chance to stun and you get three shots.
The Mid to Late Game
No plan survives contact with the enemy. The ability for this guide to give good advice will change as your fight develops uniquely. These guidelines will help you secure victory.

Rush out a Major as soon as possible after your Stuart light tank. We have gotten what we wanted from the Captain's tech building. The Major is a terrible combatant but he offers the best support power possible: A forward retreat point. Get him to a safe area near the front lines and use your Ambulance + Major to create a forward HQ. Suppression is meaningless now! You can retreat freely and only lose seconds worth of time falling back. Use this to pressure the enemy like you have never before.


When your M8A1 comes out you should swap crews with the Stuart. The Stuart will fall into a support role now. All of its gained veterancy will carry over to the M8A1.
The US forces best anti-infantry vehicle is also their artillery unit. The M8A1 is unique. It can direct fire at troops behind buildings and hedgerows. It also has a barrage power for longer range harassment. Use your Pathfinders to spot enemies and your M8A1 to punish them. This is your best tool for cracking AT guns and MGs. When fighting elite infantry your M8A1 can even the odds. I have had games end where I had 40 kills on two M8A1s. They can even hurt tanks when they have enough time and rear armor shots.
The M8A1 is very fragile. It has low health and armor. It does have a smoke screen power akin to "Panzer Tactician" at veteran level 1. Use it whenever danger arrives. You can even bombard from inside the smoke as the M8A1 does not need line of sight to fire on foes.

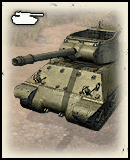
The Jackson is a reliable, if fragile, tank destroyer. It has 60 range like all other tank destroyers. Keep it safe by your AT gun and troops and it will fend off enemy tanks. Buying multiple of these is often wise.

Riflemen will die. Mistakes will be made. Replace lost squads with Paratroopers as your manpower allows it. Paratoopers can fight against Fallscrimjagers and Obersoldaten on equal terms once they get their LMG upgrade. They are excellent long range squads that can support your AT guns and Jackson Tank Destroyers against infantry threats while also staying healthy using beacons. I have won games on the backs of 40+ kill Paratrooper squads.
BARs and Bazookas
I avoid using these too much but late game your Riflemen will need to specialize. I prefer to turn Riflemen into anti-tank squads with Bazookas and let my Paratroopers and M8A1s do the heavy lifting against infantry. Choose wisely.
Against Heavy Armor
These will come. Panthers. Tigers. King Tigers! Oh my!
Your best bet is to hit them with everything. This build does not use many munitions on purpose. Our late game anti-tank recipe just needs a secret spice: the P-47 Thunderbolt.
The moment the Tiger commits to a battle and cannot easily retreat then you must drop the airstrike! The targeting is generous: the plane will track the target. Keep the pressure on with your Jacksons and AT guns! He cannot stay and keep fighting or the Thunderbolt will make another pass.
The P-47 is a shockingly good deterrent and this build gets two M8A1s. If he cannot rush down your M8A1s then they will keep sniping at infantry. Force his hand and then crush his armor with this power! If nothing else this lets you stall out Victory Points against superior armor.

Rush out a Major as soon as possible after your Stuart light tank. We have gotten what we wanted from the Captain's tech building. The Major is a terrible combatant but he offers the best support power possible: A forward retreat point. Get him to a safe area near the front lines and use your Ambulance + Major to create a forward HQ. Suppression is meaningless now! You can retreat freely and only lose seconds worth of time falling back. Use this to pressure the enemy like you have never before.


When your M8A1 comes out you should swap crews with the Stuart. The Stuart will fall into a support role now. All of its gained veterancy will carry over to the M8A1.
The US forces best anti-infantry vehicle is also their artillery unit. The M8A1 is unique. It can direct fire at troops behind buildings and hedgerows. It also has a barrage power for longer range harassment. Use your Pathfinders to spot enemies and your M8A1 to punish them. This is your best tool for cracking AT guns and MGs. When fighting elite infantry your M8A1 can even the odds. I have had games end where I had 40 kills on two M8A1s. They can even hurt tanks when they have enough time and rear armor shots.
The M8A1 is very fragile. It has low health and armor. It does have a smoke screen power akin to "Panzer Tactician" at veteran level 1. Use it whenever danger arrives. You can even bombard from inside the smoke as the M8A1 does not need line of sight to fire on foes.

The Jackson is a reliable, if fragile, tank destroyer. It has 60 range like all other tank destroyers. Keep it safe by your AT gun and troops and it will fend off enemy tanks. Buying multiple of these is often wise.

Riflemen will die. Mistakes will be made. Replace lost squads with Paratroopers as your manpower allows it. Paratoopers can fight against Fallscrimjagers and Obersoldaten on equal terms once they get their LMG upgrade. They are excellent long range squads that can support your AT guns and Jackson Tank Destroyers against infantry threats while also staying healthy using beacons. I have won games on the backs of 40+ kill Paratrooper squads.
BARs and Bazookas
I avoid using these too much but late game your Riflemen will need to specialize. I prefer to turn Riflemen into anti-tank squads with Bazookas and let my Paratroopers and M8A1s do the heavy lifting against infantry. Choose wisely.
Against Heavy Armor
These will come. Panthers. Tigers. King Tigers! Oh my!
Your best bet is to hit them with everything. This build does not use many munitions on purpose. Our late game anti-tank recipe just needs a secret spice: the P-47 Thunderbolt.
The moment the Tiger commits to a battle and cannot easily retreat then you must drop the airstrike! The targeting is generous: the plane will track the target. Keep the pressure on with your Jacksons and AT guns! He cannot stay and keep fighting or the Thunderbolt will make another pass.
The P-47 is a shockingly good deterrent and this build gets two M8A1s. If he cannot rush down your M8A1s then they will keep sniping at infantry. Force his hand and then crush his armor with this power! If nothing else this lets you stall out Victory Points against superior armor.
Recap
Here's the build in rough order, seen as a simple list:
Good luck and I hope you enjoyed this guide! Contact me on COH2.ORG, post comments on this thread, or find me on Steam!
- Rifleman
- Rifleman
- Rifleman
- Ambulance
- Pathfinder
- Airdrop .50 Cal HMG
- Captain
- 57mm AT Gun
- Stuart
- Major
- M8A1 Howie
- M36 Jackson
- M8A1 Howie
- Paratroopers
Good luck and I hope you enjoyed this guide! Contact me on COH2.ORG, post comments on this thread, or find me on Steam!
--Corp. Sherpard


