
Introduction
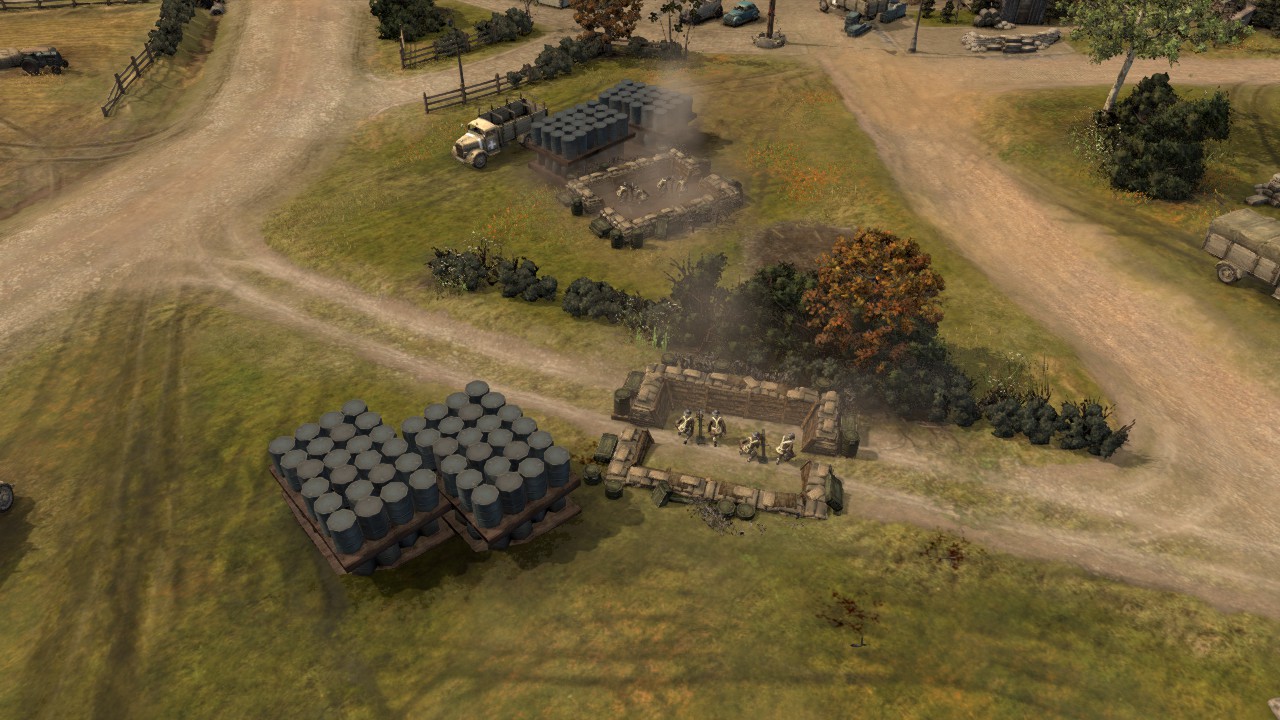
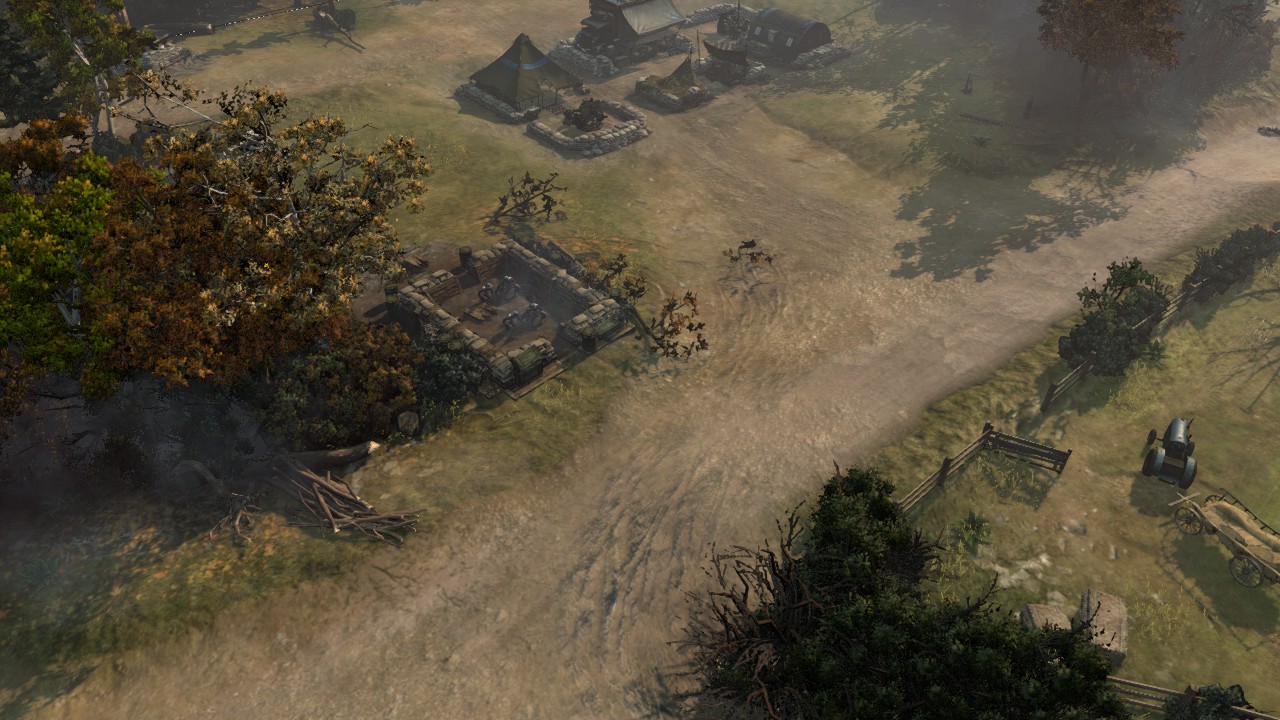
The British mortar pit is one of the most used emplacements. It is also the most loved and hated one for its game changing RNG. A good placement, a clump of enemies, and a good roll of the dice is all one needs to win a game. Or lose it. But first you need to know the pit; where to place it, how to use it and how to keep it alive. Let's begin. Here is your shovel.
| !Royal Engineers have the free destroy cover ability. It can be used to clear trees and other obstacles to place the emplacements correctly. |
The Mortar Emplacement

 400
400  8
8 | Ability Icon | Name | "Description" |
| Barrage | The crew will saturate an area with HE rounds. | |
| Creeping Smoke Barrage | A line of smoke shells will be fired. Requires veterancy one. | |
| Brace | The men will cling to their helmets and pray. Somehow, this makes them more resilient to enemy fire, reqardless of faith. |
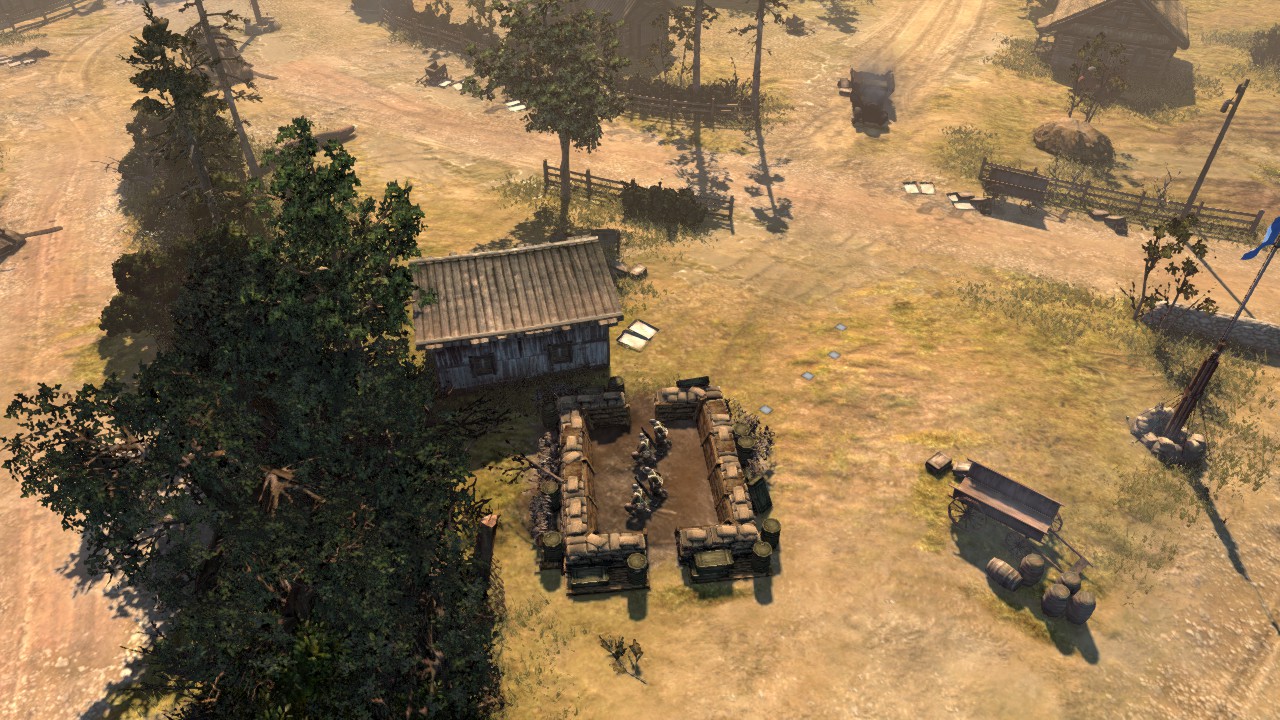
| !Put a squad inside to increase its rate of fire (reload time is reduced by 50%), and to gain some good cover. The pit has 700 hitpoints. |
At the price of 400 manpower, the mortar pit is really cost efficient. Costing 80 manpower less than two Axis mortars while having greater range, and costing 260 manpower less than two LeiGs. The only downside is that it is immobile and requires protection as well as repairs.
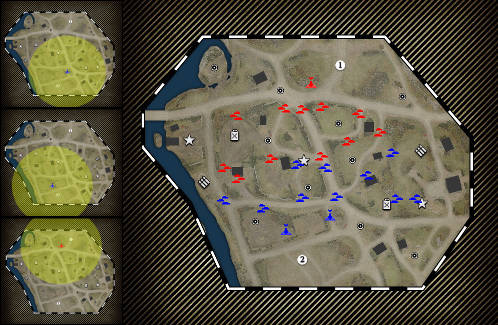
The mortar emplacement's main use is NOT to wipe squads or to bleed your opponents heavily. If you want that, then a sniper will do the job much better. Its main job is utility: deny cover and buildings, force HMGs to displace constantly, and cause a light bleed. The pit is also good against single enemy mortars. After all, two mortars in a pit sends an Axis crew packing. Even more so if an infantry squad jumps into the pit to help out.
In dealing with the pit, your opponent will have four options. One, stay and fight in the rain of shells. Two, soft retreat and abandon his position. Three, never enter that part of the map again. Four, try to destroy the pit. Whatever he does, you will gain an advantage, except for the last option: where you will have to defend the pit and might lose it which would be a big loss.
Map Placement
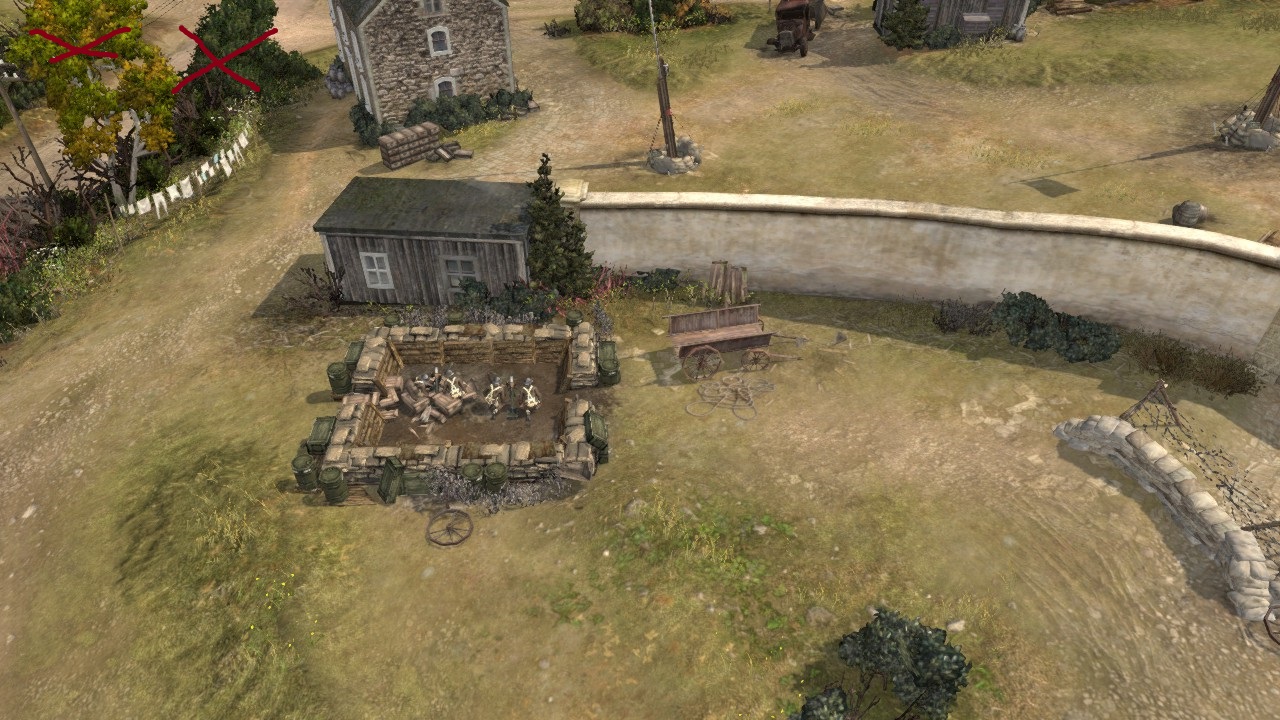
Good position is most important for the emplacement. Place it outside your door and it will only be a tea stop for the infantry walking by. Place it at the enemy's door and you will see it burn. Somewhere between those two extremes is where the emplacement ought be constructed. With that said, there are a couple of good positions on 1v1 maps that we will now cover.
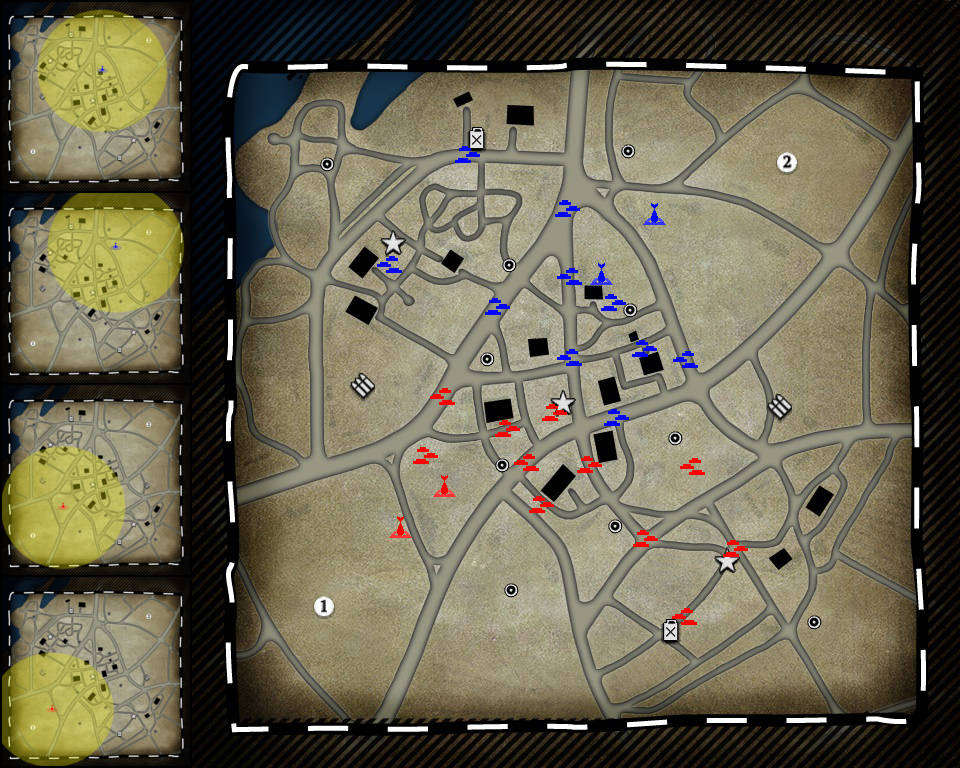
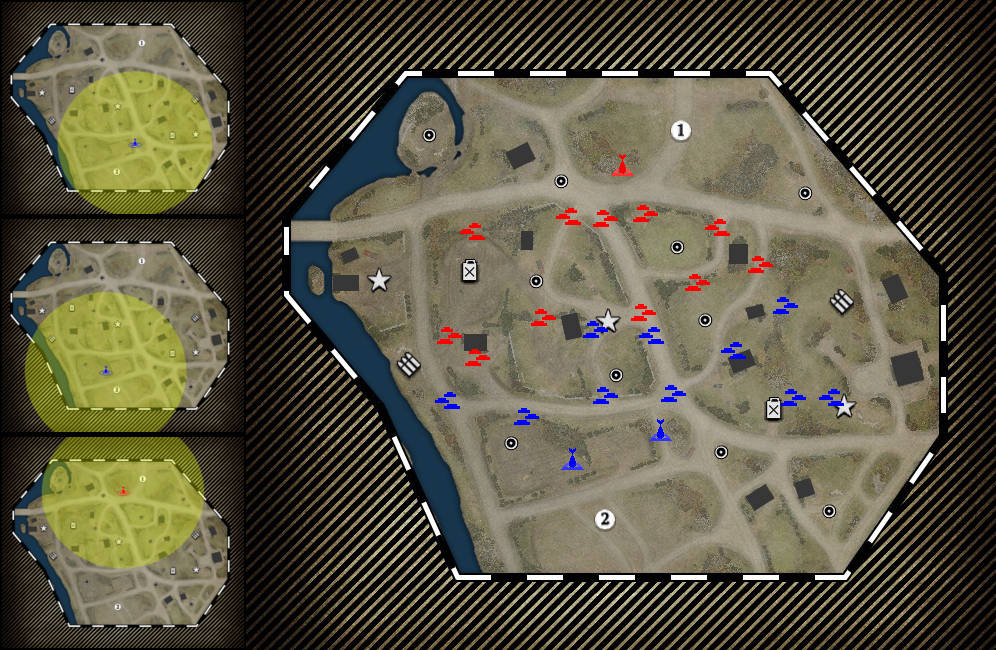
Tactical map descriptions: The mortar icon represents possible mortar placement spots, the small circles are for mine placements, so your mortar pits will be protected.
Tactical map descriptions: The mortar icon represents possible mortar placement spots, the small circles are for mine placements, so your mortar pits will be protected.
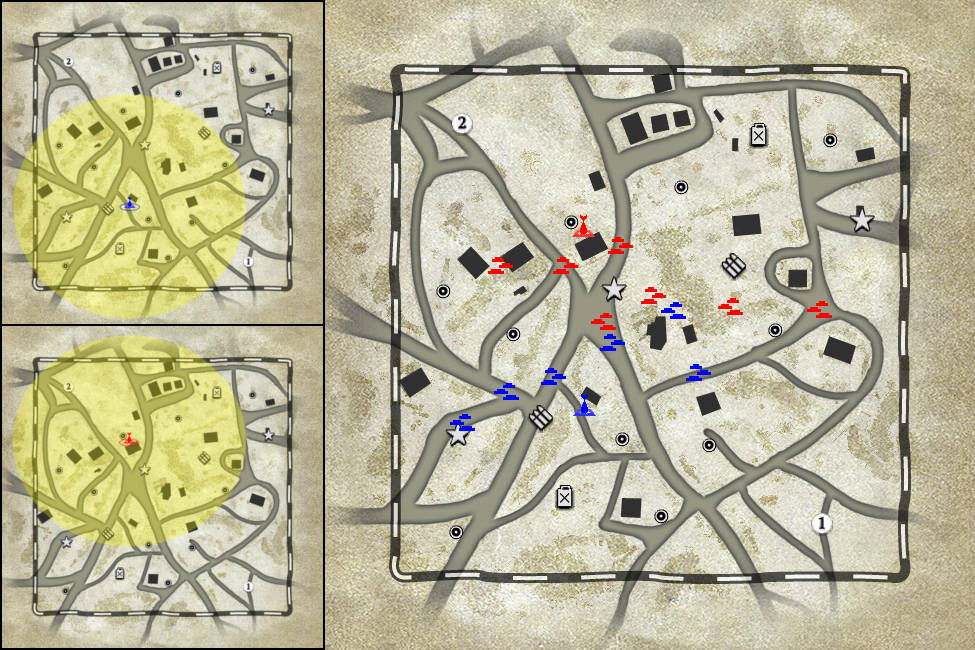
Semoisky
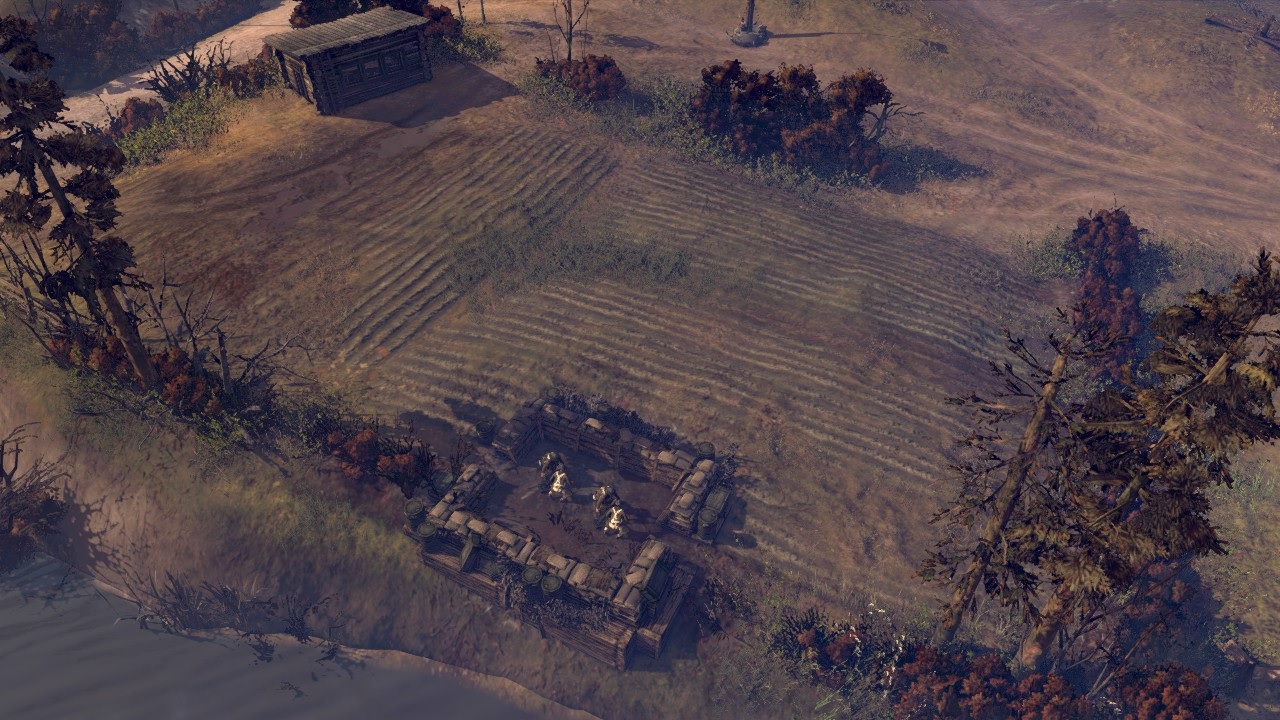
These two maps are almost identical, with the only difference being the ice in the winter map. That ice is useful since you can lay mines there, surprising any reckless infantry or vehicle trying to attack the mortar pit. The pit on this map is really potent. It can cover almost all the key buidings, it can also aid you in most fights. What is even better is that there is no way to counter it, if, you build your army and defences well.

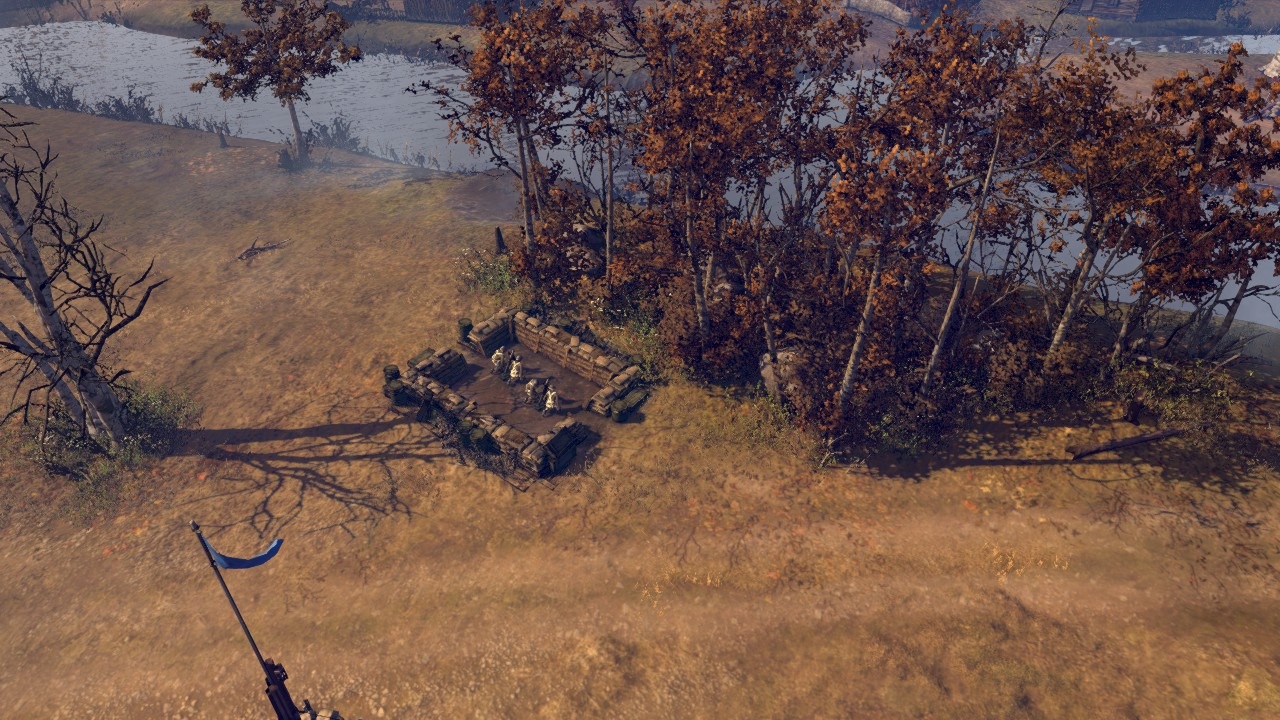
As you can see, there are two blue emplacements. The one near the water is riskier, because enemy AT guns can attack it from across the river. But it is also more powerful, as it gives you range to both buildings near the enemy cut-off, making a defence harder. The second one is behind the thicket and cannot be destroyed from the other side of the river, only by direct attack. But it cannot deal with those cut-off buildings though.
Mines should slow or stop any enemy advance and tank rushes to your emplacement. If you hear any artillery firing, except mortars, or enemy tank approaching, brace it and quickly coordinate your forces to defeat any threats. The enemy, in an attack, should be in a bad position. It should be easy to flank him and defeat him.
The red emplacement is as dangerous as the riskier blue one, but needs more effort to be kept alive. The enemy may attack it both directly or with AT guns from the shores of the pond. Always have some units in that region of the map, so that you can respond to enemy threats before it is too late.
If you are playing the winter version, the safer, blue spot for your mortar pit is recommended. Also, place some mines on the ice, to sink any invaders.
Safer
Riskier


As you can see, there are two blue emplacements. The one near the water is riskier, because enemy AT guns can attack it from across the river. But it is also more powerful, as it gives you range to both buildings near the enemy cut-off, making a defence harder. The second one is behind the thicket and cannot be destroyed from the other side of the river, only by direct attack. But it cannot deal with those cut-off buildings though.
Mines should slow or stop any enemy advance and tank rushes to your emplacement. If you hear any artillery firing, except mortars, or enemy tank approaching, brace it and quickly coordinate your forces to defeat any threats. The enemy, in an attack, should be in a bad position. It should be easy to flank him and defeat him.
The red emplacement is as dangerous as the riskier blue one, but needs more effort to be kept alive. The enemy may attack it both directly or with AT guns from the shores of the pond. Always have some units in that region of the map, so that you can respond to enemy threats before it is too late.
If you are playing the winter version, the safer, blue spot for your mortar pit is recommended. Also, place some mines on the ice, to sink any invaders.
Northern Placement
Southern Placement
Safer
Riskier
Angoville
The idea behind the mortar placement is the same for both south and north of the map. We are trying to deny as many buildings as we can from our enemy, while keeping the mortar pit as safe as possible. On this map, the north side pit will always be better placed than the south one. There is nothing we can do about the map's design.

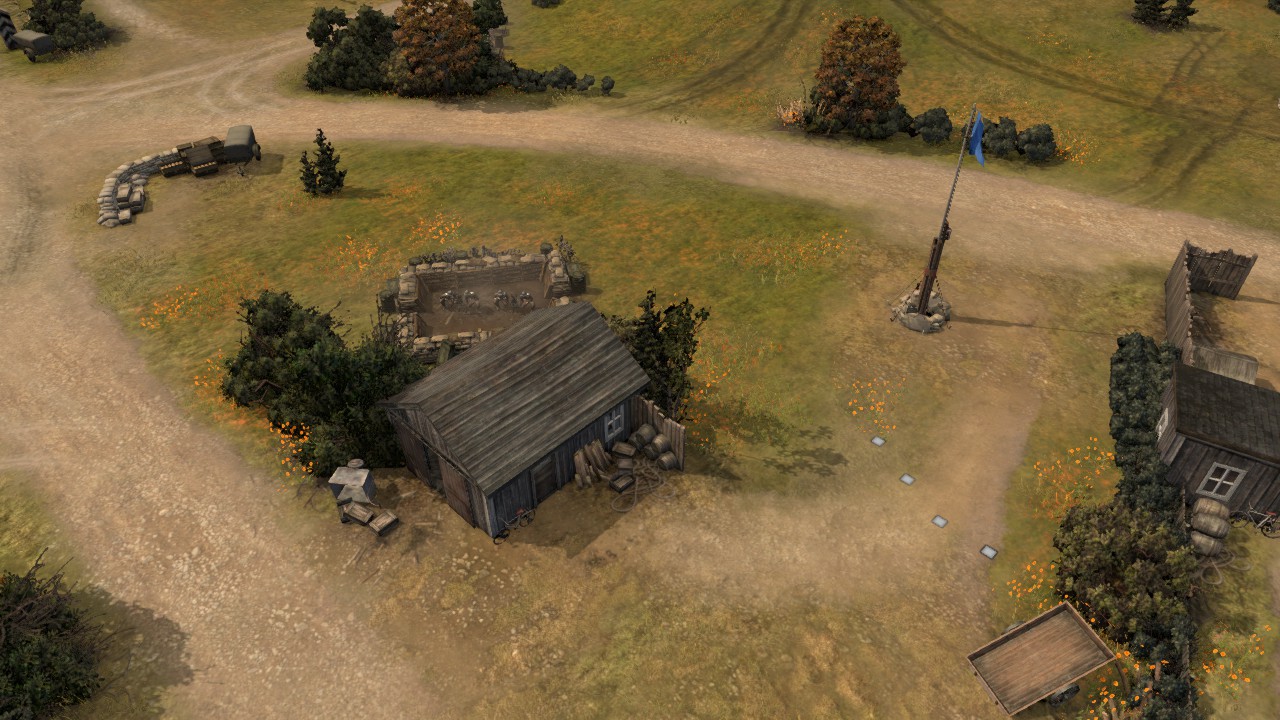
If you place the mortar pits as shown then you will have the range to attack all the key buildings on this map. It can even land shells on the east fuel point and also cover part of the west as well, including the western cut-off and the strategic points around it.
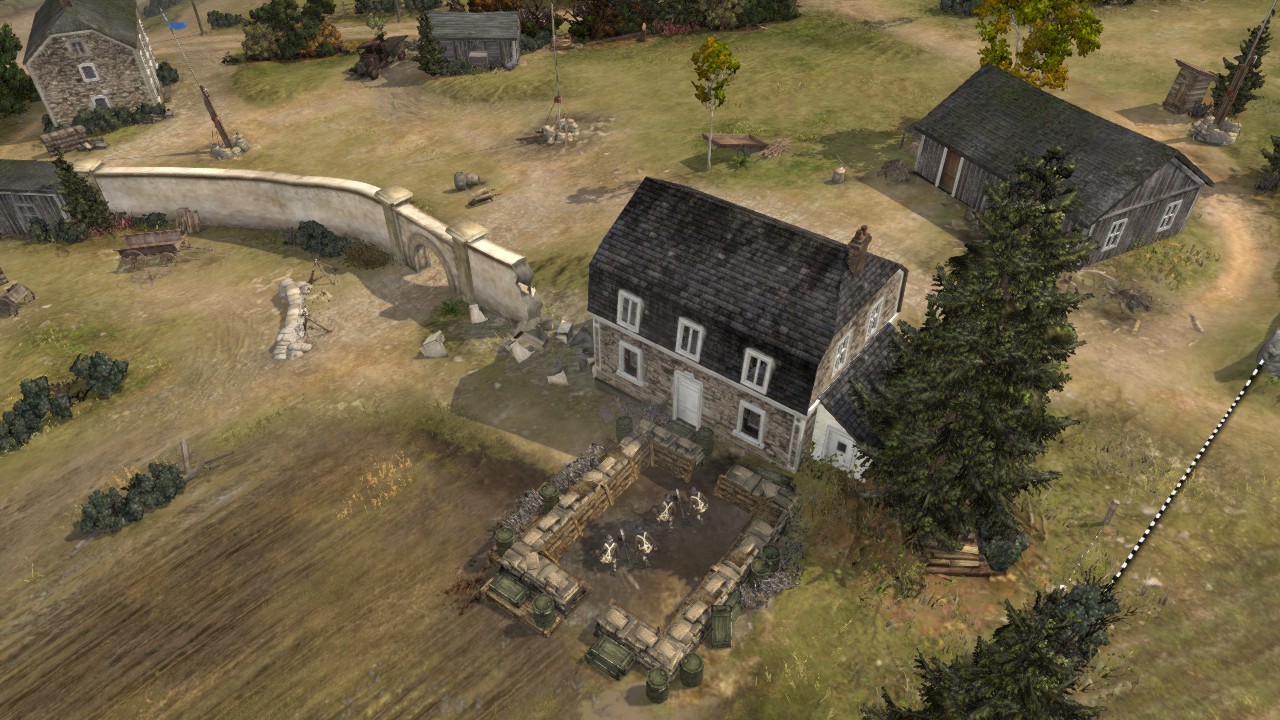
Placing mortar pits behind houses reduces the power of attacking AT guns because they cannot hit them directly. The guns will have to close in to actually attack. This is quite risky for the enemy, as you will have the option to decrew the guns and using them against your foe. The big house will shield the mortar pit from some mortar and or Leichtes shells fired at it. Your western flank is watched over by the base MGs, so you should not have to worry about it. Also, your mortar pit is close to your base, so you will be able to coordinate your defence quickly, should the enemy suprise attack. Just remember to brace it in a panic situation.

Lay mines on the locations highlighted in the tactical map image, to slow enemy progress towards your mortar pit. Placing an HMG in the house near the pit is a good move as well. Focus more on the right side of map before your first tank. That way, you always have your forces nearby if the enemy attacks your mortar pit. Another bonus is that the pit will always be supporting your troops in fights.
Harrasing the left side is fine, just be sure that you can defeat any enemy assaults on your mortar pit before it is too late. When the enemy attacks with tanks, or calls in offmap artillery, simply brace the pit and repel his attack. He is overextending by a lot during his pit assaults. You should be able to inflict big losses on him, if you respond to him fast.
Nothing is perfect for the southern part of the map is worse for your mortar pit than the northern one. It is flankable from the western side and the small house does not protect your mortar from artillery fire, like the big house on the other side. So, we have to compromise with two viable placements for the mortar pit.
At this spot, the mortar pit will have range on all the houses on this map, while also covering a huge part of the open areas as well. The downside is less protection for your pit. It is likely that the enemy will try to attack your emplacement from behind, via the western passage in the bushes. Keep it mined at all times. Also, your cut-off house may be easily contested from the western side, over the bushes that block your Vickers' sight. Use the engineers' ability to destroy cover to clear the bushes near your house. This allows your HMG to fire at the western side. You may also be attacked from the right as well. Be really cautious to guard the passage from your fuel into the courtyard.
If you defend your mortar pit, you will be rewarded by a good shooting position. Your enemy will suffer a headache through your constant attacks on his squads, outside and even inside his houses. But be careful, only build the pit here if you are really sure you will be able to defeat anything the enemy throws at you. Do not forget to use brace if things become ugly!
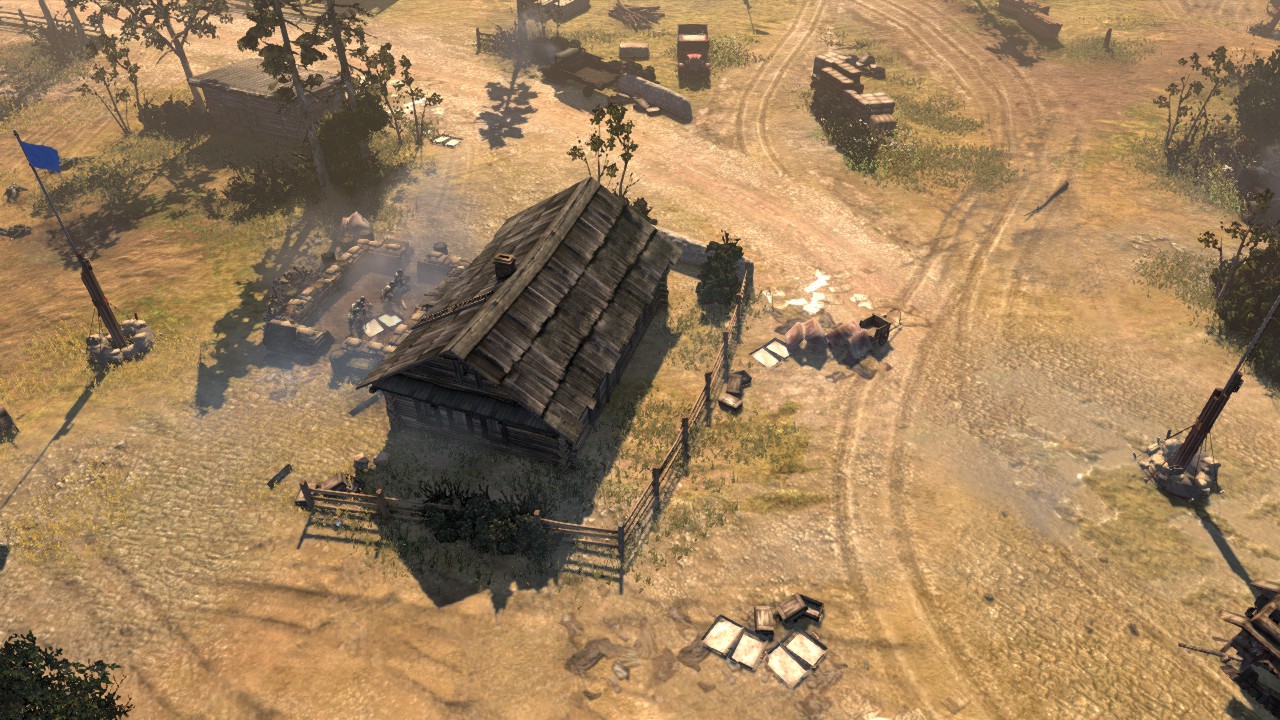
A safer spot for your mortar is behind the big house near the end of the map. As before, the house should block some artillery fire and make it difficult to attack the pit directly. The enemy cannot flank the pit from the left as it is guarded by the base HMGs. Therefore, his only attacking options are either through that stone wall or from the small pass near the house. A Vickers in that wooden barn will lock down his only attack route from the right. So, his only route left is from your cut-off, which should not be a problem to defend. This assumes you have placed defensive mines and have one to two squads nearby to secure the house near the pit. You should be fine in the early to mid game if you have those measures in place.
It is up to you to decide where to place the pit. Better firing position but less defensive? Or safer but less power? Both places are good and which one you choose should depend on how you are doing and what army composition you and your opponent have.

Angoville North
If you place the mortar pits as shown then you will have the range to attack all the key buildings on this map. It can even land shells on the east fuel point and also cover part of the west as well, including the western cut-off and the strategic points around it.
Placing mortar pits behind houses reduces the power of attacking AT guns because they cannot hit them directly. The guns will have to close in to actually attack. This is quite risky for the enemy, as you will have the option to decrew the guns and using them against your foe. The big house will shield the mortar pit from some mortar and or Leichtes shells fired at it. Your western flank is watched over by the base MGs, so you should not have to worry about it. Also, your mortar pit is close to your base, so you will be able to coordinate your defence quickly, should the enemy suprise attack. Just remember to brace it in a panic situation.
Lay mines on the locations highlighted in the tactical map image, to slow enemy progress towards your mortar pit. Placing an HMG in the house near the pit is a good move as well. Focus more on the right side of map before your first tank. That way, you always have your forces nearby if the enemy attacks your mortar pit. Another bonus is that the pit will always be supporting your troops in fights.
Harrasing the left side is fine, just be sure that you can defeat any enemy assaults on your mortar pit before it is too late. When the enemy attacks with tanks, or calls in offmap artillery, simply brace the pit and repel his attack. He is overextending by a lot during his pit assaults. You should be able to inflict big losses on him, if you respond to him fast.
Angoville South
Nothing is perfect for the southern part of the map is worse for your mortar pit than the northern one. It is flankable from the western side and the small house does not protect your mortar from artillery fire, like the big house on the other side. So, we have to compromise with two viable placements for the mortar pit.
At this spot, the mortar pit will have range on all the houses on this map, while also covering a huge part of the open areas as well. The downside is less protection for your pit. It is likely that the enemy will try to attack your emplacement from behind, via the western passage in the bushes. Keep it mined at all times. Also, your cut-off house may be easily contested from the western side, over the bushes that block your Vickers' sight. Use the engineers' ability to destroy cover to clear the bushes near your house. This allows your HMG to fire at the western side. You may also be attacked from the right as well. Be really cautious to guard the passage from your fuel into the courtyard.
If you defend your mortar pit, you will be rewarded by a good shooting position. Your enemy will suffer a headache through your constant attacks on his squads, outside and even inside his houses. But be careful, only build the pit here if you are really sure you will be able to defeat anything the enemy throws at you. Do not forget to use brace if things become ugly!
A safer spot for your mortar is behind the big house near the end of the map. As before, the house should block some artillery fire and make it difficult to attack the pit directly. The enemy cannot flank the pit from the left as it is guarded by the base HMGs. Therefore, his only attacking options are either through that stone wall or from the small pass near the house. A Vickers in that wooden barn will lock down his only attack route from the right. So, his only route left is from your cut-off, which should not be a problem to defend. This assumes you have placed defensive mines and have one to two squads nearby to secure the house near the pit. You should be fine in the early to mid game if you have those measures in place.
It is up to you to decide where to place the pit. Better firing position but less defensive? Or safer but less power? Both places are good and which one you choose should depend on how you are doing and what army composition you and your opponent have.
Kholodny Ferma
Kholodny North
This position is the best because it covers your cut-off, fuel, munitions and two strategic points, all the important houses on this map ,the middle VP, and the enemy munitions point and cutoff. This means you are able to fight on the most important sectors of the map with supporting mortar fire. To keep the mortar pit safe and sound, have a Vickers in the house near it. It will suppress any would be attacks. Do not forget to lay mines on the shown locations. You know the drill by now!
The enemy will not be able to avoid your mortar fire, except around the two VPs. Expect him to attack quickly. Have an AT gun near your mortar pit. Have it cover the middle VP with the option to displace fast to meet enemy threats. These will mainly come from your cutoff and munitions point. One Vickers in a nearby house and one more near the munition point should be enough to keep weak assaults at bay. Focus on your own side. Only push when you are sure you are able to displace fast. Wait until you have a Cromwell to go on the offensive. The rest, well you should you them by now
") .
.Kholodny South
It covers all of the important things, except the enemy VP, fuel, and cut-off. Do note the thick forest which cannot be penetrated by any weapon and the small house that protects it from the main road. There are two access routes from the enemy side: through your munitions point and through the middle VP. With an AT gun covering the main road (as well as a Vickers), and swinging to the munitions road (a second Vickers would be helpful), you should be fine.
Same drill as always: mine, wait, and then attack with a Cromwell before preparing a defense for the counterattack.
Arnhem checkpoint
Mortar coverage is almost identical on both sides. The only difference is that the southern position will never cover your fuel point, giving you a disadvantage. The strategy is the same as before: dig in, save up for a tank and... slowly push forward this time. Remember to keep an eye on the centre at all times.
Arnhem North
Arnhem South
Crossroads
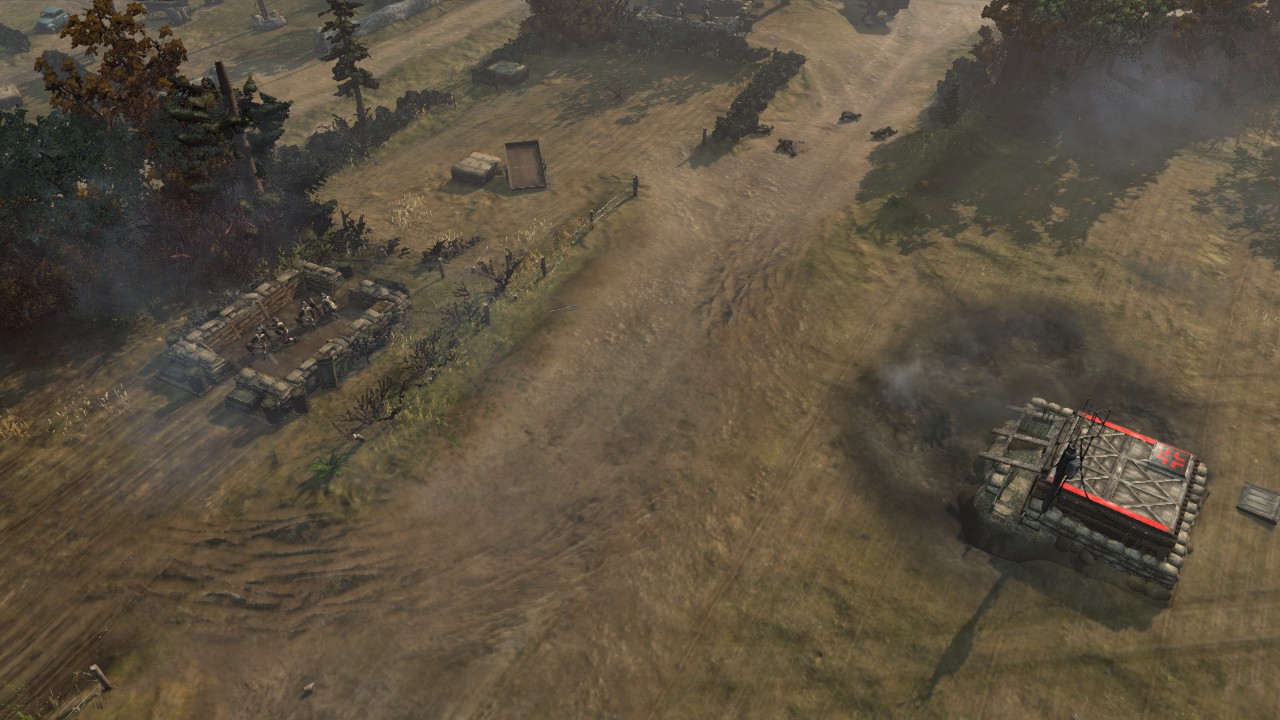
Not much to say here. Just place the mortar pit in your HQ, near the hedge corner so it covers as much ground as possible while being safe. The bushes are thick enough to stop any incoming direct shots and also a few artillery shells. Your enemy does not have many options except to bring his or her mortars forward to bombard your pit, or to assault your HQ directly. If he or she manages to bring tanks to your HQ, you are probably dead anyway. So just play normally.
Faymonville Approach
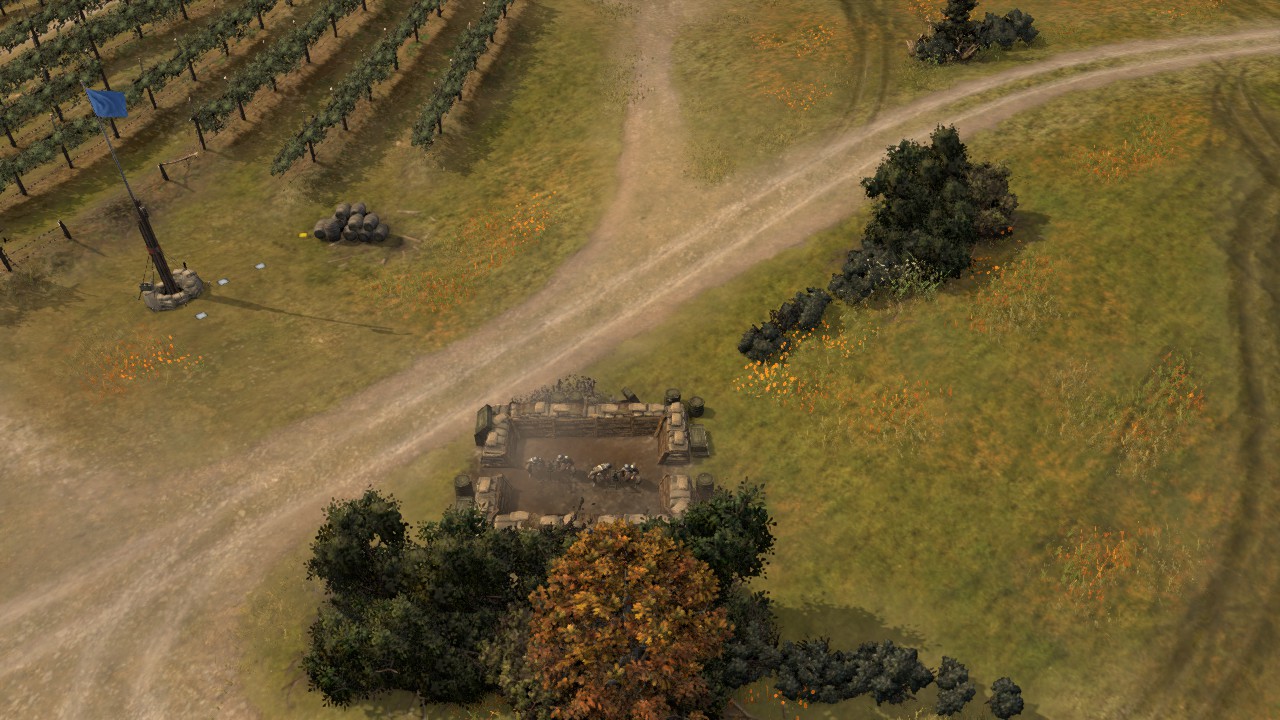
Here you have two placement options: which you choose decides which side of the map that will be yours. I personally like the left one more because of two reasons:
1. The left side is easier to hold with two HMGs: one in the middle house and one in the house near the fuel (the entrance is on your side - so there is a bigger chance the HMG will make it safe to your HQ in cause of a retreat).
2. Mortar pit is protected by a thick forect that cannot be penetrated. The enemy will have to come through your HQ or through your whole defending army in order to destroy the pit.
You know it, place mines and keep an AT gun nearby! But this time, the Vickers should not be near the pit, but in the middle house with another in the house overlooking your fuel. As always, you should focus more on your side and on defend until you have your first tank, in order to keep the mortar pit alive until the late game. Once you have things assembled, slowly push out. Keep one to two recon squads on your part of the map to anticipate enemy movements.
This mortar pit is in a worse defensive position. It can be attacked directly from the main road. So more caution is needed, together with a few mines and HMGs to guard the route. And do not forget the old AT gun. Same drill, same drill!
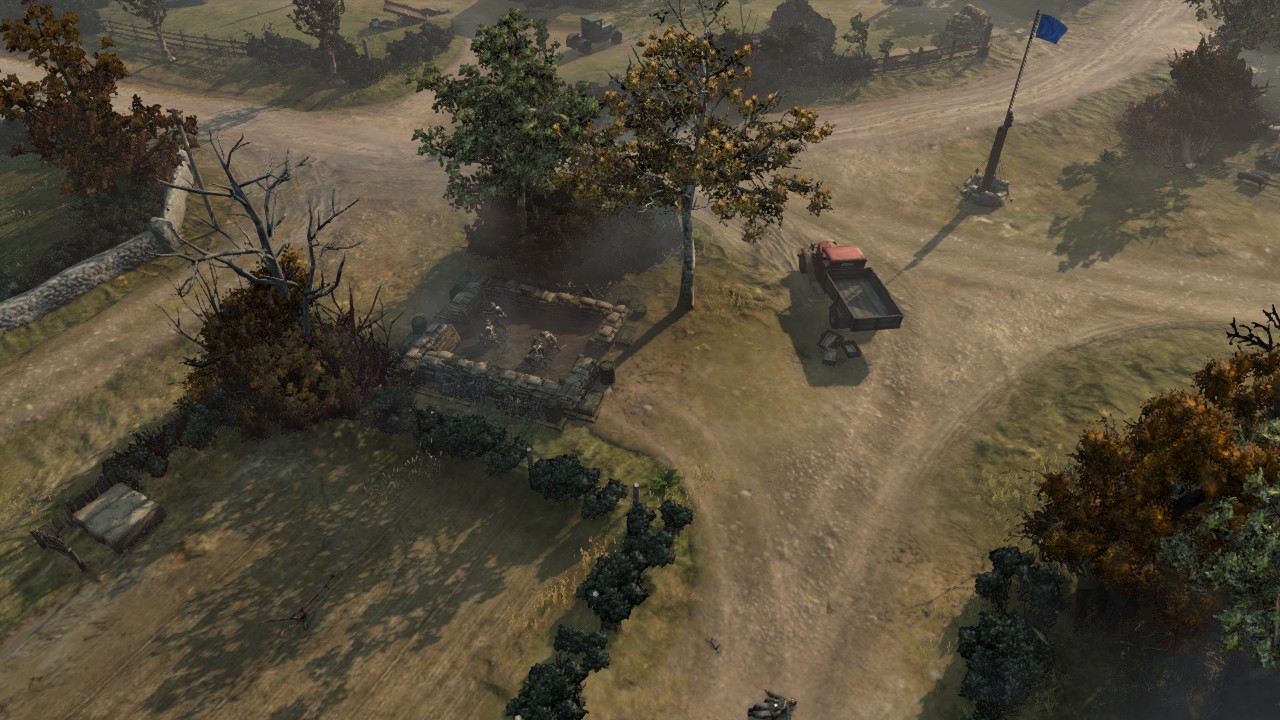
Straightforward placement position. Your mortar pit is in your base covered with your base HMGs. They should counter all infantry brave enough to assault the mortar pit. The hedge in front of it will cover it from some AT guns and tank shots because the enemy will have to attack the pit via an attack ground command. Defence of the pit should not be a problem here. Your enemy has to overextend himself to attack the pit. With a few mines around and your army close by, you should repel him or her easily. The rest is the same as before!
1. The left side is easier to hold with two HMGs: one in the middle house and one in the house near the fuel (the entrance is on your side - so there is a bigger chance the HMG will make it safe to your HQ in cause of a retreat).
2. Mortar pit is protected by a thick forect that cannot be penetrated. The enemy will have to come through your HQ or through your whole defending army in order to destroy the pit.
Faymonville South
You know it, place mines and keep an AT gun nearby! But this time, the Vickers should not be near the pit, but in the middle house with another in the house overlooking your fuel. As always, you should focus more on your side and on defend until you have your first tank, in order to keep the mortar pit alive until the late game. Once you have things assembled, slowly push out. Keep one to two recon squads on your part of the map to anticipate enemy movements.
This mortar pit is in a worse defensive position. It can be attacked directly from the main road. So more caution is needed, together with a few mines and HMGs to guard the route. And do not forget the old AT gun. Same drill, same drill!
Faymonville North
Straightforward placement position. Your mortar pit is in your base covered with your base HMGs. They should counter all infantry brave enough to assault the mortar pit. The hedge in front of it will cover it from some AT guns and tank shots because the enemy will have to attack the pit via an attack ground command. Defence of the pit should not be a problem here. Your enemy has to overextend himself to attack the pit. With a few mines around and your army close by, you should repel him or her easily. The rest is the same as before!
Commanders
The best commander roster that supports the British mortar play consists of these commanders: AER, RER, and SWR. Do not worry! The whys and full names are below.
Advanced Emplacement Regiment
This is the best commander to play emplacements with. Defensive Operations allow your infantry sections to build and repair mortar pits. Improved Fortifications give the pits more survability while Forward Assembly may repair your mortar pit for a small munitions fee.
Counter Battery allows you to counter enemy mortar fire for a small cost while Precision Barrage may be called in during the late game to hardcounter heavy artillery pieces, like the leFH howitzer or PaK. It can also be used to clear enemy blobs and fortifications.
While this commander is the best for emplacement play, the other two are generally much better in an 1v1 environment since you have to focus more on your main army, tanks and infantry than giving mortar pits luxury tools. But, the AER becomes better and better in higher game modes. This is because your teammates may make up for your shortcomings.
Royal Engineer Regiment
The RER is ideal for the strategy used in this guide. Stand Fast gives the mortar pit survability - there is no way an Axis player can counter a braced mortar pit with Stand Fast. Also it can save the lives of Royal Engineers because you do not have to put them under the risk of incoming enemy fire.
Vehicle Crew Repairs allow your tanks to quickly come back to play, and the Anti-Building Flame Mortar Support can reach even buildings your mortar pit cannot.
The highlight of this commander are the Churchill AVRE and Designated Command Vehicle. Use the Churchill to keep any infantry at bay, using the fear of its mighty petard. Designated Command Vehicle should be used on the AVRE to buff nearby units (infantry and tanks alike). The free recon should be used for full scale assaults.
Special Weapons Regiment
Another great commander for the mortar pit. It is the only commander to not have any abilities to buff the mortar pit while still being one of best for this strategy. This is mainly because of the Tank Hunters Infantry Section allowing you to softcounter any vehicles which evade your mines and AT guns to reach your mortar pit. Boys AT rifles and Anti-Tank Heat Grenades will harm and disable them. While the M3 Supply Halftrack allows you to reinforce near your mortar pit, so you can fight longer without the need of a retreat to the base. This can help your mortar pit survive things it normally would not.
Hold the Line should hopefully help your army to counter any late game pushes at your mortar pit while Concentrated Artillery Operations allow you to make big assaults yourself, destroying any static fortifications including the mighty PaK43 and the leFH howitzer as well as the feared wall of PaKs.
Vanguard Operation "Crocodile" will finish your opponent. It, together with an army supported by the artillery, means there is nothing that can stop the Crocodile late game. Just keep in mind it is not invincible, always retreat it to safety once things become rough.
Replays
Advanced Emplacement Regiment on Minsk pocket against Ostheer
I recommend you to watch this replay because it shows mortar pit placement on a map that is not described in this guide. Also you can see how I kept myself on the defensive and went double AT guns in order to protect my pit from double 222s, even at the cost of losing some map control early on. Later, once I had a Cromwell, I slowly crept forward, eventually securing almost the whole map, ending the match in one epic tank fight.
I saw that the enemy was going for an HMG42 heavy strategy, which is weak to the mortar pit strategy. You can see that he was able to hold his part of map with the HMGs, but never managed to hold my part of the map because of the pit. I went Advanced Emplacements Regiment right after I realised he was going for that HMG heavy strategy, in order to get my mortar pit up faster and to call in offmap artillery strikes on his HMGs later.
 zerg_1111
 RtN.Hector
Special thanks to GB Hooligan for casting this replay.
Final words
I hope that I have helped you understand the mortar pit better. I went over how to position and protect it properly, giving yourself a big advantage in the battlefields ahead of you. You can also apply this knowledge in bigger game modes, placing the mortar pit in a safe and strong position. All you have to do is to look at the map and think.
 __deleted__
  Yukiko
  slepo1
  MajorBloodnok