
Introduction
Hello and welcome to my USF guide!
I will try to explain to the best of my ability, the units fielded by this army, its Commanders, suitable openings and some further details, which will help you better understand how the faction works. By the end, you should know your way around the USF better than the back of your hand! Since I am primarily a 1v1 player, the main focus of this guide will aimed at that form of play, rather than team games, although most of the information which I impart is still applicable to team games, or easily converted to them. #ADAPT!
I will start this guide by discussing my concept of what a player needs to have in them, in order to be considered a good USF player. It is not enough to just believe in the USF; a good player must be able to exert an unparalleled amount of pressure on their opponent and at the same time, know when to do it. Furthermore, that pressure must be applied in the light of your goals. The USF can easily snowball a game to victory, which is what you should be looking to achieve.
I would like to emphasize that as a USF Commander, the most important thing you can practice is Riflemen play. These squads are the building blocks supporting any good USF victory. It took me years of COH1 Riflemen play, to execute this reasonably well. Even now, I still feel I have room for improvement in COH2 after many, many games.
USF Units (aka Your Arsenal)
Before advancing further, it is important to examine the USF units at your disposal. An understanding when to use each unit, is critical to avoiding production mistakes. This will not be a detailed analysis of each unit (for which there is an existing USF guide), but instead, my guide will discuss the situations to which each USF unit is best suited. This is a very practical approach.
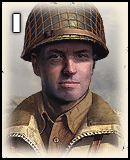
These are what the USF are all about. The Riflemen squads are the most versatile units in the game, as a consequence of which, they offer many opportunities for you to assert control. Later on, I will discuss in more detail how to direct them effectively, but for now, you just have to think of the Riflemen as the units which dictate the pace of the game. You generally want to avoid having to build Riflemen squads late game, so try to preserve the squads as best you can.
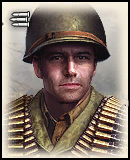
Rear Echelons are a cheap squad with little combat capability, until they are equipped with BARs. They are quite useful to screen for Riflemen and many players use them, to seize an early advantage in map control. Although I do not really agree with having more than one RE squad, or maybe two at most, I will later discuss the advantages of using more than one RE in the Build Order section.
This unit is mandatory in every game, usually built after the M20 or grenade upgrade, or earlier, if your Riflemen sustain a lot of HP damage. Be watchful for potential rushes against your base by a 222, or any vehicle really, since the ambulance is very fragile and goes down quickly.
A really good unit for close range combat, this is one of those units that you will not rebuild should it be lost, so try to preserve the Lt! Be careful how you use the Lt later in the game, since the reinforcement cost is really expensive when the Lt achieves veterancy. Keep in mind that this unit is not equipped with AT grenades, unlike regular Riflemen.
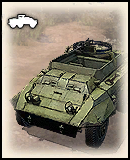
A good early shock unit, you should not really build more than one M20 at any stage of the game. When it enters play, the M20 has the potential to push your opponent right off the map especially if called in early; thereafter, it remains useful for harassing your opponent's capping squads at the edges of the battlefield. The M20 also has access to a powerful anti-vehicle mine, which can potentially kill its own direct counter, the 222.
Against OKW, you should be more aggressive with the M20, since the OKW early on do not have Panzerfausts. When you do get fausted by the OKW, you know that their tier structure is up, so you can expect the Panzer 2 later on. It is the most common unit out fielded against the USF.
Additionally, you can consider swapping the original M20 crew with an RE squad, on order to obtain a bazooka squad, if you need it to take care of a 222.
This is a unit I often build when facing Grenadier spam or an OKW player, since their army composition usually revolves around a lot of infantry units. Try to keep it moving in support of your Riflemen, and to potentially lock down cut-offs.
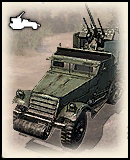
As of the recent patches, the AA Halftrack is not that desirable. The only occasion it is useful, is versus an Ostheer player that decides to go for a 222 and/or flamer halftrack, and you see you are too far away from the Captain tier after going Lieutenant tier.
The Captain's main purpose is to deal with enemy light vehicles that may appear before your first serious AT. You can also use this unit for capping around the map, if it has nothing to hunt. Consider not even fully reinforcing this squad if your opponent is going for a heavy Tier 1 build with no vehicles; in that case just cap with it.
The USF Anti-Tank gun is lackluster at the moment, but necessary in some cases nonetheless. I usually build one if I'm having trouble teching for armor and need some form of immediate AT. I feel that it is better to rely on the tanks and tank destroyers at the moment, unless and until the USF AT gun is buffed at some point in the future.
A great unit for dealing with any kind of infantry spam, or to punish your opponent for camping a certain point. It is also one of the only units you can use to trade efficiently when falling behind (pretty much like the Snipers of the other factions).

One of my favorite USF units; not really great against infantry, but it can do its job of denying your opponent the freedom to cap the sides of the map. The main objective of building the Stuart, is to destroy or deter light vehicles and eventually, to support your medium tanks in defeating bigger targets.
The most useful thing the Major can do, is serve as a forward retreat point, in conjunction with an ambulance. As with the Captain, I would also be careful reinforcing the Major, since he does not really offer anything.
The Sherman is actually quite good, and it is cheap, in manpower terms. It is a reliable anti-infantry choice for later in the game, especially when massed, but I would not really count on them to handle larger targets like a Panther.
The Jackson is a really good unit when well used, try to keep it at long range as a glass cannon. I usually only build one, when expecting heavier tanks and then, only because the USF Anti-Tank gun is not reliable most of the time.
The M8A1 is a unit that was hit by some nerfs making it not a great choice in 1v1s. Its strengths are in fighting infantry spam and it can even kill snipers with the barrage ability, if well used.
Generally, I don’t build the M8A1 anymore, and with its current state I would trade it for a Sherman or any other tank in the Major tier. However, if you are fighting an entrenched opponent that you can't seem to flank right, it may be worth building.
Otherwise, leave this unit as the last one you build in your last tier (if you do decide to go for it).
Riflemen
These are what the USF are all about. The Riflemen squads are the most versatile units in the game, as a consequence of which, they offer many opportunities for you to assert control. Later on, I will discuss in more detail how to direct them effectively, but for now, you just have to think of the Riflemen as the units which dictate the pace of the game. You generally want to avoid having to build Riflemen squads late game, so try to preserve the squads as best you can.
Rear Echelon Troops ('REs')
Rear Echelons are a cheap squad with little combat capability, until they are equipped with BARs. They are quite useful to screen for Riflemen and many players use them, to seize an early advantage in map control. Although I do not really agree with having more than one RE squad, or maybe two at most, I will later discuss the advantages of using more than one RE in the Build Order section.
Ambulance
This unit is mandatory in every game, usually built after the M20 or grenade upgrade, or earlier, if your Riflemen sustain a lot of HP damage. Be watchful for potential rushes against your base by a 222, or any vehicle really, since the ambulance is very fragile and goes down quickly.
Lieutenant
A really good unit for close range combat, this is one of those units that you will not rebuild should it be lost, so try to preserve the Lt! Be careful how you use the Lt later in the game, since the reinforcement cost is really expensive when the Lt achieves veterancy. Keep in mind that this unit is not equipped with AT grenades, unlike regular Riflemen.
M20 Utility Car
A good early shock unit, you should not really build more than one M20 at any stage of the game. When it enters play, the M20 has the potential to push your opponent right off the map especially if called in early; thereafter, it remains useful for harassing your opponent's capping squads at the edges of the battlefield. The M20 also has access to a powerful anti-vehicle mine, which can potentially kill its own direct counter, the 222.
Against OKW, you should be more aggressive with the M20, since the OKW early on do not have Panzerfausts. When you do get fausted by the OKW, you know that their tier structure is up, so you can expect the Panzer 2 later on. It is the most common unit out fielded against the USF.
Additionally, you can consider swapping the original M20 crew with an RE squad, on order to obtain a bazooka squad, if you need it to take care of a 222.
.50 cal HMG
This is a unit I often build when facing Grenadier spam or an OKW player, since their army composition usually revolves around a lot of infantry units. Try to keep it moving in support of your Riflemen, and to potentially lock down cut-offs.
AA Halftrack
As of the recent patches, the AA Halftrack is not that desirable. The only occasion it is useful, is versus an Ostheer player that decides to go for a 222 and/or flamer halftrack, and you see you are too far away from the Captain tier after going Lieutenant tier.
Captain
The Captain's main purpose is to deal with enemy light vehicles that may appear before your first serious AT. You can also use this unit for capping around the map, if it has nothing to hunt. Consider not even fully reinforcing this squad if your opponent is going for a heavy Tier 1 build with no vehicles; in that case just cap with it.
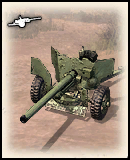
Anti-tank gun
The USF Anti-Tank gun is lackluster at the moment, but necessary in some cases nonetheless. I usually build one if I'm having trouble teching for armor and need some form of immediate AT. I feel that it is better to rely on the tanks and tank destroyers at the moment, unless and until the USF AT gun is buffed at some point in the future.
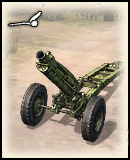
Pack Howitzer
A great unit for dealing with any kind of infantry spam, or to punish your opponent for camping a certain point. It is also one of the only units you can use to trade efficiently when falling behind (pretty much like the Snipers of the other factions).
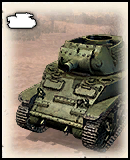
Stuart
One of my favorite USF units; not really great against infantry, but it can do its job of denying your opponent the freedom to cap the sides of the map. The main objective of building the Stuart, is to destroy or deter light vehicles and eventually, to support your medium tanks in defeating bigger targets.
Major
The most useful thing the Major can do, is serve as a forward retreat point, in conjunction with an ambulance. As with the Captain, I would also be careful reinforcing the Major, since he does not really offer anything.
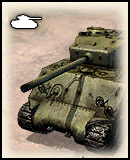
Sherman
The Sherman is actually quite good, and it is cheap, in manpower terms. It is a reliable anti-infantry choice for later in the game, especially when massed, but I would not really count on them to handle larger targets like a Panther.
Jackson
The Jackson is a really good unit when well used, try to keep it at long range as a glass cannon. I usually only build one, when expecting heavier tanks and then, only because the USF Anti-Tank gun is not reliable most of the time.
M8A1 Scott
The M8A1 is a unit that was hit by some nerfs making it not a great choice in 1v1s. Its strengths are in fighting infantry spam and it can even kill snipers with the barrage ability, if well used.
Generally, I don’t build the M8A1 anymore, and with its current state I would trade it for a Sherman or any other tank in the Major tier. However, if you are fighting an entrenched opponent that you can't seem to flank right, it may be worth building.
Otherwise, leave this unit as the last one you build in your last tier (if you do decide to go for it).
Inspecting the USF Commanders
Airborne Company
The best late game USF commander, in my opinion, because the P-47 ability is really strong for taking down big targets. The rest of the abilities are at the moment not on par with the other commanders, but they can certainly be useful in certain situations. The Pathfinders are an okay unit, but hard to pull off efficiently, while the Paratroopers really aren’t particularly good all around, so I wouldn’t get them.
The best way to efficiently use this commander is if you want to either skip a tier or you are expecting a late game big tank like the Tiger, where the P-47 ability is most valuable. While I certainly think that the MG drop and AT gun drop should be changed be more consistent with other commanders, there is still space for them. If you want to skip the Captain but still need an AT-gun then the AT gun drop is very useful, same for the MG.
Armor Company
As with recent changes, this commander is the best overall for all stages of the game. I would put it as the best USF commander.
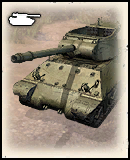
The Assault Engineers are good on more urban maps, since they have access to the Flamethrower, but I would not field more than one, due to the fact that they are not really reliable infantry, for their cost. The rest of the Commander is pretty good, including the M10, which is the best AT unit to which you will have access.
The best way to use this Commander, is to counter certain Ostheer/OKW Commanders. It makes for more of a reactive Commander choice and you will want to be sure to research all the USF tiers and take advantage of the vast unit selection. Then, you can cover your weakness of not having a reliable mobile AT, by researching the M10 and/or the Bulldozer Sherman, which is a good mobile anti infantry vehicle. Don’t forget to use attack ground if you want to make the Bulldozer more effective.
Rifle Company
Used to be one of the best USF Commanders, now its mostly used if you want access to the Easy Eight, but overall the abilities from this commander are not worth going for.
It grants access to:
- Flamethrowers for your RE, haven’t really been able to put them to good use.
- The Riflemen flares.
- The phosphorous barrage, which is good for dealing with any fortified position.
- The Sherman Easy Eight, easily one of my favorite tanks.
Infantry Company
The Infantry Commander is good, but does not promote as aggressive a style as I think USF needs, in order to succeed. The mines are nice, but take a long time to lay; the Mortar Halftrack is useful in certain situations and the LMG is so-so, but not well suited to the sort of offensive action, which you should be developing as the USF Commander. The rest of the abilities are reasonably useful, but more applicable to team games.
The best use I have found for Infantry Company, is to employ the early mines on important points, while you are capping them (so you do not waste any time) and then develop your play, around the fact that you want to bait your opponent to walk onto them. This means playing on one side of the map, planting mines and then switching your attacks to the other side of the map, so as to invite your opponent into your trap. The Mortar Half-track is also good for countering defensive Ostheer play and can even do a good job at replacing the Pack Howitzer, if you did not select the Captain. However, if I had to choose, I would go with the Pack Howitzer for that role.
Heavy Cavalry Company
The heavy cavalry commander is a solid commander that you should have on your loadout all the times. The first ability allows riflemen to lay down mines and sandbags, which is pretty useful after you won an engagement and the enemy had to retreat or when you are capping a point. However, in any other occasion it's not worth the time.
The second ability "Smoke barrage" is mostly useless unless you do not have grenades teched for smoke grenades. That said, the latter is recommended anyways when you are going to play offensively, and smoke grenades are much cheaper.
Rangers as a unit are currently overshadowed by the riflemen. There are very few scenarios where they can be useful since they bleed a lot of manpower and cost a lot to call-in which is not ideal for USF. This leaves rangers useful mostly on urban maps and only if you find yourself floating a lot of manpower with no way to tech up.
Combined Arms is a useful ability and munition sink if you need that extra power on your next engagement. It's pretty good especially when you get the opportunity to amass a lot of units which happens more often in team games.
Finally, the Pershing which at the moment could be a better heavy tank but nonetheless it is the only one USF has and does an ok job. Depending on how the game is going ,the Pershing usually goes well with a strong lieutenant plus captain tier play to leave that fuel for the Pershing but there are some games where the CPs just dont stack up fast enough due to the lack of action. In these cases, you need to go major in before the Pershing.
Mechanized and Recon Support Company
There is not much to say about these Commanders, since they are certainly under-performing at the moment and I would not recommend using them at all.
The Mech Co.WC51 contained in the Mechanized Company is costly and does not really offer much in terms of harassment. It is too clunky on many maps to effectively deal with a Sniper. However, with that out of the way I have put it to good use recently ONLY against OKW (since they lack the early panzerfaust); you have to play aggressive in order to snowball the really early lead you gain from this to an early victory, if you want to see some use of this commander see game two of this series:
The Recon Support Commander has the M8, which is a so-so unit and that is about it; the rest of the Commander abilities do not offer anything late game for the USF.
USF Build Orders
There are quite a number of openings for USF, each with their own pros and cons. I will say which one I prefer and state why, but I do not want to ignore the fact that there are players out there doing something else and since I want to include as much information about USF as possible in this guide, I will go over them briefly.
This is the opening I use most often, since 3 Riflemen squads are the optimum number to control. There are not so many squads that they might hamper your teching, but enough to hold the map and to keep up with your opponent, until you can field the M20.
The pros :
The cons:
I cannot stress enough how important it is for you to carry out the M20 rush properly, since USF has a lot of opportunities to snowball the game. With any advantage you obtain, you must try to multiply it. Therefore, early vehicle rushes, like the M20 or Stuart, allow you to stay one step ahead of your opponent. Many games are over almost before they begin, because the enemy is not prepared for the M20; if you do a good job with the first 3 Riflemen squads, your opponent will simply be under too much pressure to field a good AT response. This can often be the case when up against OKW!
If I had to choose the second best opening, it would be this one. The pressure of dealing with more than 3 Riflemen depends on how well you handle them and can easily mean your opponent will not even cap their own cut-off point! But, at the same time, you are much more dependent on your Riflemen play, since you will not have the saving grace of an early M20. On the other hand, if you do play well with what you have, then you will have more fuel for an early Stuart.
The pros:
The cons:
With this opening, there is always the chance that with some early bad engagements and reinforcing costs, you get “stuck” on the early tiers. For example, if you fail with the 3 Riflemen opening AND the M20 does not have the shock value it was supposed to have, you still have access to the HMG of the Lieutenant tier. But with the 4 Riflemen opening, you do not have this kind of unit choice. It is important to highlight this difference, because there are going to be games where your early aggression fails and you lack enough fuel for the Lieutenant right away. Since floating resources is bad and you want to keep your opponent under pressure, then you pretty much have no choice, but to resort to this extra Rifle squad opening.
In my opinion this kind of opening with Rear Echelon squads, is like shooting yourself in the foot right off the bat! Nevertheless, I will still discuss this Build Order, since it seems to attract a fair amount of use. The Rear Echelon squads are not great fighting units early on and later, they merely become good trading units, with emphasis on the word 'trading', since they still do not measure up in any scenario against LMG-equipped and vetted Grenadier squads.
The pros:
The cons:
Now, this list may seem to have more pros than cons, but the fact that REs are really weak combat units early on, is a big deal. If your enemy sees this and is smart about how to play, they will certainly attack your cut-off point and it will be hard for you to fend them off. This leaves you with no resource flow, as well as fighting with units, which will slowly, but surely, fall to bad trades.
Rifle-Rifle-Rifle-Lieutenant-M20
This is the opening I use most often, since 3 Riflemen squads are the optimum number to control. There are not so many squads that they might hamper your teching, but enough to hold the map and to keep up with your opponent, until you can field the M20.
The pros :
- You can be aggressive
- You can start teching up early (which leads to a “shock” unit)
The cons:
- One less Rifle squad than you could have, which means you will rely heavily on the impact of the early M20
I cannot stress enough how important it is for you to carry out the M20 rush properly, since USF has a lot of opportunities to snowball the game. With any advantage you obtain, you must try to multiply it. Therefore, early vehicle rushes, like the M20 or Stuart, allow you to stay one step ahead of your opponent. Many games are over almost before they begin, because the enemy is not prepared for the M20; if you do a good job with the first 3 Riflemen squads, your opponent will simply be under too much pressure to field a good AT response. This can often be the case when up against OKW!
Rifle-Rifle-Rifle-and more Rifles-Lt (M20) OR Captain (Stuart)
EITHER
OR
OR
If I had to choose the second best opening, it would be this one. The pressure of dealing with more than 3 Riflemen depends on how well you handle them and can easily mean your opponent will not even cap their own cut-off point! But, at the same time, you are much more dependent on your Riflemen play, since you will not have the saving grace of an early M20. On the other hand, if you do play well with what you have, then you will have more fuel for an early Stuart.
The pros:
- You can be extra aggressive
- More capping power than usual
- Possibility of researching an earlier Stuart
The cons:
- Heavily reliant on Riflemen play
- It's possible to put yourself in a really bad place, if you make an early mistake!
With this opening, there is always the chance that with some early bad engagements and reinforcing costs, you get “stuck” on the early tiers. For example, if you fail with the 3 Riflemen opening AND the M20 does not have the shock value it was supposed to have, you still have access to the HMG of the Lieutenant tier. But with the 4 Riflemen opening, you do not have this kind of unit choice. It is important to highlight this difference, because there are going to be games where your early aggression fails and you lack enough fuel for the Lieutenant right away. Since floating resources is bad and you want to keep your opponent under pressure, then you pretty much have no choice, but to resort to this extra Rifle squad opening.
2 or more RE squads-Riflemen (x3) OR All RE squads
OR
In my opinion this kind of opening with Rear Echelon squads, is like shooting yourself in the foot right off the bat! Nevertheless, I will still discuss this Build Order, since it seems to attract a fair amount of use. The Rear Echelon squads are not great fighting units early on and later, they merely become good trading units, with emphasis on the word 'trading', since they still do not measure up in any scenario against LMG-equipped and vetted Grenadier squads.
The pros:
- Extra capping power
- Good manpower trading mid-game, due to RE’s being cheap to reinforce
- Flexible in the way that you can research early techs and/or easily adapt
The cons:
- Not really good for aggressive play
- Army can be lackluster, both early and later on
Now, this list may seem to have more pros than cons, but the fact that REs are really weak combat units early on, is a big deal. If your enemy sees this and is smart about how to play, they will certainly attack your cut-off point and it will be hard for you to fend them off. This leaves you with no resource flow, as well as fighting with units, which will slowly, but surely, fall to bad trades.
USF Strategy against the Ostheer
There are two main strategies that the Ostheer player will use and it is up to you to identify which one, then to employ the appropriate response. Keep in mind that Ostheer is the most punishing match up, so any mistakes are really hard to recover from.
Against the Sniper Threat
 ostheer ostheer
This strategy is very map dependent, since there are some maps on which flanking and killing a Sniper, is much easier than on others. There are two ways to deal with the Sniper menace and, depending on the map, one can be more beneficial than the other.
The first way and the one I prefer, is out-teching your opponent. Instead of going for heavy infantry play, you research an army composition, where the strength is in the light vehicles or medium tanks, which makes it hard for the Sniper to have a real impact beyond the early game. That means the M20, Stuart and/or Sherman rush is going to be your objective, while the Riflemen disrupt enemy forces with smoke grenades. This is my default strategy against the Sniper, but there is another possibility too.
The second strategy is a Riflemen-oriented style, which is highly dependent on the map. However, it can set your opponent back quite firmly, if well executed. After deploying the M20, you will need to research early BAR's, ambulance, grenades and an extra Riflemen squad. Try to flank the Sniper and kill it, by sneaking 2 BAR-equipped Riflemen squads behind enemy lines. The drawback to this approach (and of course, why I use the other more frequently) is that if it goes wrong, you do not have units from the other tiers to back you up.
This strategy is not appropriate for following maps:
- Faymonville Approach (too small, hard to flank the Sniper effectively)
- Langres (depending on how good your opponent is, the fact that the map is so open may mean the MG has an easy time protecting the Sniper)
- Crossing In The Woods (the distance from the center of the map to the bases is short, and the Sniper will most likely be deployed there, since it covers the high munition points; also there is only one flank route if the Sniper is sent to one side of the map to get the high fuel).
Against Grenadier Spam Threat
ostheer ostheerGrenadier spam is honestly more annoying to counter than the Sniper, but it is very doable. There is only one approach to take, namely out-teching your opponent and avoiding the Riflemen vs. Grenadier match-up as best you can, until you get either Flamethrowers or BARs. Your main objective is to achieve a combination of light vehicles, HMG and Pack Howitzer, but researching the Sherman is also critical, because if your opponent goes for a heavy Tier 2, their main counter to the Sherman is immobile (the PAK), which means you can exploit the flanks of the map, where it is dangerous to send a PAK to deal with the Sherman.
USF Strategy against the OKW
Against OKW, the strategy is straightforward: you want a combined arms army with the M20 rush, HMG (a really important unit against OKW) and some Flamethrower upgrades on the Riflemen. This should be enough to deal with any infantry, but take care not to skip the Captain tier, since the Pack Howitzer is really useful against the OKW trucks, used in conjunction with the AT gun. If your opponent goes for the Puma, one Stuart and one AT-gun can make short work of it, with the Captain in support.
The main difference from fighting the Ostheer, is that you want a big confrontation against OKW, instead of running around and flanking, while creeping forward with your MG, slowly gaining territory. Consider using Armor doctrine, if you think that your opponent might go for an Ostwind, since the M10 works well against it. Otherwise, the Flamethrower upgrade on the Riflemen is really useful, if your opponent goes for an infantry-heavy strategy.
Overall, I would say this is the easiest match-up for USF, especially if you maintain your aggression from the first minute. I do not usually skip any tier against the OKW, since you are going to use pretty much every unit at your disposal to deal with everything the OKW has, which will mostly be a large number of infantry units. You achieve this, by having your main force supported by a HMG whilst covering the sides of the maps with light vehicles, although you may occasionally need to have these light vehicles support your main force, depending on the map and the situation.
Riflemen Tactics
As I have mentioned earlier using Riflemen squads well is the key to good USF play. The next part is going to be one big chapter, since I have a hard time separating any of the following topics, because they are all interconnected. Hopefully, by the end of this chapter, you will better understand how to use to your advantage, the basic infantry of the USF faction.
Positioning, Manpower and Maps
To start with, I want to talk about the importance of the positioning of Riflemen squads on the map. This is more important in the early stages of the game, but later, the way you position your Riflemen, can mean winning or losing a large engagement.
The correct way to station Riflemen squads, is usually to position them on the flanks of the map, since direct confrontations with an Ostheer player can easily swing against you. The best opportunity which the Ostheer has to win early on, is when its forces are concentrated (at least until Grenadiers get vet 3 and are upgraded with LMGs); this is not so true against the OKW, so you can try to take advantage of that, by using early cut-off harassment. The reason is that when Riflemen are on the flanks, they can easily come down to the middle of the map, which is where the Ostheer player is probably going. This is because if you want to keep your forces together while posing a threat, as the Ostheer likes to do, then the middle of the map is the best place to be, because the Ostheer can easily strike at any side of the map, with a large number of units.
This is more easily demonstrated by showing my usual capping order on some known maps. Although you should note that none of this is set in stone, since I usually adapt my tactics, if I am playing against OKW or Ostheer, or even based on what I know about the player I am fighting.
The broad aim behind the capping order of any of these maps, is to capture a high fuel point (so that the M20 rush is possible) AND to be in such a position as to easily flank the opponent, if they offer the opportunity. You will notice a common pattern in all of the maps, which is that the third Riflemen squad usually goes to either the middle of the map, or to a place where it is likely, that the enemy player will also move.
To make things simpler, I have only shown the capping order for the base positions on which Allies are usually played in tournaments:
The RE squad goes to the right to cap the high fuel; the first Riflemen captures the cut-off and the munitions point, so that you have access to munitions for the grenades later on; the second Riflemen goes to the middle of the map to scout your opponent's movement while capping the middle VP; the third Riflemen is usually the one you want to send to contest a point, either the cut-off or your opponent's high fuel.
You want your first RE squad to cap both MP points and move on to the munitions, as well as to be available, so that if needed, it can rush the building near the North cut-off. The first Riflemen squad caps the fuel whilst the second and third Riflemen harass the top/middle part of the map. Note how the bottom squads can easily assist in the top half of the map, since just when they are done capping, the third riflemen is taking the field.
The RE squad goes for the high fuel on the right, while the first Riflemen squad rushes the North fuel; then, the second Riflemen squad caps the cut-off, connecting it to the fuel on the North. Finally, the third Riflemen squad goes to the centre: notice how all these units are ready to concentrate onto the middle of the map, if needs be.
Angoville is an unusual map, since there is no “middle”; there are instead two sides between which you have to choose. Usually, I send my RE squad to the cut-off and then to the middle of the map.That way, I can see on which side my opponent has gone, and if they go left, then the RE is ready to harass the cut- off in conjunction with the first Riflemen squad, which was also sent directly to the middle of the map. The destination of the second and third Riflemen squad is dependent upon which side of the map my opponent chooses to go, but generally, you want them on the left, so they can harass the right cut-off.
Now that we have had a general look at the first minutes of capturing points, I can better explain about making flanking manoeuvres. You probably noticed that at the end of the first capture orders, the Riflemen are in such a position, that they could easily move to an important enemy point, or assist some other squad. This is what you want most of the time, because when combined with smoke, it is hard to counter a full USF attack. It is important to pay attention to where your opponent IS and WANTS to move, so that you can easily move around the enemy and flank attack, when you feel you have the upper hand.
Angoville is the best map on which to practice this, since if the enemy player moves further than they should from any of the cut-offs, they expose themselves to some good harassment. Generally, when carrying out these big offensives, you want the Riflemen squads who are “behind enemy lines” to go first, since the enemy MG (in case of an Ostheer player) will have to re-position, leaving the front line open for the rest of your squads to come in. It is also important that you use smoke grenades, to deny damage while coming in and to deny the MG suppression.
Another important part of USF or Riflemen play, is to consider the strengths of the entire enemy army. If you think that you do not have enough units to pull off a big offensive, or that it may be a risky move, then consider harassing points with smoke and avoid fighting. This will ensure that your opponent feels pressured, but will not cause any major losses to your army. This is also an important option to look at, since you will want to do this many times, to be able to either tech up, or to research something which needs a more expensive investment on your part e.g. researching the M20, or Sherman, or possibly the Pershing.
Try to keep a good balance between aggressive play and passive play and remember, that if you drop the ball at any moment as USF, it is hard to get the Riflemen “back on track”. What I mean is that by having Riflemen already out in the field, it is easier for other units to arrive and deploy, since the enemy forces may feel threatened by the positioning of your Riflemen. I recommend watching the OMGPOP game on OCF, where I played USF and he played Ostheer, which I think is a good example of my style, using early aggression. Here, I kept the pressure up, even when outnumbered, relying on superior positioning in order to win the last crucial engagement of the game:
For a detailed view of how to use USF Riflemen against OKW, the game against Vindicarex playing as OKW stands as a an example, since it presents a good opportunity to see how the superiority of USF against OKW early on, snowballs into better teching, which leads into an easy win:
The correct way to station Riflemen squads, is usually to position them on the flanks of the map, since direct confrontations with an Ostheer player can easily swing against you. The best opportunity which the Ostheer has to win early on, is when its forces are concentrated (at least until Grenadiers get vet 3 and are upgraded with LMGs); this is not so true against the OKW, so you can try to take advantage of that, by using early cut-off harassment. The reason is that when Riflemen are on the flanks, they can easily come down to the middle of the map, which is where the Ostheer player is probably going. This is because if you want to keep your forces together while posing a threat, as the Ostheer likes to do, then the middle of the map is the best place to be, because the Ostheer can easily strike at any side of the map, with a large number of units.
This is more easily demonstrated by showing my usual capping order on some known maps. Although you should note that none of this is set in stone, since I usually adapt my tactics, if I am playing against OKW or Ostheer, or even based on what I know about the player I am fighting.
The broad aim behind the capping order of any of these maps, is to capture a high fuel point (so that the M20 rush is possible) AND to be in such a position as to easily flank the opponent, if they offer the opportunity. You will notice a common pattern in all of the maps, which is that the third Riflemen squad usually goes to either the middle of the map, or to a place where it is likely, that the enemy player will also move.
To make things simpler, I have only shown the capping order for the base positions on which Allies are usually played in tournaments:
Key:
Green- Rear Echelon cooks
Red- 1st Rifle Squad
Orange-2nd Rifle Squad
Yellow-3rd Rifle Squad
Green- Rear Echelon cooks
Red- 1st Rifle Squad
Orange-2nd Rifle Squad
Yellow-3rd Rifle Squad
Langres


The RE squad goes to the right to cap the high fuel; the first Riflemen captures the cut-off and the munitions point, so that you have access to munitions for the grenades later on; the second Riflemen goes to the middle of the map to scout your opponent's movement while capping the middle VP; the third Riflemen is usually the one you want to send to contest a point, either the cut-off or your opponent's high fuel.
Kholodny Ferma


You want your first RE squad to cap both MP points and move on to the munitions, as well as to be available, so that if needed, it can rush the building near the North cut-off. The first Riflemen squad caps the fuel whilst the second and third Riflemen harass the top/middle part of the map. Note how the bottom squads can easily assist in the top half of the map, since just when they are done capping, the third riflemen is taking the field.
Semoskiy Winter


The RE squad goes for the high fuel on the right, while the first Riflemen squad rushes the North fuel; then, the second Riflemen squad caps the cut-off, connecting it to the fuel on the North. Finally, the third Riflemen squad goes to the centre: notice how all these units are ready to concentrate onto the middle of the map, if needs be.
Angoville


Angoville is an unusual map, since there is no “middle”; there are instead two sides between which you have to choose. Usually, I send my RE squad to the cut-off and then to the middle of the map.That way, I can see on which side my opponent has gone, and if they go left, then the RE is ready to harass the cut- off in conjunction with the first Riflemen squad, which was also sent directly to the middle of the map. The destination of the second and third Riflemen squad is dependent upon which side of the map my opponent chooses to go, but generally, you want them on the left, so they can harass the right cut-off.
Capping for Fun and Profit
Now that we have had a general look at the first minutes of capturing points, I can better explain about making flanking manoeuvres. You probably noticed that at the end of the first capture orders, the Riflemen are in such a position, that they could easily move to an important enemy point, or assist some other squad. This is what you want most of the time, because when combined with smoke, it is hard to counter a full USF attack. It is important to pay attention to where your opponent IS and WANTS to move, so that you can easily move around the enemy and flank attack, when you feel you have the upper hand.
Angoville is the best map on which to practice this, since if the enemy player moves further than they should from any of the cut-offs, they expose themselves to some good harassment. Generally, when carrying out these big offensives, you want the Riflemen squads who are “behind enemy lines” to go first, since the enemy MG (in case of an Ostheer player) will have to re-position, leaving the front line open for the rest of your squads to come in. It is also important that you use smoke grenades, to deny damage while coming in and to deny the MG suppression.
Another important part of USF or Riflemen play, is to consider the strengths of the entire enemy army. If you think that you do not have enough units to pull off a big offensive, or that it may be a risky move, then consider harassing points with smoke and avoid fighting. This will ensure that your opponent feels pressured, but will not cause any major losses to your army. This is also an important option to look at, since you will want to do this many times, to be able to either tech up, or to research something which needs a more expensive investment on your part e.g. researching the M20, or Sherman, or possibly the Pershing.
Try to keep a good balance between aggressive play and passive play and remember, that if you drop the ball at any moment as USF, it is hard to get the Riflemen “back on track”. What I mean is that by having Riflemen already out in the field, it is easier for other units to arrive and deploy, since the enemy forces may feel threatened by the positioning of your Riflemen. I recommend watching the OMGPOP game on OCF, where I played USF and he played Ostheer, which I think is a good example of my style, using early aggression. Here, I kept the pressure up, even when outnumbered, relying on superior positioning in order to win the last crucial engagement of the game:
For a detailed view of how to use USF Riflemen against OKW, the game against Vindicarex playing as OKW stands as a an example, since it presents a good opportunity to see how the superiority of USF against OKW early on, snowballs into better teching, which leads into an easy win:
Flanking
There are some more points which I should discuss before ending this section, namely the use of Riflemen for making flanking attacks. I briefly mentioned the use of smoke grenades and that in many cases, you should first send in the Riflemen who are “behind enemy lines”. But there are also some other points, which you need to monitor:
That said, we are ready to move on to the next section, in which I briefly comment, about what I think is important for the different battle phases.
- Split your units and do not blob! Unless you are against someone that has not built any MG, it is never a good idea. If you avoid blobbing, you will ensure that your whole force will not get pinned down.
- Try to create as much chaos as possible. Even if the enemy MG pins one squad, keep it in there for as much time as possible.
- Keep an eye out for low health squads, while carrying out these big flanks. It is when you are busy with this kind of tactic, that you are more prone to losing squads. If you can carry out these aggressive manoeuvres while preserving your army, then you are in the clear.
- Focus hurling your grenades at important support weapons, or at an enemy squad which is clumped up; also, try to throw multiple grenades at the same time, since it is almost impossible for your opponent to react to all of them.
That said, we are ready to move on to the next section, in which I briefly comment, about what I think is important for the different battle phases.
Game Phases
Early game
In the early game, the USF is at its deadliest and this is where you should keep your main focus, since you can easily win games in 10 minutes (although do not become nervous, even if things run on to a late game). You need to concentrate on three things in the early game:
A good way to start snowballing the game, is to make your three Riflemen squads launch some kind of offensive and bear in mind, that you do not always need to force full retreats, for the attack to be effective. Of course, forcing full retreats is better and usually against the OKW, that can be pretty easy to achieve, while against Ostheer, it is doable, if they go for an early Sniper.
Against some heavier Grenadier builds, you can keep your opponent on their side of the map whilst waiting for the M20, by carrying out cut-off moves and then attacking directly. Remember! If you select Rifle Company, do not to use all your munitions on either grenades or Flamethrowers alone, since you need both.
- keeping your opponent off important resources;
- pulling off the M20 rush (to further deny resources); and
- being able to maintain your aggression while avoiding significant manpower losses.
A good way to start snowballing the game, is to make your three Riflemen squads launch some kind of offensive and bear in mind, that you do not always need to force full retreats, for the attack to be effective. Of course, forcing full retreats is better and usually against the OKW, that can be pretty easy to achieve, while against Ostheer, it is doable, if they go for an early Sniper.
Against some heavier Grenadier builds, you can keep your opponent on their side of the map whilst waiting for the M20, by carrying out cut-off moves and then attacking directly. Remember! If you select Rifle Company, do not to use all your munitions on either grenades or Flamethrowers alone, since you need both.
Mid game
The mid game is where, in my opinion, the USF really takes off. You have access to a good array of units, from HMGs to Pack Howitzers and arguably the best light vehicles, which can really help you control the edges of the map, and which can also be useful for controlling Grenadier spam. Here, your objective is to ensure either VP pressure, so that you have a good edge coming into late game and/or that you have the teching advantage, which can help close out games, if you are able to bring out a Sherman in time for their Tier 2. Be careful of any large engagements, since getting back on the map can be difficult as USF: keeping your presence showing on the map is important.
Late game
Late game, it becomes a lot harder to win matches as USF, but not at all impossible. You definitely need a lot more attention to detail in order to survive, but it really helps that Shermans are such an effective tank and cheap into the bargain. If your opponent is focusing mainly on infantry, then investing in a lot of Shermans is not a bad idea, while if the enemy are going for a heavy vehicle approach, then the Jackson tank destroyer is a good glass cannon, which can really throw your opponent off balance, when supported by use of smoke, or a Sherman offensive.
Also, it is necessary to have some kind of indirect fire, for which purpose the Pack Howitzer, or M8A1 Priest, are the best you can find . All in all, USF late game is about committing everything: you cannot really make cheeky trades any more, since USF is outclassed in every form of indirect fire, as well as in terms of individual units. Your best option is to consult your strategic mind and drive your opponent off the map, making smart use of smoke (including the Sherman smoke) and effecting successful tank flank attacks, with Riflemen in support.
Also, it is necessary to have some kind of indirect fire, for which purpose the Pack Howitzer, or M8A1 Priest, are the best you can find . All in all, USF late game is about committing everything: you cannot really make cheeky trades any more, since USF is outclassed in every form of indirect fire, as well as in terms of individual units. Your best option is to consult your strategic mind and drive your opponent off the map, making smart use of smoke (including the Sherman smoke) and effecting successful tank flank attacks, with Riflemen in support.
More in-depth sniper counter play
The sniper is without a doubt the unit that is the most frustrating to play against as USF as well one of the only saving graces for Ostheer against USF, but there are ways you can fight it outside rushing your M20 as discussed before. First of all, one really important thing is to reduce the bleed the sniper inflicts on you.
Let us think about the player that is using the sniper for a while here so we can understand better how to fight it; the Ostheer sniper wants to be in a position where can inflict damage while being safe. More importantly, it reigns supreme in keeping USF at bay by constantly keeping riflemen squad low on models thus denying the opportunity for a big flank since you will be missing that one sniped riflemen.
Now let us think what frustrates a sniper user when fighting in particularly a USF player: First of all, if a rifleman is behind a shot blocker then your sniper either has to reposition which makes it lose time or - depending on the situation - it cannot even fire since repositioning might render it in a position too dangerous. The second most frustrating thing is when the TEMPO of the match is high: When you constantly stage big flanks, the sniper is using most of its time repositioning itself to safer spots before firing. The further use of grenades might result in the sniper not firing a single shot.
Now that we recapped the things that make sniper play awkward, we can devise means to deal with him effectively. The first thing you want check out are the shot blockers on the map. These are really important, especially if located near strategic points to deny the sniper a clear line of sight.
Make sure you save manpower. If you know the sniper is nearby, cap only if that either denies an important resource like fuel to your opponent, or if you have a plan in place to deal with the sniper, like squads ready to flank or an M20 on standby.
Further, try to avoid small skirmishes. For example, when a grenadier is fighting against riflemen at medium range, the sniper will soon show up to support the grens against your lone squad. However, in larger scale engagements with several RM squad involved that come in from different angles and potentially the help of smoke and /or grenades, the sniper will constantly need to reposition itself and often will not be able to get off a lot of shots before having to run for its life.
The last topic is when to do the “big flanks”: Ideally, you want to either have BARs or grenades available (with enough munitions to use smoke and maybe some grenades depending on the number of MGs at hand). Once you have those, the idea is to get the Ostheer player to overextend (preferably through the center of the map). Set up two RM so they can flank deeply around the side or even the rear of the OH’s main force. In order to be effective, the OH player has to position the sniper far forward. Once the counterattack comes, the sniper likely needs to retreat through the flanking RM squads (preferably these are the ones with BARs) which should make short work of it.
USF mentality
There is another topic that is important to succeed, which is the mentality in which you approach the game when playing USF. If you are overall a defensive player, then USF is not for you. My play is guided by the phrase “The best defense is a good offense”. With this in mind, it is really important that you are always thinking one step ahead on what could be plan B in case something goes wrong. You do not want to be the one reacting to what your opponent is doing.
You should always think about what your opponent is likely to do next and how you can counter that. This is easier to assess a few minutes into the game by which you should have a feeling about what kind of opponent you are dealing with. Many players are defensive while others like to go straight for your cut off after having won an engagement. Always be wary of what your opponent plans to do in order to have a swift response. For example, if your opponent indeed goes for your cut off, you should already be ordering a rifle squad to come in from behind the enemy lines to disrupt this move.
What USF excels at is snowballing a small lead to a big one, or how I like to call it “if they give you a hand you take the whole arm”. As soon as you are in a leading position in a game (for example when the M20 hits the field) you want to take as much advantage as possible. If you win an engagement, think about how to exploit this. Maybe you can push for his fuel or lay some M20 mines, to name a few potential options.
Keep in mind that you can shape the game with how you play and force your opponent to play on your terms. A good example of this that I have made good use of, is the follow up after forcing a mass retreat with an M20: You might be able to go for the opponent’s fuel so that he has to stick to T1/T2 play with call-in tanks, which in turn means that you can upgrade BARs and grenades and maybe build an extra rifle. Now your opponent has to fight off your superior infantry while being stuck to T1/T2.
Conclusion
I hope this guide has offered some insight into how I operate with USF and that it will hopefully encourage some more love for this army. Trying to bring everything I know into this guide, was a lot harder than I initially anticipated, so it might seem difficult on a first read to comprehend everything at once. I suggest you might also watch my interview for OCF, which contains further analysis about why I made the decisions which I did:
Above all else, remember our phrase from the Iberian peninsula: #Adapt! ")
 DevM
DevM  AmiPolizeiFunk
  MajorBloodnok
  van Voort
  Yukiko
  squippy
  Siphon X.