
Introduction
Achtung, stillgestanden! Listen carefully, Kommandant! I am going to introduce a strategy that is neither in need of the mighty Panzerkampfwagen VI „Tiger“ nor of our brave Luftwaffe. Only a effectively mixed force of Ostheer stock units in combination with the Mobile Defense Doctrine is required. You will tease out the anti tank capabilities of a Panzerspähwagen Sd.Kfz. 234 „Puma“ to the maximum in order to repel Allied armoured forces and you will combine your infantry forces with an anti-infantry tank of your choice to push back allied soldiers. Let me elaborate.
The Commander and his abilities
0CP Counter Offensive Tactic
 35
35 Pay 35 munitions to cap neutral territory faster. Use this ability when initiating a counterattack.
2CP Panzer Tactician
 30
30 Panzer Tactician enables your armoured forces to make use of smoke for 30 munitions. Employing smoke is necessary to assure the survival of your armoured forces in emergency cases. I shall come back to it when we discuss the proper usage of your motorized units.
3CP Osttruppen Reserve
|


Call in two Osttruppen squads for 425 manpower. These Osttruppen squads can arrive with veterancy and/or LMG42 on one squad/both squads or nothing at all.
Here is a little table about likelihoods concerning veterancy and LMG42:
| 1 Squad% | Vet 0 | Vet 1 | Vet 2 | Vet3 |
| Without LMG-42 | 40 | 20 | 7.5 | 5 |
| With LMG-42 | 10 | 5 | 3.75 | 2.5 |
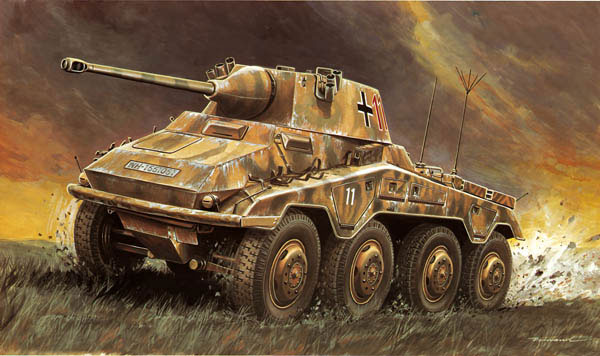
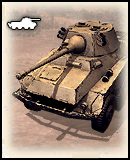
5CP Panzerspähwagen Sd.Kfz. 234 „Puma“
|

Field a Puma for 270 manpower and 80 fuel. This fast light armoured unit allows you to engage enemy armour from long range and fits perfectly with your defensive forces.
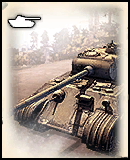
9CP Panzerkampfwagen IV Command Tank
|
This ability permits you to request one Panzer IV Command Tank for 360 manpower and 125 fuel. The Command Tank grants defensive bonus (0.8 received damage) to all entities residing in its aura (radius: 45). Furthermore it is characterized by decent anti infantry capabilities.
Build Order and Tactics
Tier I:
At the very beginning of the game you should build up a solid force which consists of three Grenadiers and one MG42. While your Grenadiers cap territory and engage attacking enemy infantry your MG42 assures that you stay in the game even if your foe has more squads of Conscripts or Rifleman at his disposal.
Then - depending on the current situation of the game - you decide what to do build next. There is indeed variety in the choices you can make:
If you play on a map featuring multiple buildings as Semoiskiy or a map that favours static gameplay as Langreskaya you should consider requesting a Granatwerfer 34 squad. This mortar will reliably clear out buildings occupied by opposing infantry as well as continuously bombard hostile weapon teams who might cause trouble. Once your mortar has reached veterancy his services can confidently be called upon even in the Late Game. Furthermore a mortar will give you advantage if you use it to support Grenadiers during engagements. Try firmly to keep your mortar alive by changing its position, deploying it behind the frontline and regularly reinforcing it if required. Use the mortar to dislodge Tommy squads in cover.
OR
Building a Sniper can involve considerable positive and negative consequences for your general playstyle having a huge impact. Only specific maps are suitable for a Sniper: Crossing in the Woods and Langreskaya. These two maps are anyway favourable for Ostheer. They allow an early preparation for an interception of flanks executed by both infantry and armour which intend to eliminate your Sniper.
Crossing in the Woods consist of mainly three „lanes“: west, mid, east. Hopefully you have occupied and secured at least one lane (west or east) so that you can exclude your foe can flank from there. Subsequently, you have to position one Grenadier squad at each possible flanking point in order to be warned and to prevent flanks.
Langreskaya North is a clearly laid out position wherefore a flank is obvious. Langreskaya South is constrictive due to some obstacles but nevertheless easy to oversee. Approaching as in Crossing in the Woods is helpful. In addition keep a faustable squad near to your Sniper to be fully assured you are able to prevent a surprising vehicle from chasing down your Sniper.
Aside from the maps you should consider that a Sniper is more effective against USF than SU in general due to the high reinforcement costs of Rifleman. Eliminating Riflemen gives the Sniper more experience than eliminating Conscripts. Soviets have also more options to slay your Sniper, as counter-sniping, (non-)doctrinal mortars and Scout Cars.
Let me briefly summarize the pros and cons of a Sniper:
Pros:
- Additional line of sight
- Sniper can serve as reconnaissance
- Steady manpower drain for your foe
- Useful as a tool to clear out pesky weapon teams
- Hard to ignore, your foe will focus your Sniper and might execute breakneck flanks
Cons:
- Costs 360 manpower which delays your tech
- Instead of spending 360 manpower on a Sniper you could build other infantry squads to increase field presence and cap power
- Sniper is extremely fragile
- Many options to eliminate Sniper such as indirect fire combined with malevolent RNG
- Foe can avoid being shot by Sniper just by hiding behind shotblockers
As you can see, a Sniper is pretty situational and only effective against certain strategies on certain maps. You decide whether he is worthwhile.
OR
A second MG42 could be viable in open maps without many shot blockers. If your USF foe builds a Lieutnant and heads for fast light vehicles it might be wise not to build a second MG42. Since March Deployment II MG42's viability has returned (increased near, mid and far accuracy).
In order to heal your forces set up a heal bunker at a position of your choice. Recommendable is in your base near reinforcing points.
Tactical Advice:
You must consider that Ostheer in general tends to be fragile which applies mostly to Early Game. Allied forces overwhelm Ostheer with ease, especially when they attack aggressively with multiple squads from more than one side. Therefore, you should play rather defensively, securing and holding essential points in Early Game: at least one fuel and victory point (really recommended), munition point (if possible); neutralize or cap a second VP (if possible); of course all points should be connected. These measures ensure your foe will neither overrun you with armour in Mid Game nor will you have grave fuel issues. Furthermore, you are not going to have serious problems with draining of victory points by at least holding one of them.
Be mobile and flexible with your Grenadier squads who should together repel hostile attacks from long range in cover which try to cut off or to decap your fuel point. If your foe attacks the cut off and the fuel point simultaneously then defend your cut off point with your MG42/Pioneers and strike back at your fuel point with your Grenadiers. Attempt to make use of your other unit. Consider placing one teller mine on a location where you assume an enemy vehicle will approach, specially when playing against USF Lieutenant. Avoid casualty inflicting engagements for you and do not fight skirmishes which you cannot win.
All-in-all play defensively securing the points mentioned above. Do not initiate over-ambitious offensives which can cost you control of your usually small territory. Upgrading Mine Sweepers for your Pioneers is helpful versus Soviet mines and demo charges.
Tier II:
By building the Leichte Mechanized Company you are permitted to access PAK40s, Panzerspähwagen Sd.Kfz. 222 and Schützenpanzerwagen Sd.Kfz. 251 which is able to become a flame thrower if you pay 120 munitions.
Consider purchasing a 222 in order to be capable of properly dealing with infantry and especially light vehicles. Use your 222 in order to damage or hunt down hostile light vehicles or to wipe out squads on retreat on low health. Furthermore you can use 222 as a scouting unit in order to keep an eye on your flanks. In case of stalemates which your foe wants to break in his favour you should not forget to use veterancy 1 ability for 10 munitions which spots infantry on your minimap. Do never overextend your 222 since it can be brought down very swiftly. One anti tank grenade and some volleys are sufficient as well as one shot from an anti tank gun and some volleys. If you hit a Soviet mine or an American anti tank mine then good luck Kamerad!
OR
Panzergrenadiers are only worth their 340 manpower in fighting in narrow maps such as Kholodny Ferma. Here they can fulfil their potential as short range infantry and weapon team threatening force. Try to avoid long range engagements and casualty heavy skirmishes due to high reinforcement costs. Only if you really have an abundance of munitions you can think about spending 120 munitions for two Panzerschrecks whose performance is disputable. Bear in mind that Panzergrenadiers exposed to tanks can drop one Schreck which can fall into enemy hands and costs you 60 munitions.
Panzerabwehrkanone 40 provides you an excellent option for destroying enemy armored vehicles; long range, decent damage and reliable penetration menace any kind of Allied armor. Cover your PaK40s with Grenadiers or Osttruppen whose tasks are to faust charging armor besides fighting infantry. A fausted tank is almost a dead one because his escape capabilities are severely limited. If a tank drives over a Tellermine he can say goodbye unless he is extremely lucky. Do not forget the veterancy 1 ability of the PaK40: stunning a targeted vehicle.
Do you think your Grenadiers need some fresh reinforcements and direct fire support on the field? How about calling in two Osttruppen squads? These two Osttruppen squads – six man per each squad - increase your infantry presence significantly. They provide you with additional fire power and two more available Fausts. Depending on the RNG they might field LMG42s which do not cost you any munition and/or bonus veterancy for your auxiliaries. If they do not receive any bonus they are still able to serve as meat shield. Furthermore Osttruppen are well suited to take vacant weapons. Fighting in cover is essential for Osttruppen as they get strengthened and take less damage from enemy fire. If you think you will not need Osttruppen at this stage of the game you can still call them in when the time has come.
Up until now you have lacked a mobile force to prosecute enemy armor. Sd.Kfz. 234 „Puma“ is going to alter that. Before teching up to Tier III call in this vehicle which is one of the most important reasons why you have chosen to execute this strategy. A Puma fits perfectly to your forces and overall strategy as it can seriously damage every medium Allied tank from long range and swiftly pass through the frontlines – or escape. Combined with the fausting power of Grenadiers and Osttruppen as well as generous anti-tank capabilites of PaK40s you are able to turn any kind of Allied armour into a burning wreck.
Tactical Advice:
I.) Versus United States Forces:
 usf
usf
usf1.) Versus Lieutnant:
The Lieutnant appears mostly about the 4th minute mark. M20 appears about the 5th minute mark which is very early considering most Ostheer players begin to tech up in this phase of the battle. Early M20 can be countered by wisely laid down Tellers, i.e. Tellers on main roads or approaches. Hopefully you have collected a decent amount of munitions.
If that does not work you have to persevere until you get a 222 out in order to counter M20. Be careful about the bazooka crew of M20 since many players tend to crew their M20 with Rear Echelons and keep their bazooka crew ready to engage 222s and also take care for the M20's anti tank mine which one hits 222.
As an alternative you can produce a PaK40 to counter M20 or - in case you have 75 munitions and an appropriate Grenadier positioning – faust M20 to destruction which is risky though.
If your opponent chooses to play with Anti Air Halftrack you have to build a PaK40 to counter it safely. Other than that you can ambush the AA Haltrack with a fausting Grenadier squad and try to finish it with 222 provided you do not show up from back side of AA Halftrack.
American heavy machine guns can be countered by rifle grenades or mortars quite comfortably.
Generally avoid close ranged engagements versus Lieutnant due to his BAR and Thompson.
If you have to engage USF mortar, be sure that no squad or weapon team is clumping up in cover. The best way to get rid of USF mortar is unexpected pushing with grenadiers and a sniper covered by MG42 towards the direction of the mortar. Do not forget to make use of Rifle Grenades, especially if mortar is set up close behind a hedge.
2.) Versus Captain:
You can easily notice if your opponent goes for Captain when you look at the timer: If Lieutenant or an early light vehicle have not appeared until the 6th minute and/or your foe fielded four riflemen instead of three you can be sure he went for Captain. A Stuart can be dealt with a Tellermine like the M20 or be beaten by a Faust combined with PaK40 to finish it.
If you try to engage a Stuart with Puma you have to care about Stuart's stun ability which allows your foe to stun your Puma in order to destroy it in safety. It is preferable to engage a Stuart from far range.
If you have to face M1 75mm Pack Howitzer grant your infantry squads particular attention. Since Automatic Seeking Cover System was implemented infantry inclines to clump up in cover at the pleasure of artillery pieces. Preventing that is only possible by avid micromanagement of your squads being under fire by the Pack Howitzer, the same goes for weapon teams. In order to prevent high veterancy on the Pack Howitzer try to engage it with rifle grenades, mortar or brave but calculated pushes to decrew or destroy it.
II.) Versus Soviet Union:
 soviets
soviets1.) Versus Tier I:
Most players build Tier I in order to build M3A1 Scout Cars. They crew them with Pioneer squads upgraded with Flamethrowers which grants them access to a powerful and deadly shock unit in early game. In order to avoid squad losses, do not overextend your squads and do not spread them too far. Keep them together to prevent one of them being hunted down on retreat by the flaming M3A1. Try to ambush M3A1 with Grenadiers who hide behind Line of Sight blockers such as buildings and do not waste munitions on M3A1 if you cannot finish it until you reach Tier II to request a 222 in order to handle M3A1 appropriately. Be careful about Guards, mines or AT'nades from Conscripts if you rush the M3A1.
If your opponent goes for Snipers you should not purchase more MG42s or Snipers yourself. Avoid confronting or hunting Snipers in a wide open field with your Grenadiers since they can easily withdraw and shoot again once they are in security. Spread your Grenadiers unless your foe has purchased M3A1 and use Line of Sight blockers at your advantage. Capture aggressively nevertheless since Snipers mean a lack of field presence. When you purchase a 222 upgrade try to severely hit the Snipers without driving into AT'nading Conscripts, Guards or mines. Other than that, you can try to eliminate Snipers with Rifle Grenades or mortar.
In case of Penal Battalions do not let them fight in close range against your Grenadiers. Their flamethrowers are quite effective versus Grenadiers in short range, another reason to engage them in far range.
2.) Versus Tier II:
If your opponents decide to produce Maxims and Mortars for a more stationary play you should consider purchasing two Mortars instead of one. Your Grenadiers should push and capture the flanks. Do not let Mortar squads fight who only consist of two men – retreat and reinforce them - and relocate your Mortars regularly. Once you have upgraded Tier II you can engage Maxims with Rifle Grenades as well as LMG42s. Avoid clumping with Grenadiers and MG42. If you produce a 222 be careful about ZiS AT guns since they put the final nail in the coffin.
III.) Versus United Kingdom Forces:

The research of British Tier II will be completed between the 2 and 3 minute mark in most cases so you have to cope with its arsenal quite early. British Tier II offers your foe a couple of options to go with:
Royal Engineers can be fielded rather quickly for a price of 210 manpower. They can lay down mines and be upgraded with mine sweepers to search for your Tellers.
Besides that, he is able to add one extra man to them via research and grant them PIATs thus giving them more time to withstand fire while their PIATs seek to destroy your 222 and Puma both of which must be extremely careful when facing PIATs.
If you have fielded a Sniper you have to be aware of the fact that your foe can field the British counterpart who is not only able to drain your manpower but also can damage your light vehicles. If you fear being countersniped you should use your 222's ability unlocked by reaching veterancy level 1 and called "Infantry Awareness" to spot British snipers on the minimap.
Grenadiers and PaK should cover your 222 and be ready to faust since your foe will use the shock factor of AEC rush as efficiently as he can.
Special section: Emplacements
Bofors are seen rarely on the battlefield these days since they restrict AEC requisition consequently limiting possible British shock power in the early game and since Bofors can be countered without much effort. Mortars can barrage their health points to a level at which British player must activate "Brace!" to prevent its destruction so that PaKs and flamer can finish it off. Mortar Pits on the contrary often make an appearance due to comfortably controlling the part of the map their range covers and due to the capability of counterbarraging hostile Mortars. If you face Mortar Pits you should seek to conquer those parts of the map not covered by Mortar Pit. In case you must face it in a narrow map your units should spread out and never flock together to prevent unnecessary casualties. Once you have your light vehicles as well as your PaK available your own Mortar is supposed to barrage the British Mortar to force it into "Brace!". As soon as your foe has activated "Brace!" your PaK should search an appropriate angle to open fire while your Mortar continues barraging and your light vehicles and infantry should support this advance. If you notice your push is not working properly or has been anticipated it is strongly recommended to fall back in order to not let your foe seize the opportunity to wipe out some of your units. You can try to knock out the Mortar Pit again with similar approaches at a more convenient moment. Destroying the Mortar Pit proved to be frustrating yet not impossible. Apparently, no golden path has been paved that could be followed in order to smash Mortar Pits reliably. No better way exists than trying again and again to destruct it by pushing with combined arms' assistance and seizing the momentum.
In case someone chooses to construct a 17lber, be aware that your tanks NEVER enter its range. IF they do they should come from multiple flanks which should be checked with Mine Sweepers before to demolish it WITH support of your remaining force. Other than that, you can counter it by simply fielding two mortar crews to barrage it constantly which can be assisted by PaKs in their task in case no British tanks show up. If the British player uses "Brace!" your armour should join the feast while your mortars keep on barraging and your PaKs cover your force or continue shooting as well. Be aware that 17lber Emplacements can use flares once they have reached veterancy level one revealing the area they have targeted.
However, one favourable fact about emplacements is that your mortar will gain veterancy quite swiftly since the probability of hitting the emplacement with mortar shells is nearly 100%. Veterancy level 3 Ostheer mortars will be granted more range thus being able to deal with static Brits comfortably.
Tier III:
Acquire Command Panzer IV which imparts defensive buffs to all units in an aura (radius: 45). Use the Command Panzer IV as a support unit to repel infantry pushes. If you push make sure that it secures your flanks and that your units stay in its aura.
Tactical Advice:
I.) Versus United States Forces:
usf
usf1.) Versus Major:
Most USF players' first Major vehicle is a Sherman. It will be either hard or easy to counter it depending on the map. Your main tool to destroy Shermans will be the PaK40 combined with Pumas. This combination excels quite effectively with fausting Grenadiers and Osttruppen. By engaging Shermans from long range with Pumas you assure your Puma is not going to be damaged or destroyed by Shermans. Furthermore you can hide Grenadiers or Osttruppen behind Line of Sight blockers to land a surprising Faust on a Sherman.
Jacksons tend to two-shot Pumas unless some RNG happens in your favour. Therefore do not face Jacksons generally unless they are on low health to finish them. Utilize smoke in emergency cases. Other than that, confront Jacksons with PaK40s. Avoid anti tank grenades from Rifleman since they sentence your Puma to death.
Pumas are able to take down 75mm Howitzer Motor Carriage M8 „Scott“ reliably since they cannot take much damage and fail to hit moving Pumas. PaK40s two-shot Scotts and can engage them from long range. Keep an eye on your infantry due to Scott's tendency to one-shot squads.
It is generally recommended to hunt an American tank with Puma if it was shot multiple times by PaK40. Jackson must be on low and Puma on full health though so that one further shot from Puma destroys Jackson.
II.) Versus Soviet Union
soviets
soviets1.) Versus Tier III:
If your foe rushes for Quad or T70 light tank you can again prepare with a Tellermine which usually onehits both or induces abandonment. The combination of Grenadiers, PaK40s and Pumas if you already reached 5 CP should earnestly constrict Quad as well as T70 activity. Every time when your foe attacks your infantry with those vehicles try to punish him with the help of mobile Puma which gains veterancy by harassing hostile armour. If you decide to push forward your PaK40 ensure you have a Grenadier squad next to it in case your foe flanks or rushes his tanks. Let anti tank units cover your Ostwind if you push and guard your Ostwind with at least one Grenadier squad for fausting as well as capping purposes. Be careful about SU76 since it was buffed quite well in the last patches. Try to engage it like SU85 (see below).
2.) Versus Tier IV:
In case your foe decides to go for Soviet Tier IV you should consider that Katyushas will join the battle. Katyushas are mobile rocket launchers which fire four volleys and prove to be deadly tools to counter mmassed infantry. Therefore you have to split up your forces a bit in order to prevent heavy casualties or squad wipes especially with your Osttruppen. Your weapon teams are also viable targets for Katyusha barrages which means to not let them clump up together. As soon as your foe places his Katyusha too offensively you have to capitalize on that by charging in or flanking his fragile Katyusha and destroy it.
It is recommandable to engage T34/76s from far range with a Puma since you can hit him but he will not be able to hit you. Keep in mind that a Puma is pretty fragile in direct combat. Use „Target Weak Piont“ ability of both PaK40s or Puma once they reach veterancy 1 to immobilize T34/76 and other hostile tanks.
SU85s see the battlefield rather rarely in 1v1s but can nevertheless appear. Engage SU85s with PaK40s and try to faust them if your enemy gives you the opportunity. Once SU85 is fausted and exposed to PaK40s its life should be over. Since its rotation speed is decreased you can send in Pumas in order to accelerate its death and gain veterancy. In case of danger for your armour use smoke to interrupt Line of Sight to your vehicle and escape. If your anti infantry tank might be in trouble and has already used its smoke your Puma should rush to it in order to use smoke to cover it so it can escape.
III.) Versus United Kingdom Forces:
British Tier III comprises tanks only ranging from cheap all-rounders to dedicated tank destroyers and damage sponges. By researching Tier III British players gain instantly access to Cromwells, Centaur Anti Aircraft Tanks and Sherman Fireflies. Apart from those three possible options British players will be able to construct 17lber Anti Tank Emplacements. Let us now focus on the three universally accessible tanks.
Cromwells are are capable of executing deadly flanks due to their great speed. They can crush infantry effectively and punish overextension by brutally chasing down retreating squads and weapon teams. This lethal attribute will be enhanced through gaining more veterancy levels. They will never fail to penetrate your Puma if the shot connects. Therefore you have to maneuver your Puma as well as your infantry carefully never overextending or pushing too aggressively. If it pushes into your forces, try to lower its health a little so a faust will leave a damage engine critical. Then finish it off with your available anti tank force from a safe range. Puma should not dive but rather keep attacking from a range wider than Cromwell ones; the same applies to PaK of course. If you have luck your foe will rush into a Teller Mine sentencing his Cromwell to certain destruction. In case you have to deal with more than one Cromwell you should consider purchasing a second PaK which should not be sent together with your first PaK since one successful push would wipe out both. Take Fausts to heart to deprive Cromwells of their paramount strength.
Sherman Fireflies have the role of a dedicated tank destroyer and fulfill their task with ease. Once Fireflies used to have a low rate of fire but strong Tulip Rockets. Nowadays they have a decent rate of fire but weak Tulip Rockets which are now able to benumb your tanks in case they hit them though. Fireflies can engage armoured targets from far range, and thus are a danger your armor. They enter the game rarely alone having at least one Cromwell to accompany since they proved to be quite fragile when flanked from hostile tanks. Engaging them with PaKs and Panzerschrecks is most reasonable since they are not able to counter infantry. If you do so, you should keep an eye out for Cromwells or infantry support which will most probably try to hinder your plan. Confront Cromwells with your Puma or Panther while pushing away Firefly. Cope with hostile infantry with your Grenadiers and MG42 as well as Panzer IV Command Tank. If your foe pushes with his armour, dodge Tulip Rockets and use smoke in emergency cases.
Tier IV
After you have gathered one Puma and Command Panzer IV, skip Tier III entirely. Tech to Tier IV to acquire a Panther as soon as possible. This tank helps you to counter any Allied armour that may approach but can also draw damage from possible heavy tanks and can be a bulwark against infantry.
A second PaK40 in order to deal with heavy tanks or massed medium tanks is optional. Build it earlier if you feel your foe is going to focus on armour predominantly.
Tactical Advice:
I.) Versus United States Forces:
usf
usfYour Panther should be Pershing's main antagonist and damage sinking sponge. Be careful about Pershing's special armor piercing rounds which are available at veterancy level one. Your Pak and Puma should use Target Weak Point against the Pershing followed by firing off a Faust to cripple its engine in order to finish it off. You will probably float munitions when playing with this doctrine, so invest in as many tellers as possible. A triggered teller means a dead pershing
II.) Versus Soviet Union
soviets
sovietsIf you face KV8 Flame Thrower Tanks be sure you do not overextend your infantry. Otherwise you grant KV8s the chance to chase down your infantry along a long retreat path. Target Weak Point or Fausts are great tools to slow down a KV8s advance. If you advance with infantry back them up with Puma and PaK40. Immediate reaction is required if your foe pushes aggressively with KV8 and his army whilst using Incendiary Barrage ability which usually causes Ostheer defensive lines to collapse. Other than that, peer into your flanks in the Fog of War to hear the sound of KV8 roaming.
Confront an IS-2 heavy tank with two PaK40s and Puma from far range. Only close in with your Puma if IS-2 has low health and not guarded well but even then consider that RNG could let your shots deflect on IS-2 which makes it risky because IS-2 twoshoots Pumas. Osttruppen serve as cannon fodder – like they present themselves – and meat shield. Also they can try to faust the IS-2. Again Target Weak Point will be a deadly threat to IS-2. Immobilizing it gives you the chance to finish it swiftly and without danger. Make sure your infantry – especially Grenadiers – do not stand close to each other because it can result in an one-shot. Tellermines can help to pin down IS-2 in order to destroy it from a safe distance.
An ISU-152 heavy assault gun forces you to adapt your Build Order: Instead of anti infantry tanks you have to produce Panzer IVs because PaK40s and Pumas aren't enough to counter ISU-152 effectively. These allow you to harass your foe's flanks and change positions swiftly. Force your foe to split up his concentration on various flanks so that your PaK40s can advance and engage ISU-152. Hide your infantry otherwise they can be potentially one-shoted. Use Target Weak Point from both of your PaK40s and Puma if you can. Cover your PaK40s as well as Puma and provide them sight to ISU-152 and charge in with your Panzer IVs from the flanks. If you manage to achieve this case ISU-152 will turn into a burning wreck. Be careful about IL-2 Bombing Runs since they annihilate any infantry they hit. They are also lethal to armour. Other than that, you can utilize a trick to beat ISU-152: Some patches ago ISU-152 is only able to use either anti tank or anti infantry munition. So when you advance with armour and he has anti infantry munition loaded he must reload and vice versa if you come with infantry or PaK40s. Most players choose anti infantry rounds because they hope to one-shot infantry and have ZiS guns to cover ISU-152 versus armoured threats. Therefore you need Panzer IVs since they are a threat to be reckoned with and need the attention of ZiS guns and Conscripts unless your foe wants to risk his ISU-152 being flanked by Panzer IVs. This will be the moment when you have to advance with your PaK40s and Pumas to use the momentum.
III.) Versus United Kingdom Forces:
1.) Versus Hammer
Hammer Tactics warrant British players to build the "Comet Tank", as well as access to a couple of novelties for their forces. The Comet Tank is a pricy, enhanced version of the Cromwell Tank thus having one dangerous characteristic in common: high celerity and acceleration. On top of that typical acceleration which increases with veterancy levels, Comet Tanks will be able to use "Emergency War Speed" once Royal Engineers have repaired them. Comets can call upon the services of "M89 White Phosphorous Shells" thus being capable of draining your infantry's life points swiftly which proves to be effective versus PaK crews in particular. Other than that, Comets are effective against both infantry and armour, and can even 1v1 panthers. Their armour tends to deflect shots of even PaKs or Panthers.
Destructing them is a challenge of endurance. Target Weak Point ability of PaKs and Pumas as well as Fausts or lucky Tellers will give you the opportunity you need.
Apart from Comets Hammer Tactics allow British tanks in general to track targets they hit via "Vehicle Tracking". This competence reveals your armour hitten by British armour on your opponent's minimap for a short duration of time. Be aware that if your armour was hitten, retreated into the fog of war and returns shortly thereafter your opponent will know you want to him.
Hammer Tactics bestow "Gammon Bombs" upon Infantry Sections which work similarly to Satchels, but can also stun vehicles.
Furthermore, Royal Engineers who repair any British armour for 5 seconds will grant this piece of armour Emergency War Speed. It is used like its German counterpart Blitzkrieg. However, this ability expires after one usage and the vehicle must be repaired again to regain it.
2.) Versus Anvil
Anvil Tactics focus on a more defensive and tanky army. Like its Hammer counterpart, Anvil grants your British foe three novelties and one additional tank. In this case British players will gain access to "Churchill Tanks" which have huge HP pools and almost impenetrable armour, but are slow. Due to those properties, Churchills will let your AT weaponry reach veterancy levels faster. Use Target Weak Point in combination with Faust and inflict as much damage as you can. Be careful about grenades that can be thrown by Churchills. "Infantry Support Smoke" enables secure passage for the rest of the British army but can also save the Churchill from killing blows. Use attack ground to minimize effects of this ability. Furthermore, Churchill's main gun has decent penetration and damage being capable of dealing with most of your army. Your Panther should attack as well as tank the Churchill for maximal veterancy gain and benefit of all of your forces.
One of the novelties which Anvil Tactics included is called "Heavy Engineer". Royal Engineers upgraded with it will receive an increase in terms of armour a Vickers K machine gun (similar to Bren Light machine gun) and faster repair rates at the cost of much of their speed.Those Engineers can be countered by MG42 HMGs and Rifle Grenades, and/or by getting a mortar or a sniper. They will suffer greatly under those weapons since they cannot dodge due to their slow movement.
In case one squad of Infantry Section has upgraded "Pyrotechnics Supplies" which allow them to use "Coordinated Fire" from their base howitzers Anvil Tactics will enrich this barrage with "Airburst Shells". A mixture of HE and Airburst Shells will be fired from the British base from now on. Airburst Shells have higher AOE, less penetration and can stun vehicles. Evacuate the targeted area and return once the barrage has cancelled.
Last but not least, Anvil Tactics facilitate increased vision radius for capture points hold by the United Kingdom. Be aware that you decap points before you amass flank potential there so that your opponent cannot estimate its intensity.
From now on, you have to adapt in diligent consideration of possible upcoming hostile threads.
Summary of the Build Order
Let us summarize the Build Order:


 ____
____ ____
____
 ____
____

Maps
I.) Appropriate Maps:
Crossing in the Woods
Langreskaya
Angoville
Arnhem Checkpoint
Crossroads
II.) So-so Maps:
Faymonville Approach
Road to Kharkov
Kholodny Ferma Summer
Kholodny Ferma Winter
Lost Glider
IV.) Vetoed Maps:
La Gleize
Semoiskiy Summer
Semoiskiy Winter
Minsk Pocket
Crossing in the Woods
Langreskaya
Angoville
Arnhem Checkpoint
Crossroads
II.) So-so Maps:
Faymonville Approach
Road to Kharkov
Kholodny Ferma Summer
Kholodny Ferma Winter
Lost Glider
IV.) Vetoed Maps:
La Gleize
Semoiskiy Summer
Semoiskiy Winter
Minsk Pocket
Bulletins
In order to benefit from the beginning on from Bulletins it is recommended to use Bulletins which strengthen your basic units. Grenadier strengthening Bulletins seem to be the best choice since your army will consist mostly of them. Other than that, you can use the Bulletin which grants your Panther to achieve veterancy 10% faster.
Example Game
(Notification: I built 4 Grenadiers instead of 3 here and no Osttruppen.)
Closing Words
Having gained knowledge about this strategy you are prepared to defend the Fatherland appropriately! Others may have chosen the monstrous and tardy Tiger or the fragile and hasty Luftwaffe but you have not. You have chosen to execute the finest strategy of the Wehrmacht and you will succeed. Now join the battlefield, show these weaklings of Allies they cannot fool our army and make the Fatherland proud, Kommandant!
Gezeichnet:
General der Streitkräfte des Westwalls, Theodosios
Gezeichnet:
General der Streitkräfte des Westwalls, Theodosios
 Theodosios
  TM.Dutchy
  Sarantini
  van Voort
  FichtenMoped