

Infantry Company
DISCLAIMERS
This guide is written from the perspective of any game mode, and is viable strategy in all modes.
Stats, consideration and commentary are all based upon the March 31, 2015 Edition of Company of Heroes 2.
GOOD AFTERNOON SOLDIERS!!!!!!

This commander, should you have the patriotism and guts to command, is arguably the most Down-n-Dirty, Brute force, blow'em-and-shoot-em'-to-bits commander the United States Forces has to offer. There ain't no Finnesse in this Company SON!!! This aint no Airborne Company!! And this sure as hell ain't no RECON Company! This is INFANTRY COMPANY BABY! And we pwn face! Hooah!
This commander has the highest amount of Indirect fire and Artillery of any of the United States Forces commanders, and the commander that offers one of the most powerful small arms upgrades in the game - which of course you can hand out to any squad you have under your command - the M1919 LMG.
But first, we'll formally introduce the units this commander has to offer:
Commander Abilities
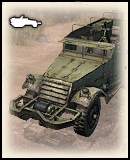
2CP M21 Mortar Halftrack
|


This self-propelled Mortar halftrack is the American equivalent of the Ostheer Mortar Halftrack. It has access to your typical normal barrage found on all mortars, and something similar to the already unique Pack Howitzer - white phosphorus smoke rounds. Except, as a perk, these rounds do not require Veterancy. This halftrack has access to Delayed fuse mortar rounds at Veterancy level 1.
The White Phosphorus Smoke rounds will prevent vehicles from using their weapons if they are inside the smoke cloud, and will whittle enemy infantry's health down to just 1 HP, making it trivially easy to kill them. It also still functions as covering smoke.
| !The delayed fuse rounds are unlocked at veterancy level 1. These rounds do TWICE THE DAMAGE of the normal shells, but have a 2+ second timer before exploding, and are innaccurate, so refrain from using them against roving targets. |
2CP Rifleman Defensive Package
Passive

This is an interesting part of the doctrine that is often neglected - thanks to the United States Forces' mobile nature. Rifleman gain the ability to plant general purpose mines - much like soviet engineers. They can also build sandbags - Just like Volkgrenadiers or Conscripts, and they can construct Fighting Positions. (Note they do not magically turn into Rear echelons with this ability, so they cannot fire grenades out of positions they construct. However the positions can be upgraded to use the 50 Cal machine gun, and they can take cover in these positions,as they function as green cover.)
Parts of this ability are a bit out of place in this doctrine; as I stated before the United States Forces stress mobility, so being cooped up behind sandbags and camping isn't always the best idea. Riflemen also cannot fire rifle grenades out of Fighting Positions like Rear Echelons can. However you can use your Riflemen to push to a forward position and then plop down a quick fighting position/sandbag green cover when your Rear Echelon troops aren't nearby.
The Mines are cheap at 30 munitions and should be planted by your riflemen whenever possible.
| !Placing anymore than one mine in a spot will increase the damage you inflict to vehicles. |
Mines can be good for flank protection, but you need to make sure you have the resources to equip M1919 LMGs later.
3CP M1919 LMG

70
The M1919 LMG turns your Riflemen (or Rear Echelons if you so choose) into mean green kraut mowin' machines.
This upgrade allows you to keep hordes of infantry at bay with the M1919 and its Defensive stance ability. This is the best LMG in the game next to the Obersoldaten MG34, However it is expensive at 70 munitions per gun.
This Weapon Rack upgrade is also unique in the fact that you do not have to unlock a Weapon Rack to use it. Just reach 3 command points, and the weapon racks will automatically open.
Mortar/Infantry support gun fire is dangerous to your riflemen when using this LMG.
| !Unfortunately defensive stance was nerfed out of existence; riflemen behind sandbags or green cover with an LMG are still very formidable. |
8CP Time on Target Artillery
180
Drops an off-map "Time on Target" artillery barrage on a position.
This artillery is slightly weaker than I&R Pathfinder Artillery and Mechanized Artillery. However it arrives much, much slower, and all the shells will hit at the same time; hence the name, time on target.
This ability's primary function is to heavily damage or finish off immobile OKW Headquarter buildings. It's inadvisable to use this artillery against anything else, as it is very expensive in munitions and you NEED munitions to equip your riflemen with LMGs.
| !DO NOT TRY TO HIT MOVING OR MOVABLE TARGETS WITH THIS BARRAGE! IT WILL BE A WASTE AND IT WILL MISS! |
9CP M7B1 Priest
|
The M7B1 Priest is the only Mobile Gun-Howitzer in the game, and is mounted on the M4 Sherman Chassis - giving it decent survivability compared to other artillery pieces.
It comes with two barrage abilities: a normal barrage; and a creeping barrage that strikes along a precision line - similar to the OKW Walking Stuka.
It has a .50cal on top for Self-Defense, but do not count on it to do much.
Use the Priest in conjunction with Time on target to form a TRUE TIME ON TARGET BARRAGE. Fire both barrage abilities at a stationary target of value like a Schwerer Panzer HQ, and watch it evaporate into a poof of dirt. No structure can survive a simultaneous Priest/Time on Target barrage.
Use this coordinated power to break defensive strongpoints with ease.
Remember to position as close as safely possible to your target when using the Priest Barrage, so that you can improve the accuracy of your barrage, and thus your damage per barrage.
Don't mistake a Priest for an ISU-152 Assault Gun. It is still an artillery piece,and it still dies easily despite being on a Tank Chassis.
| !Make sure to shift queue your Priest to reverse to a safe location after using the Barrage. |
Build Order
Early Game
Spread out initially, keeping your riflemen in roving pairs once you cap a decent amount of territory to maximize their firepower. Be careful not to BLOB. Keep the squads spread out, but close enough to where they can come to each others aid. Keep your spacing or you'll be pinned by one MG42 or Kubelwagen.
| ! You need medical support for your men, or your riflemen will start losing engagements they should win because they have lower health than their counterparts, so make sure you buy a WC51 Ambulance. |
Your enemy will likely build Light vehicles to counterplay your riflemen squads.
If you see this HQ building(the one without a Hospital symbol on it) from Oberkommando West then prepare yourself for light vehicles.
| ! If you see a Hospital headquarters(Battlegroup Headquarters), you're in good shape ,and the enemy is playing to your strategy. |
Expect these light vehicles from the Ostheer:
| ! You will need more firepower to destroy these light vehicles reliably. The M1 Garand is a good rifle, The Greatest battle implement ever devised! But it will not kill a Halftrack, and Anti-Tank Rifle grenades are usually not enough to finish off supported light vehicles. |
Mid Game
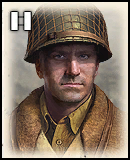
Pick an Officer
If you go Lieutenant....
This route is more aggressive and risky.
This route is more aggressive and risky.
You must plant A LOT of M20 M6 Anti Tank mines in the right places, especially on the retreat paths to your base. If you don't do this, or don't have the munitions to do this, you risk being overrun and decimated by a rushed Luchs, as nothing you have can stop it from rampaging directly if you choose Lieutenant and fail to apply enough pressure to your opponent.
Your enemy will likely build a 251/17 or Puma Scout Car to counter your M20. Do NOT engage a 251/17 with your M20 unless it is clearly overextended and you can get close enough with your M20 to kill it with its .50 Caliber.
If you get to facehugging range of a 251/17 Flak Halftrack, it cannot fire back without using attack ground. Use this to your advantage and circle strafe it.
If a Puma Scout Car engages your M20 retreat as far you can, and attempt to bait the Puma over an M6 Anti Tank mine. If you cannot bait it over an M6 mine, retreat as far as you can away from the enemy's support as you can possibly go, and pop out your crew and use your bazooka in desperate self defense. If you lose your M20 to a Puma, do not build another, and do not continue with another light vehicle from the Lieutenant tier. From here you should side tech to a Captain and hope for the best.
| ! If your opponent gets a 251/17 Flak Halftrack and does not overextend it, then you must counter-build an M15A1 AA Halftrack of your own as you do not have access to true anti tank options with this officer to destroy it. |
Luckily however,there does not have to be so much pressure with this alternate build.
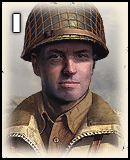
If you go Captain....
This route is much safer, and light vehicles of any kind are not an issue to you.
However you're forced to be less aggressive and mobile due to lack of light vehicles.
This route is much safer, and light vehicles of any kind are not an issue to you.
However you're forced to be less aggressive and mobile due to lack of light vehicles.
Remember to use supervise with your captain if you go this route, or your teching will be noticeably slower.
Simply Add an Anti tank gun for effective self-defense against all light vehicles.
| ! Do NOT allow your enemy to steal away your Anti Tank gun by you overextending it to finish off a badly damaged light vehicle, it is a nightmare to fight against your own Anti Tank gun. |
The front line is starting to materialize
At this point you should be also at Command point 2, and after researching an officer, you have another yet another choice to make.
If you went Captain...
Call in a M21 Mortar Halftrack when you have the Fuel and manpower to clear out defensive positions from a distance
 +
+ 
If you went Lieutenant...
Research the Grenade Upgrade and swarm the enemy's position with your riflemen, light vehicles, Lieutenant, and smoke grenades.
 +
+ 

After a minute or two of fighting, you should be at 3 Command points now as well. Equip all your riflemen with an M1919 LMG ASAP.
If you went Captain...
Call in a M21 Mortar Halftrack when you have the Fuel and manpower to clear out defensive positions from a distance
OR
If you went Lieutenant...
Research the Grenade Upgrade and swarm the enemy's position with your riflemen, light vehicles, Lieutenant, and smoke grenades.
After a minute or two of fighting, you should be at 3 Command points now as well. Equip all your riflemen with an M1919 LMG ASAP.
| ! If you have lost any squads replace them now. This infantry core will allow you to keep a larger enemy infantry force at bay, even if it includes upgraded Obersoldaten, if you use proper positioning and cover. |
Late Game
As the game progresses, Tech to a Major (speed this up with Supervise from your Captain if you chose him) and move your ambulance to the front lines so you can keep up forward pressure and containment.
Build the M7B1 Priest once you have at least 3 Major Tier Tanks of any combination simultaneously on the field of play.
This is very important. You always want to have an excessive amount of tanks to protect your priest, as losing it derails our entire strategy, and will ultimately lose you the game. You most likely won't be able to call the Priest in at 9 Command points safely, and that is OK.
Use the Priest, and Time on Target, in conjunction with your riflemen and AT guns, to push the enemy off the map and win in a decisive assault.
Also use the Captain's Supervise to replace tank losses quickly.
| ! Once you have near enough fuel for an M4A3 Sherman, retreat your Captain PERMANENTLY if you picked him, and have him supervise your base buildings for improved unit creation times. |
Build the M7B1 Priest once you have at least 3 Major Tier Tanks of any combination simultaneously on the field of play.
| ! If you lose one Tank, replace it before buying the Priest. If you lose one of your Shermans, replace with a Jackson. |
This is very important. You always want to have an excessive amount of tanks to protect your priest, as losing it derails our entire strategy, and will ultimately lose you the game. You most likely won't be able to call the Priest in at 9 Command points safely, and that is OK.
Use the Priest, and Time on Target, in conjunction with your riflemen and AT guns, to push the enemy off the map and win in a decisive assault.
| ! If the game continues after you make your assault, and you take heavy casualties, then you can replenish your infantry losses by buying Rear Echelon Troops with Supervise, and equipping them with M1919 LMGs as makeshift elite infantry. |
Also use the Captain's Supervise to replace tank losses quickly.
When to use this Commander
This commander is extremely potent against the Oberkommando West  okw. They do not have the infantry or amount of grenades available to answer your riflemen and will only be able to win infantry engagements by massing infantry or camping a section of the map, or investing in a Light Vehicle from the Mechanized Regiment Headquarters, which puts all the cards in your hands since you have plenty of Indirect fire to dislodge them, and plenty of Anti Tank options to deal with their light vehicles.
okw. They do not have the infantry or amount of grenades available to answer your riflemen and will only be able to win infantry engagements by massing infantry or camping a section of the map, or investing in a Light Vehicle from the Mechanized Regiment Headquarters, which puts all the cards in your hands since you have plenty of Indirect fire to dislodge them, and plenty of Anti Tank options to deal with their light vehicles. When to MAYBE NOT to use this commander
This commander is somewhat weaker against the Ostheer ostheer. The Ostheer has better access to grenades and indirect fire, which can flush your defensive stance riflemen cover from a distance and force you to retreat more often if your micro is not the best. Rifle grenades are a huge concern for your LMG riflemen, however, as long as you DODGE you should still be favored in your engagements against all Ostheer infantry as long as you have LMG's.
This commander is also weaker than commanders like Rifle Company and Armor Company on urban maps due to the main offensive strength of this doctrine, the LMG being a downgrade at close range, and flamethrowers being a much better choice.
ostheer. The Ostheer has better access to grenades and indirect fire, which can flush your defensive stance riflemen cover from a distance and force you to retreat more often if your micro is not the best. Rifle grenades are a huge concern for your LMG riflemen, however, as long as you DODGE you should still be favored in your engagements against all Ostheer infantry as long as you have LMG's.This commander is also weaker than commanders like Rifle Company and Armor Company on urban maps due to the main offensive strength of this doctrine, the LMG being a downgrade at close range, and flamethrowers being a much better choice.
Conclusion
Thanks for taking the time to read my guide!
I hope this guide has helped you master the Infantry Company Commander!
Now go out there and rule the battlefield!
I hope this guide has helped you master the Infantry Company Commander!
Now go out there and rule the battlefield!
 CookiezNcreem
  TM.Dutchy
  van Voort