
How to: Add Destruction to Your Custom Map


Alright then, folks. Having seen the popularity of mapping on the rise, I thought I'd put in my say and lend a hand. Out of all the maps that I've seen and played from the Workshop, and of all the creations that I've admired, I've rarely seen enough destruction (for my tastes at least). In my time with The Great War 1918 mod for COH1, the more mud, blood and fire, the better!
So, that’s the purpose of this little guide: a how-to guide to destruction for COH2. More specifically, this guide will teach you how to make burning forests. Expect more guides on how to add destruction to your custom maps in the future.
Now, to begin, this is not an extensive guide to creating maps from scratch, rather a list of steps to add destruction to an already created map. These steps can also be followed as you go along, but destruction, I find, is much better left until the end.
Today's Guide will result in:

Step I: Finding your location
War is chaos, and if the weapons of the 1930's-1940's were as accurate as they were today, things could have progressed very differently. With that in mind, imagine that the weapons which have bombarded your map before the players get to see it were extremely inaccurate. Whether bombs dropped from planes, or artillery shells fired at a general location, some were likely to miss.
So, for the purposes of this example, I'll be adding two stray shells that have landed just off course from their target. Firstly, we need to find a location that we want:
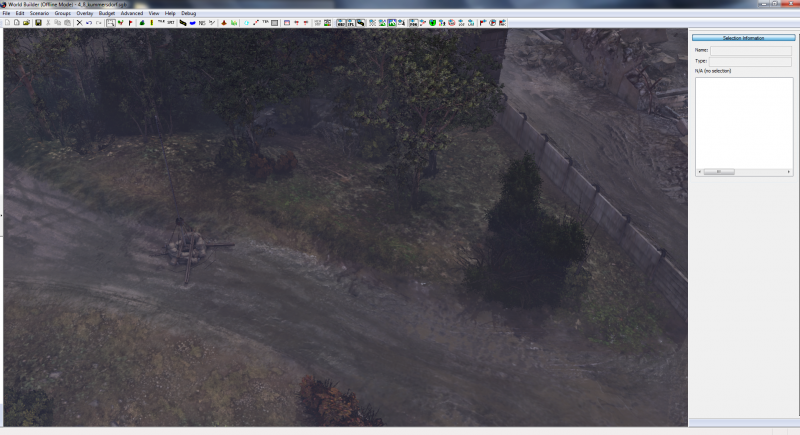
So, for the purposes of this example, I'll be adding two stray shells that have landed just off course from their target. Firstly, we need to find a location that we want:


Step II: Timber!
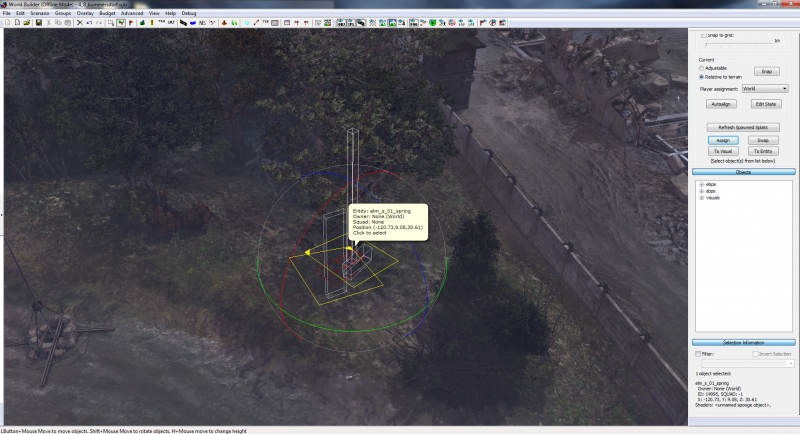
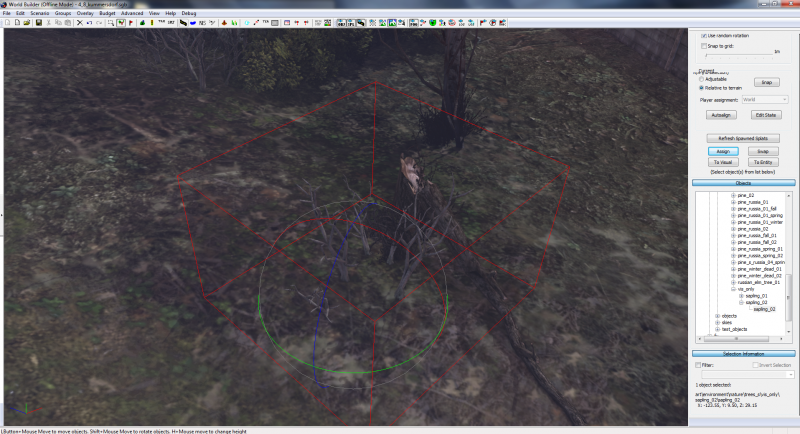
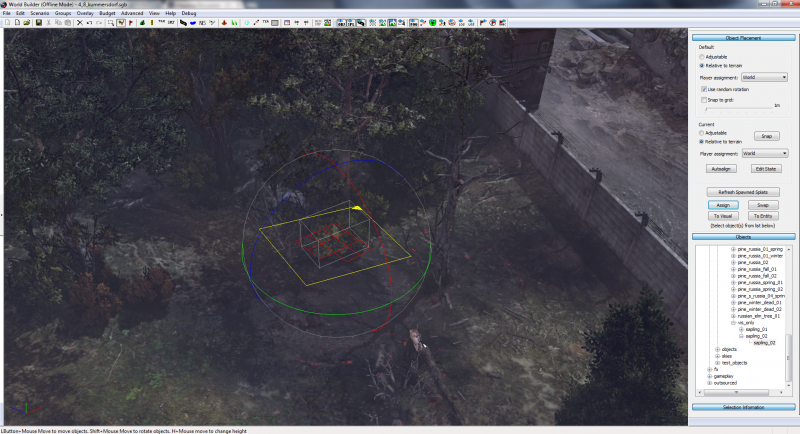
Here we have a healthy looking forest, right next to a muddy road and crumbling ruin. Time to blow it up. Grab one of the trees you want in Object Placement mode and find:
Press Assign, and viola, your tree is kissing the dirt. Rotate by holding Shift and dragging the mouse so that it faces away from the explosion, and then click any other objects in the area that would not survive the explosion, and delete them.
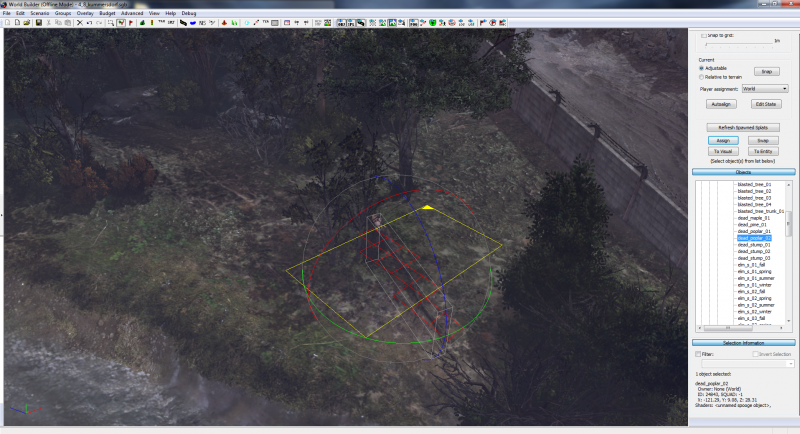
Here I've removed the bushes and scrub from the base of the tree, and instead added a sapling, which looks crisp and white from the fire. This little beauty adds a neat pinch of detail to burning forests, and can be found in Object Placement mode:
Now, explosions are pretty big, right? And unless a shell happens to hit a tree bang on, it's going to hit more than one. But instead of knocking over another tree, let's have one that has survived the explosion, but has burned up instead.

Remove the bushes as normal (if you even have any) and select the tree that you want. On the menu to the left you'll see “Edit State”, which will open a new window. On this, Add a Set Health box, and you’ll see a value of 1.0.
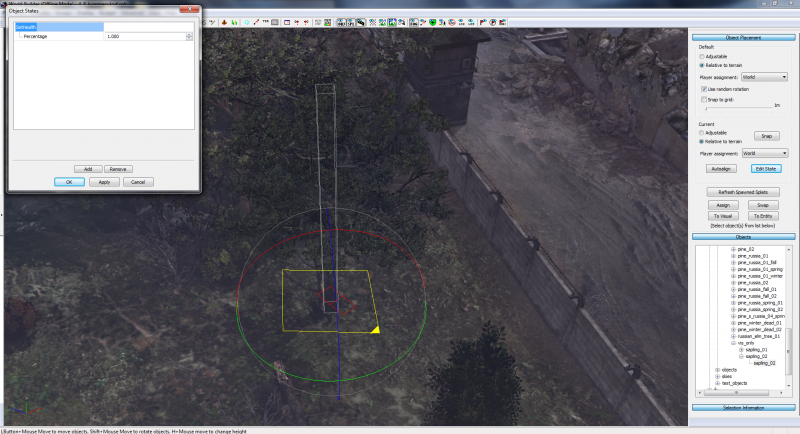
This number, 1.0, represents an object at full health. Now, there's no point in clicking the arrows to raise or lower the number, because it takes so long to get anywhere! Simply type in the number you want to get the desired effect: the lower, the more damage the object has taken, until at 0 it is destroyed. Certain objects will have different stages of destruction, trees included, but for the purposes of this, I have put it at 0.2.
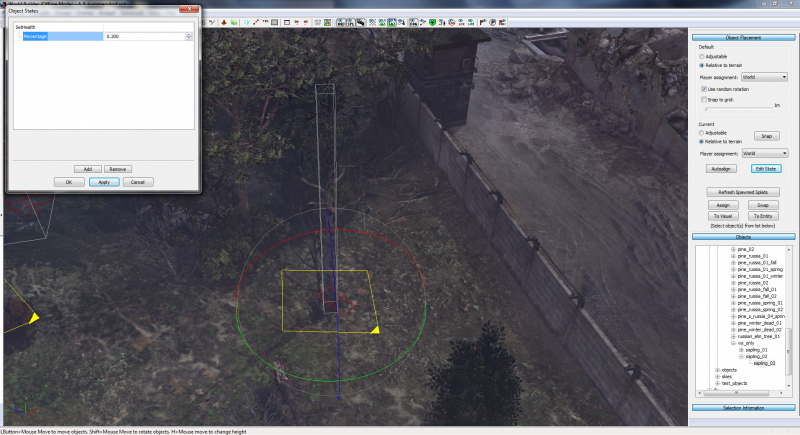
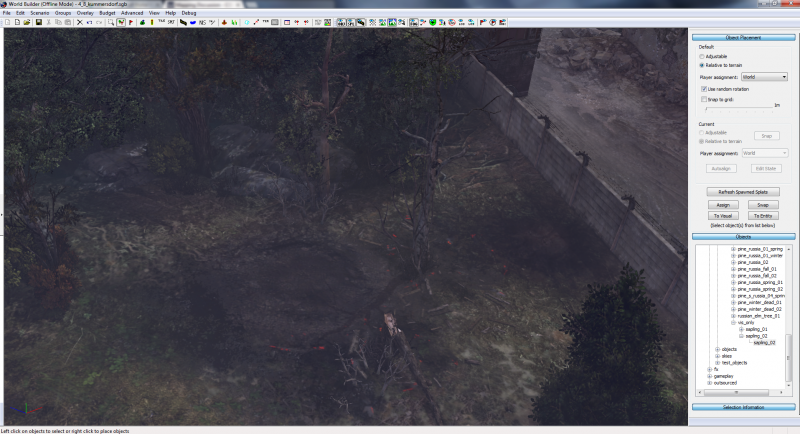
With the area cleared and the trees damaged, we have our blast zone.
Code
ebps/environment/art_nature/trees_s/dead_poplar_02

Press Assign, and viola, your tree is kissing the dirt. Rotate by holding Shift and dragging the mouse so that it faces away from the explosion, and then click any other objects in the area that would not survive the explosion, and delete them.

Here I've removed the bushes and scrub from the base of the tree, and instead added a sapling, which looks crisp and white from the fire. This little beauty adds a neat pinch of detail to burning forests, and can be found in Object Placement mode:
Code
visuals/environment/nature/trees_s/vis_only/sapling_02
Now, explosions are pretty big, right? And unless a shell happens to hit a tree bang on, it's going to hit more than one. But instead of knocking over another tree, let's have one that has survived the explosion, but has burned up instead.

Remove the bushes as normal (if you even have any) and select the tree that you want. On the menu to the left you'll see “Edit State”, which will open a new window. On this, Add a Set Health box, and you’ll see a value of 1.0.

This number, 1.0, represents an object at full health. Now, there's no point in clicking the arrows to raise or lower the number, because it takes so long to get anywhere! Simply type in the number you want to get the desired effect: the lower, the more damage the object has taken, until at 0 it is destroyed. Certain objects will have different stages of destruction, trees included, but for the purposes of this, I have put it at 0.2.

With the area cleared and the trees damaged, we have our blast zone.

Step III: Raze
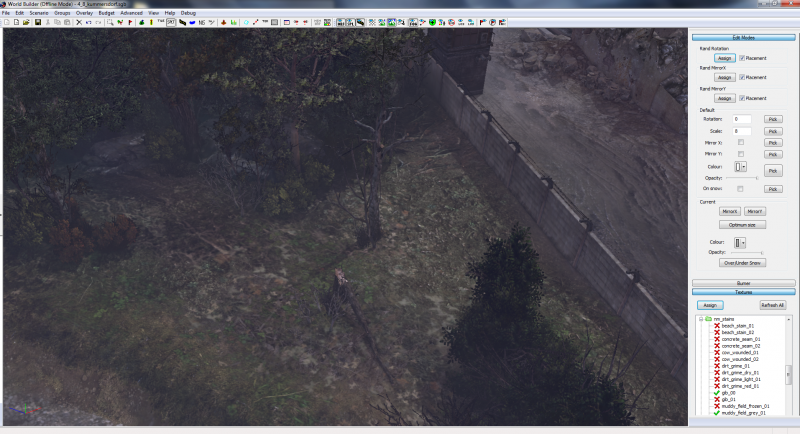
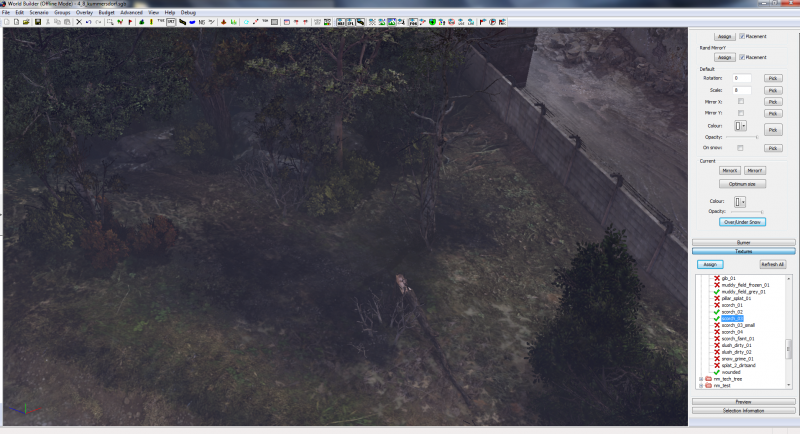
Jumping onto the SPLT generator, assign all of the random placement options by ticking the boxes on the top right, assign a size to around 8, keep the Opacity at full and have a look for some scorch marks. I would recommend:
Place two or three of these sporadically around the area, but not directly where you're going to have the crater. Also, keep in mind the wind direction on your map – fire travels fast, so try to have the scorch lead in a certain direction to show where the fire has been. In my example, the fire will be travelling from East to West. It is also worth noting that if your Splats appear to be too small, don’t hesitate to select them and clock the Optimum Size option (just don't go over the top!).
For some extra details, we’ll also add wood debris, both burned and burning. After all, we are blowing up trees. Still on the SPLT menu, find:
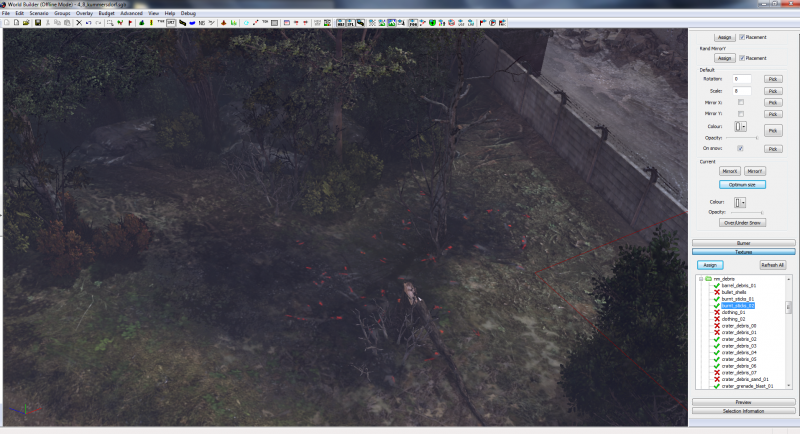
Scatter some of these around your trees in particular, and lower the Opacity if you think that they are too blatant. Then, on the same list, find:
Scatter a few of these too, changing the Colour to something darker if the wood appears to be too too light for the particular trees you're using.
Code
nm_stains/scorch_03
Place two or three of these sporadically around the area, but not directly where you're going to have the crater. Also, keep in mind the wind direction on your map – fire travels fast, so try to have the scorch lead in a certain direction to show where the fire has been. In my example, the fire will be travelling from East to West. It is also worth noting that if your Splats appear to be too small, don’t hesitate to select them and clock the Optimum Size option (just don't go over the top!).

For some extra details, we’ll also add wood debris, both burned and burning. After all, we are blowing up trees. Still on the SPLT menu, find:
Code
nm_debris/burnt_sticks_01 (or 02)

Scatter some of these around your trees in particular, and lower the Opacity if you think that they are too blatant. Then, on the same list, find:
Code
nm_debris/barrel_debris_01

Scatter a few of these too, changing the Colour to something darker if the wood appears to be too too light for the particular trees you're using.
Step IV: Craters
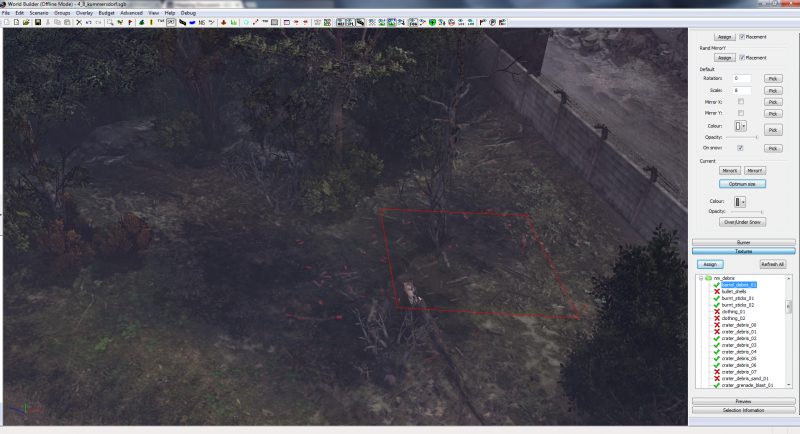
I would never recommend adding craters to a map until the very last stages of your Splat placement, usually because you always want them to be on the top. With that in mind, if you select the new “On Snow” button on the right-side menu, it will always appear on top.
Increasing the size of the Splats to 12 this time, check out:
crater_dirt/bia_crater_2 (or some others, if you fancy experimenting)
Place this near your trees, keeping in mind the size of the blast zone. You want it near your trees, but not directly touching them. If the crater has reached your trees, the chances are that there wouldn't be much left of them.
With that added, we have a few more steps regarding changing our environment, before we enter the final steps.
Increasing the size of the Splats to 12 this time, check out:
crater_dirt/bia_crater_2 (or some others, if you fancy experimenting)
Place this near your trees, keeping in mind the size of the blast zone. You want it near your trees, but not directly touching them. If the crater has reached your trees, the chances are that there wouldn't be much left of them.

With that added, we have a few more steps regarding changing our environment, before we enter the final steps.
Step V: Collateral Damage
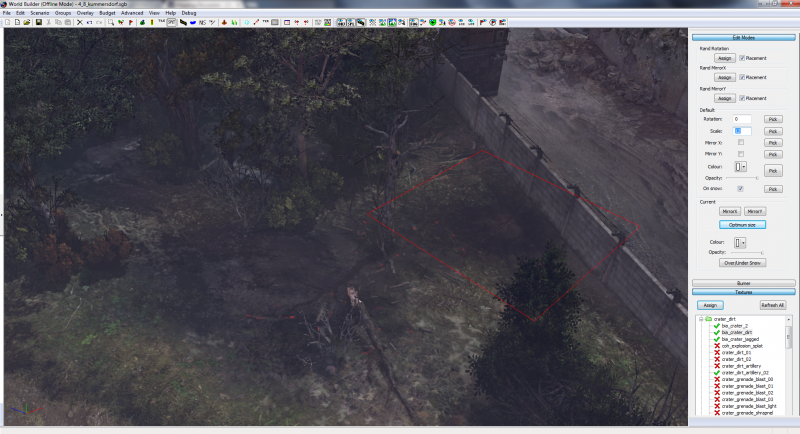
The crater we just added was a little bigger than expected, and it's encroaching on the trees at the back. But rather than reduce the size of the crater, I think I’d rather see the destruction take over.
As before, remove any of the greenery you may have near the area, and reduce the health of the tree to appear similar to the others we have destroyed. Add some more saplings, and boom…
… We have a little more destruction. Next up, we have to deal with this concrete wall, which is unrealistically standing in the face of our scorched earth. Step onto the Spline Menu, select Objects, and click your wall.
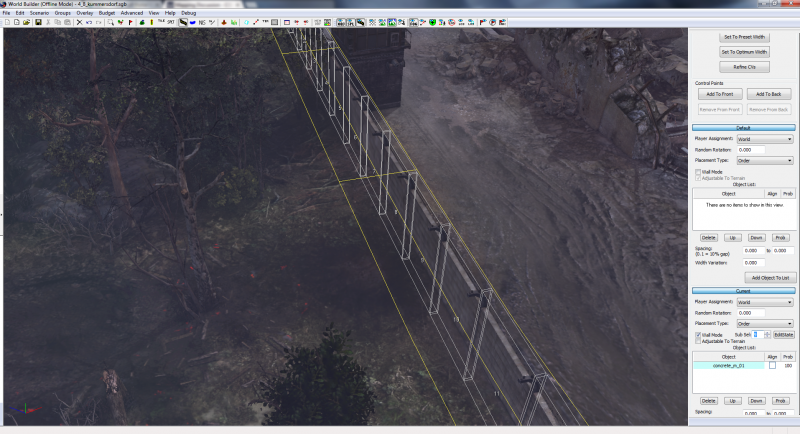
Under Current, find the Sub Sel entry, and type the number corresponding to the section of the wall you want to remove. Once you're on it, hit EditState.
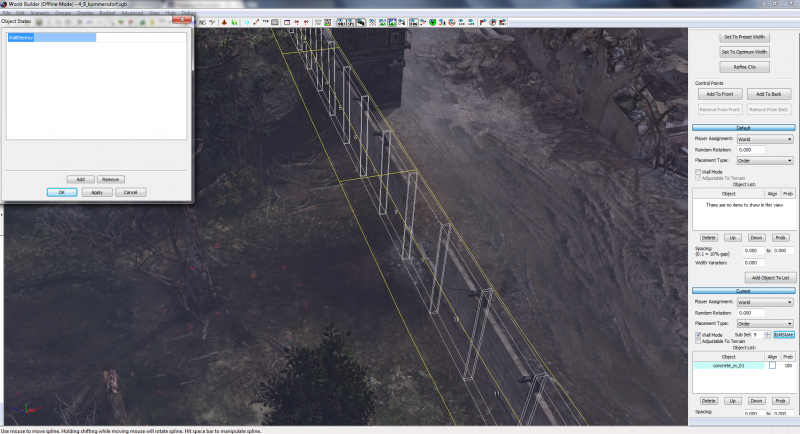
As with the trees, a window should pop up, and after pressing Add, a WallDestroy Option should be there, underneath SetHealth. Select WallDestroy, and immediately a hole should appear. Cycle through the same process with the other cells until the hole is big enough, and we'll be ready to move on.

As before, remove any of the greenery you may have near the area, and reduce the health of the tree to appear similar to the others we have destroyed. Add some more saplings, and boom…

… We have a little more destruction. Next up, we have to deal with this concrete wall, which is unrealistically standing in the face of our scorched earth. Step onto the Spline Menu, select Objects, and click your wall.

Under Current, find the Sub Sel entry, and type the number corresponding to the section of the wall you want to remove. Once you're on it, hit EditState.

As with the trees, a window should pop up, and after pressing Add, a WallDestroy Option should be there, underneath SetHealth. Select WallDestroy, and immediately a hole should appear. Cycle through the same process with the other cells until the hole is big enough, and we'll be ready to move on.
Step VI: Heightmapping
Now, I don’t know about you, but I’m sure that craters kick up some dirt. Having a flat crater is useless to us, and while it will work as cover in game, it will look silly. Jump onto the Heightmapping tool, make sure that Additive is selected for one button, and Subtractive for another, reduce your brush size to around 4, bump the feather up to 100, and lower the strength considerably, to around 14.
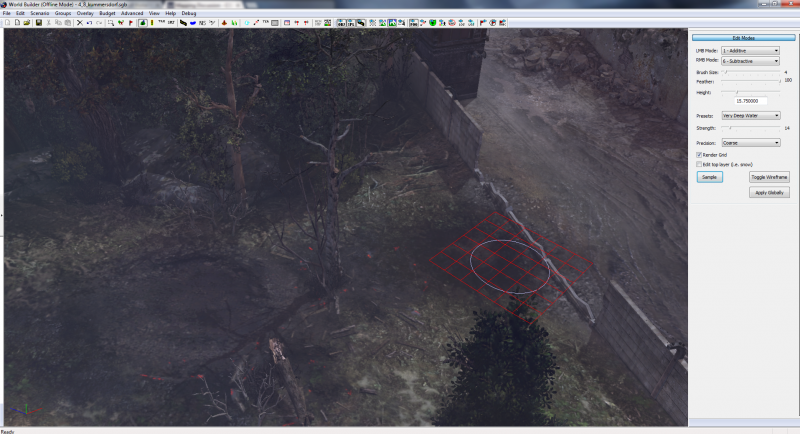
Now, mappers all seem to do their craters differently, but how I do mine is nice and simple. Holding down the Additive button, trace the outer rim of your craters, and click once in the centre with Subtractive.
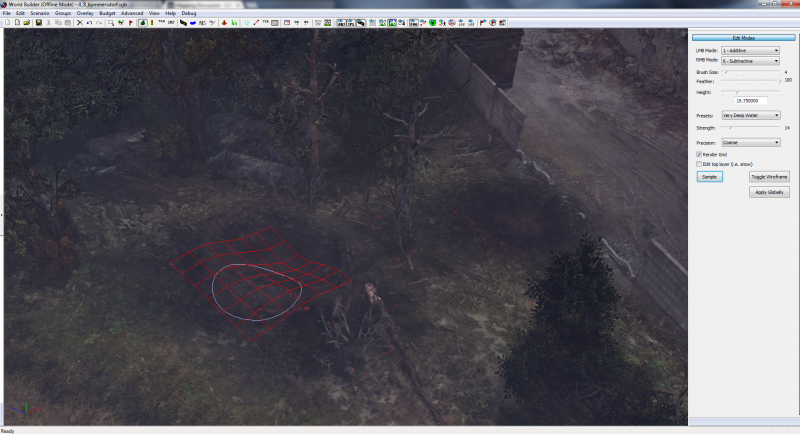
Now we have craters that should look and act like craters!

Now, mappers all seem to do their craters differently, but how I do mine is nice and simple. Holding down the Additive button, trace the outer rim of your craters, and click once in the centre with Subtractive.

Now we have craters that should look and act like craters!
Step VII: That Burning Desire
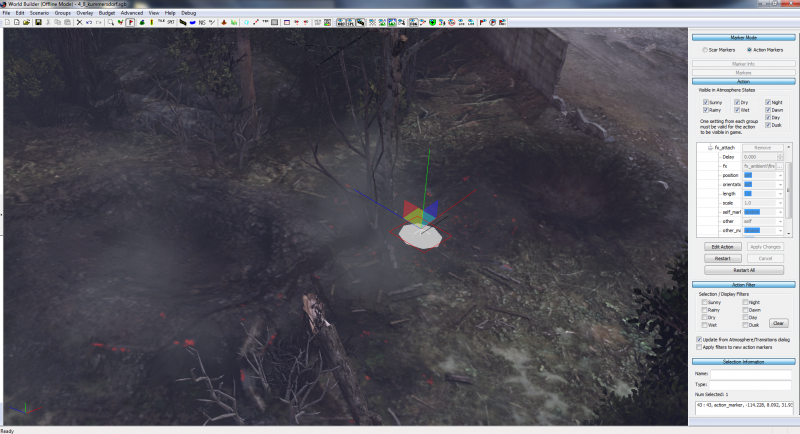
See the red flag on the hotbar? That’s our marker tool. Select that, and make sure that you click the Action Marker button, rather than Scar Marker. With this stage comes a lot of experimentation, but if I show you my method, hopefully you'll be able to brave your own styles.
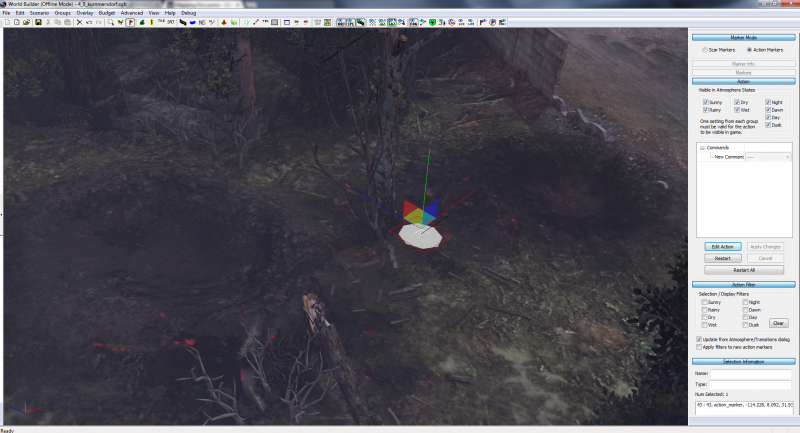
Next up, right-click somewhere you want the fire to be, and then click the cross that appears. With the coloured squares and bars that appear, you can move the height and position of your marker, but for now, just click and drag the green bar upwards slightly, as in the picture, so that it is off the floor.
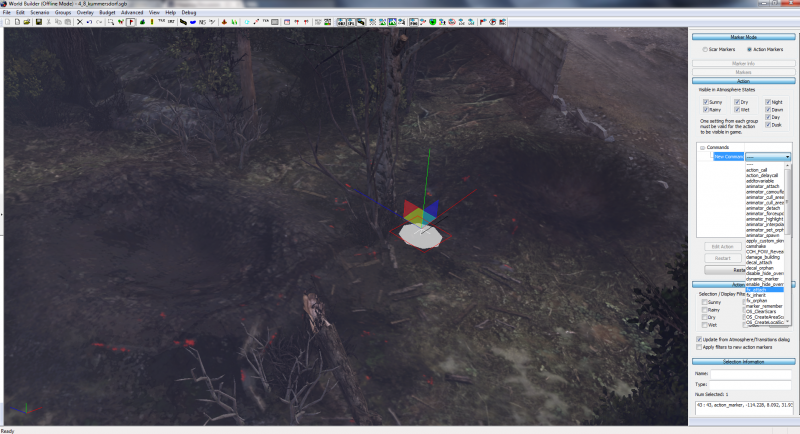
On the right-side menu, select Edit Action, and where a New Command appears, open the menu to find “fx_attach”. Click the “+” to expand the menu, and where is says “fx”, click the “…” next to it.
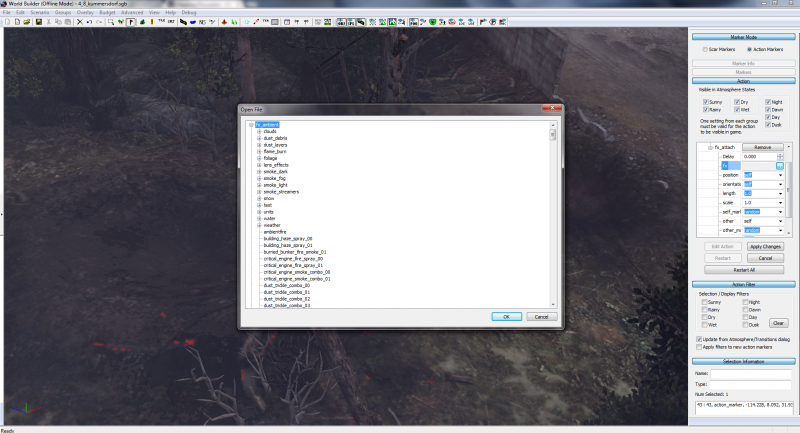
In the menu that appears, look straight for fx_ambient. These are our visual effects that will run throughout the course of any game you play on the map. Within this menu lies a treasure trove of possible effects that you can use.

Going down the main list, rather than entering any other folders, try to find the following fx:
Please ensure that you Accept your choice, rather than double-clicking on your selection, and once the window has closed, Apply Changes. Within a few moments, the fx should kick in, and you should see both smoke and embers. If you don’t see embers, then click and drag the green bar again, and raise it a little further off the ground.
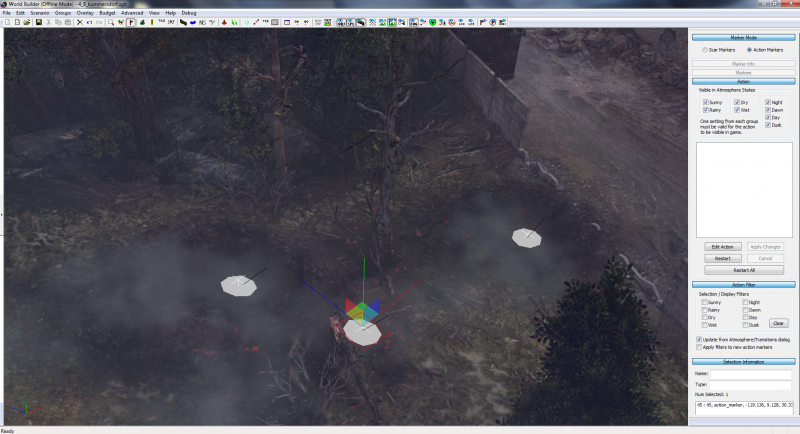
As with other objects, holding C and click-dragging will copy an fx marker, with the same attachment, so that you can cover a small area with the same effect, but each marker should be adjusted in height to ensure that you can still see the embers.
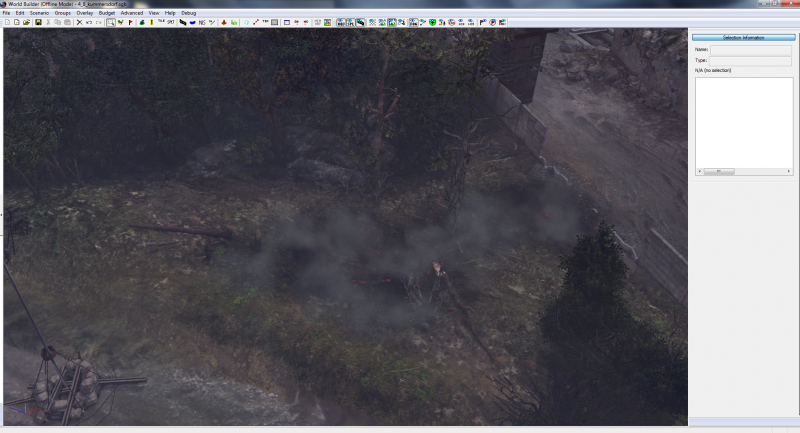
And there we have it, the first steps to a burning forest. You can easily exacerbate this effect with more craters, more fx (particularly with larger fires and lingering smoke) and more destruction!
If there is anything else that you would like more detail, or would like to give you opinion on, I would love to hear it! Just leave a note in the thread. More guides are coming.

Next up, right-click somewhere you want the fire to be, and then click the cross that appears. With the coloured squares and bars that appear, you can move the height and position of your marker, but for now, just click and drag the green bar upwards slightly, as in the picture, so that it is off the floor.

On the right-side menu, select Edit Action, and where a New Command appears, open the menu to find “fx_attach”. Click the “+” to expand the menu, and where is says “fx”, click the “…” next to it.

In the menu that appears, look straight for fx_ambient. These are our visual effects that will run throughout the course of any game you play on the map. Within this menu lies a treasure trove of possible effects that you can use.

Going down the main list, rather than entering any other folders, try to find the following fx:
Code
fire_ambient_coals_00_w_smoke

Please ensure that you Accept your choice, rather than double-clicking on your selection, and once the window has closed, Apply Changes. Within a few moments, the fx should kick in, and you should see both smoke and embers. If you don’t see embers, then click and drag the green bar again, and raise it a little further off the ground.

As with other objects, holding C and click-dragging will copy an fx marker, with the same attachment, so that you can cover a small area with the same effect, but each marker should be adjusted in height to ensure that you can still see the embers.

And there we have it, the first steps to a burning forest. You can easily exacerbate this effect with more craters, more fx (particularly with larger fires and lingering smoke) and more destruction!
If there is anything else that you would like more detail, or would like to give you opinion on, I would love to hear it! Just leave a note in the thread. More guides are coming.
 MonolithicBacon
  Janne252
  computerheat