
Introduction
Ostheer and OKW have a hard time of their early game in 2v2s. As a result, most players find themselves shoehorned into specific commanders to get the most out of their factions. The point of this guide is to allow players to try out new defensive strategies that are far less reliant on the boring metagame that we see in most matches. while not sacrificing their ability to be victorious vs. allied players.
The Commanders
Osttruppen Doctrine
Abilities:
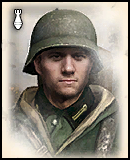
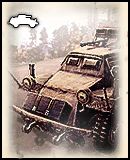
0 CP: Osttruppen
 200
200  5
5
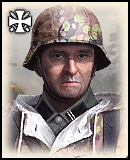
2 CP: Artillery Field Officer
240 9
2 CP: Trenches

3 CP: Redistribute Resources

Converts:
 50
50
Into:
 125
125
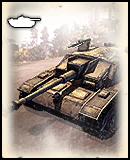
12 CP: Railway Artillery Barrage

200
200 5 A weak, yet quite cost effective squad that excels at supporting combined arms efforts from behind cover. These are your meat shields, use them to soak up damage so that your mgs and mortars can deal the bulk of the damage unmolested. These soldiers may be expendable, but they are the backbone of this 2v2 strategy. You can rely on Osttruppen!
2 CP: Artillery Field Officer
240 9 This Lieutenant-Colonel of Artillery will support all friendly infantry through the use of his abilities. He has the ability to boost the accuracy of all nearby friendly units (your allies' units included), the ability to call in a smoke barrage on a target area, and the ability to focus all artillery fire on a single position, regardless of cool-down (Does not include allied players' artillery).
2 CP: Trenches
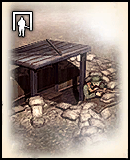
This ability allows your Grenadier and Osttruppen squads to build trenches. Trenches give Ostheer a free way to create building cover. Ostheer Trenches can garrison all infantry, MGs, and mortars.
3 CP: Redistribute Resources
Converts:
50 Into:
125 Redistribute Resources lets you get all of the munitions you need to solidify your position. You will have almost enough munitions to plant s-mines, teller mines, and bunkers to your hearts' content. It will also allow you to spam the fast cool-downing pzfaust on your Osttruppen, dealing heavy damage to infantry.
12 CP: Railway Artillery Barrage
200 This heavy artillery strike is the perfect choice to counter static units like immobilized tanks, static artillery, and defensive positions. This ability will allow you to force enemy units to flee from cap-zones, retreat from cover, and break up enemy assaults. It is an expensive, but versatile area denial option.
Fortifications Doctrine
Abilities:
1 CP: MG34
210 5
2 CP: Heavy Fortifications
3 CP: Field Defenses
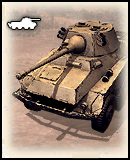
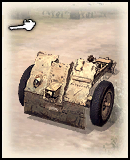
8 CP: Pak43
500 13
12 CP: Zeroing Artillery
300
1 CP: MG34
210 5 Despite being the weakest and cheapest mg in the game, the MG34 has the potential to give OKW a defensive backbone while their offensive infantry captures territory. While MG34s don't do enough damage to punish enemy advances by themselves, they are quite a formidable foe when supported by indirect fire and defensive infantry.
2 CP: Heavy Fortifications
This passive ability allows your Sturmpioneers to construct defensive trenches, tank traps, and flak emplacements (250mp, 10fu and 4popcap). You can make great use of this ability to funnel enemy armor into your defensive positions, and also to help shore up your rear lines. Typically, flak emplacements are not worth their cost, but they can be a viable unit to defend lower elevation area from a hill.
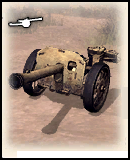
3 CP: Field Defenses
This ability allows your Volksgrenadier squads to build bunkers(150mp) and s-mine fields(60mu to start, 15mu per plot). While the bunkers ability only allows for the construction of MG42-bunkers, the s-mine ability allows Volksgrenadiers to quickly put down defenses after a successful push, before an enemy counterattack can be mustered. Especially useful in the late game when you can convert excess fuel to munitions.
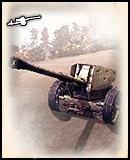
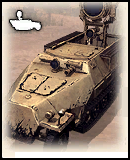
8 CP: Pak43
500 13 The Pak43 gives you access to one of the strongest AT weapons in the game. it can be countered at equal cost by an enemy with an IL2 bombing run or either of the USF offmaps, but at the end of the day, OKW floats far more manpower than USF/Sov can float munitions. Replace the initial crew with Osttruppen, and it can even survive an incendiary barrage by constantly reinforcing.
12 CP: Zeroing Artillery
300 This heavy artillery strike is the perfect choice to counter units like immobilized tanks, enemy assaults, and defensive positions. This ability will allow you to force enemy units to flee from capzones, retreat from cover, and break up enemy assaults. It is an expensive, but versatile area denial option, but not nearly as cost effective as railway artillery over smaller areas. Requires vision over the target area to be used to full effect.
The Build
Early Game
The early game portion of this build is focused on carving out a defensive position through the strength of your two armies. Rush squads to the desired location and dig in, relying on back-capping squads to secure your rear.
Ostheer:
Ostheer:
Build a squad of Osttruppen while your pioneers capture territory. Next build an MG42, then another Osttruppen and another MG42. Use the Osttruppen to rush for green cover/ houses at the area you want to defend.
You typically want to buid your T1 after you build your second MG42, but it is possible to wait longer if your ally is going to support you with a raketenwerfer.
Buy time with your Osttruppen's lives as you wait for the MG42s to arrive and consolidate your position. Buy a 3rd Osttruppen.
Try not to retreat, and spend the mp after your 3rd Osttruppen squad to build a command bunker if your ally decided to not go t1 battlegroup hq. Get a mortar to solidify your defensive line and punish static infantry play. Get an artillery field officer. His special ability can give your Osttruppen more accuracy, and his smoke barrage can help your ally assault positions.
Remember, if you or your ally loses teamweapons, recrew them with Osttruppen! Osttruppen only cost 16 mp to reinforce, and reinforce quickly, making them formidable weapons teams.
OKW:
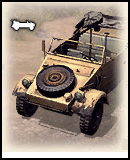
While your ally soaks damage and attempts to bring up his mgs, it is your job to cover his flank and give him an edge very early on. Build a Kubel, then 2 Volksgrenadiers, an additional Sturmpioneer, and another Volksgrenadier.
Use your kubel + starting Sturmpioneers to push away units attacking before your allies' mgs can get into position. If you see an m3a1, use the Osttruppen as a meatshield. Their panzer faults can save you.
You have a choice on going either T2 or T1.
T2 will allow you to bring up mechanized support units, which will be useful on the offense. The puma will be especially useful, as it will allow you to push enemy light vehicles without requiring a Raketenwerfer or 2, and will give good protection to your ally's halftrack. It will also allow you to actually hunt down and kill pesky light armor. Typically, T2 is the better choice.
T1 will allow your ally to reinforce at the front without spending resources on a bunker. The new irht will allow you to cheaply spy on enemy troop movements, and the cheaper leig will give you a longer range support weapon. Build in a defensive location that your ally can soft retreat to easily.
Remember, f you ever have Volksgrenadiers idling around, build green cover sandbags. They greatly increase the Osttruppen's survivability and damage, especially as they gain veterancy. They are also free.
Mid Game
By the time the mid game rolls around, you should have managed to secure a nice little area on the front lines to reinforce at, as well as made inroads towards the enemy's fuel point and towards a second VP.
Ostheer:

Ostheer:
Once you have a heavily defended position, start using your pioneers (you can even build a second one if you want) to lay wire all over the area. If you find yourself floating munitions, put down some s-mine fields. This will make it harder for enemies to flank and easier for you to spread out your forces, instead of staying clustered in one area.
Tech to T2 as soon as you can. Pgrens, Pak40s, and the HT are all important to this strategy. Pgrens will let you defend your flanks easily from enemy advances, while Paks will form the backbone of your AT. 2 Paks is a good number, but never get them until you need them. Remember that your ally can build raketenwerfers for early game AT.
Get a 251 HT, and upgrade it to a flamer half track as soon as you can (use resource transfer if you have to. Use the FHT to support your ally's pushes, allowing him to reinforce and to clear buildings.
Start spreading out towards a second VP. Your ally should be harassing enemies with his more offensive strategy, all you need to do is set up behind his assaults, and help push back counterattacks.
OKW:
-or-
Once your ally has entrenched himself, you can begin to push out. While your ally focuses on repelling enemy assault and making a defensive strong point, you should focus on attacking enemy cutoffs and resource points. Try to reduce the enemy income as much as possible, and defend captured areas with Volks-mines and MG34s.
Your puma will arrive at this time if you went T2.
Tech however you feel you need to. If you find that you are doing very well, or started T1, go T3. If you feel like you need more map presence after a T2 start, go T1. In terms of armor, the JP4, P4, and Panther are all viable choices. Remember that you will have a Pak43 to fall back to in the later game, so don't invest too heavily into AT.
You will have a large amount of freedom in your tech choices. React to what you are fighting on the battlefield. A set build path will only constrict you.
Versus Enemy Light Vehicles:

Ostheer:
Ostheer has a fairly hard time countering Soviet light vehicles this patch, especially the M5 AAHT. Your best bet is to have your Osttruppen soak the damage while you roll your Pak40 into position. Remember, the T70, M20, M5 AAHT, and M15 AAHT all die to only 2 Pak shots, so they will be forced to move at the mere threat of damage.
222s are also a choice if you want a more mobile form of light AT. Be careful, however, since most light vehicles can kill a single 222 quite easily. Typically, you will want your ally to counter the threats with his Puma.
OKW:
Your Puma will make short work of any enemy light armor you may end up fighting. Use its abilities to help it vet up. With vet and a little bit of micro, it can stand up to any medium.
Remember to support your ally with a Raketenwerfer if he is unable to tech to T2 fast enough. In a building, a Raketen is a formidable foe, and one not easily dislodged.
Mid-Late Game:
Will typically feel like a continuation of the mid game. Just be ready to fight heavier allied armor, as well as enemy artillery and indirect fire.
Ostheer:
Tech to T2 as soon as you can. Pgrens, Pak40s, and the HT are all important to this strategy. Pgrens will let you defend your flanks easily from enemy advances, while Paks will form the backbone of your AT. 2 Paks is a good number, but never get them until you need them. Remember that your ally can build raketenwerfers for early game AT.
Get a 251 HT, and upgrade it to a flamer half track as soon as you can (use resource transfer if you have to. Use the FHT to support your ally's pushes, allowing him to reinforce and to clear buildings.
Start spreading out towards a second VP. Your ally should be harassing enemies with his more offensive strategy, all you need to do is set up behind his assaults, and help push back counterattacks.
OKW:
-or-
Once your ally has entrenched himself, you can begin to push out. While your ally focuses on repelling enemy assault and making a defensive strong point, you should focus on attacking enemy cutoffs and resource points. Try to reduce the enemy income as much as possible, and defend captured areas with Volks-mines and MG34s.
Your puma will arrive at this time if you went T2.
Tech however you feel you need to. If you find that you are doing very well, or started T1, go T3. If you feel like you need more map presence after a T2 start, go T1. In terms of armor, the JP4, P4, and Panther are all viable choices. Remember that you will have a Pak43 to fall back to in the later game, so don't invest too heavily into AT.
You will have a large amount of freedom in your tech choices. React to what you are fighting on the battlefield. A set build path will only constrict you.
Versus Enemy Light Vehicles:
Remember that light vehicles will be coming, and as such it is prudent to be ready for them.
Ostheer:
Ostheer has a fairly hard time countering Soviet light vehicles this patch, especially the M5 AAHT. Your best bet is to have your Osttruppen soak the damage while you roll your Pak40 into position. Remember, the T70, M20, M5 AAHT, and M15 AAHT all die to only 2 Pak shots, so they will be forced to move at the mere threat of damage.
222s are also a choice if you want a more mobile form of light AT. Be careful, however, since most light vehicles can kill a single 222 quite easily. Typically, you will want your ally to counter the threats with his Puma.
OKW:
Your Puma will make short work of any enemy light armor you may end up fighting. Use its abilities to help it vet up. With vet and a little bit of micro, it can stand up to any medium.
Remember to support your ally with a Raketenwerfer if he is unable to tech to T2 fast enough. In a building, a Raketen is a formidable foe, and one not easily dislodged.
Mid-Late Game:
Will typically feel like a continuation of the mid game. Just be ready to fight heavier allied armor, as well as enemy artillery and indirect fire.
Ostheer:
By this point, your enemies will have stopped attacking your initial position, and focused more on attacking 2nd VP you and your ally secured. At this point, it is fine to rotate all of your forces towards the point of contention and focus there. Leave behind an MG and a squad of Osttruppen to protect from harassers, and lay a teller or two to punish enemy advances. Remember to protect your ally's Pak43 when it arrives.
If your enemy has started relying on mortars to do the job, use your own mortar to counter barrage. The Ostheer mortar is more than a match for a Soviet 82mm, and even a 120.
Rocket artillery may prove to be an annoyance. Remember to cycle your troops out of the fire zone, and reinforce them as you can. The more rockets your opponent fires at you, the less he is firing at your ally, and the less that will actually bleeding anyone.
Tech to T3 at your leisure, and secure your flanks with a pair of Stugs to respond to mobile threats.
OKW:
Your ally should have consolidated and made a fairly effective front for you to support when needed. If your enemy decides to assault your ally, support him. After they have retreated, push into enemy territory and let your ally take the indirect fire bleed. Cooperation is key, so that your ally can keep his flamer HT with your troops, giving you a way to clear buildings and to reinforce on the front.
Build a Shwerer Panzer Headquarters in a safe position behind the lines. Use it to support your defenses, but not as a frontline emplacement.
Build Obers. Obers will be your only elite infantry, so keep them alive and upgrade them immediately. They are very cost efficient when behind cover and not taking fire. get support armor out in the form of a Panther, P4, or a JP4.
Build a Pak43 at CP8 behind the front line, in a location that is easily defend-able and has a good firing arc towards key points. Remember to keep it by a reinforcement building, so that incendiary strikes and plain small arms fire doesn't wipe the crew.
If you find yourself fighting large amounts of indirect fire, use your Puma (if you have one) with sweepers to harass Katyushas and to sight for your ally's railway artillery.
It will be harder and harder for you to push into enemy territory. If you feel like you are bleeding too hard, it is perfectly all right to transition into more of a support role. Use your obers to hurt assaulting enemy units from behind the Osttruppen, and use your Volks to deter flanking armor. Use your Sturms to lay mines and obstacles everywhere you can. Remember to cycle your troops from the front when there is no combat. This will cut down on your "actual" infantry's bleed, and allow you to save up for bigger and better units.
Use your Sturmpioneers to help your ally dig in. Place wire, mines, and tank traps in various locations to constrict enemy armor paths, and make flanking your heavy armor impossible.
Late Game
In the late game, you should be on your way to victory. Your defensive line should be very hard for your opponent's to hit, and you should have a sizable resource and VP advantage.
Ostheer:

Ostheer:
Keep playing as you have been playing. If you find yourself floating fuel, consider teching up to T4. Panthers are great late game tanks, and Panzerwerfers synergize extremely well with the Artillery Field Officer.
OKW:
OKW:
Consider getting a King Tiger if you do not feel pressured to buy armor. The KT will be a very effective unit to defend VPs, and will be unstoppable when supported by Stugs, Paks, and potential Panthers.
By this point, you will have trouble pushing into enemy territory. Focus on supporting your ally, and rely on lone harassing squads.
By this point, you will have trouble pushing into enemy territory. Focus on supporting your ally, and rely on lone harassing squads.
Tips and Tricks
Maps
This strategy does not work on all maps. You typically want maps that have easily defended resource points, and narrow points of entry. urban Maps work as well if you can restrict enemy movement with wire. Here are the best 2v2 maps for this strategy:
- Rails and Metal
- Road to Kharkov
- Minsk Pocket
- Ettlebruck Station
Additional tips
- Make sure to build Volksgrenadier sandbags for your Ostheer comrade.
- Remember that Osttruppen only get their bonus when behind cover. This does not apply to building cover, so only put Osttruppen in buildings to deny them to the enemy and to increase their survivability.
- Teller mines will kill enemy M20s, M5s, M17s, and T70s in one hit. They are a very good investment, and can be easily spammed with Redistribute Resources.
- Osttruppen gain a large amount of accuracy with veterancy. This makes them great choices for picking up dropped light machine guns and at weapons.
- Build fuel caches whenever you can. They will help your okw ally scale much more quickly into heavy lategame tanks, whilst also increasing your own fuel + munition income thanks to Redistribute resources.
- MG42 incendiary rounds deal extra damage and penetration, all for a nominal munitions cost. Spam it whenever possible, as incendiary rounds will bleed enemy infantry heavily, and wreck any light vehicle in 2-3 bursts.
- The Artillery Field Officer's Victor Target ability allows Panzerwerfers to fire 16 rockets, as opposed to 10 on their regular barrage. The Victor Target ability also ignores cooldowns on the artillery pieces it relies on.
- The Puma's aimed shot can be used to snipe infantry models at 100% accuracy. Use this to snipe lone retreating squad members and to wipe high vet squads.
- Sturmpioneers can lay tank traps to further cut down enemy armor mobility.
- You typically want to hold at least 1 VP, 1 munitions point, and 1 fuel point in your opening rush. Figure out with your ally ahead of time where you want to set up.
- Trenches are free and provide building cover. This makes them suitable positions to put Raketenwerfers. They also make great mortar emplacements.
How to counter this strategy
USF:
As USF, your best bet will be to go Infantry Company. Infantry Company will give you access to indirect fire which will allow you to smoke enemy MGs and push back enemy positions without relying on large amounts of munitions.
As USF, your best bet will be to go Infantry Company. Infantry Company will give you access to indirect fire which will allow you to smoke enemy MGs and push back enemy positions without relying on large amounts of munitions.
Soviet:
The Soviets have many choices to counter this strategy. Fast SU76s will allow you to bombard enemy positions from afar, and without bleeding munitions. Mortars are useful to smoke enemy positions, but remember that you won't be bleeding them very hard with HE rounds. Fast teching to Katyusha is probably your best bet, as the Katyusha will be able to deal heavy damage to fortified positions.
Doctrinally, the ISU is probably your best choice. It can wipe squads and crush defenses, and comes with a Pak43 counter, but comes very late.
 comm_ash
  pigsoup
  MajorBloodnok
  FichtenMoped