
WorldBuilder TotW #8: Rock Formations
And welcome back ladies and gents, to the WorldBuilder tip of the week. This week, we over at COH2.ORG are continuing to provide you with small hints and tips to use in WorldBuilder, helping to improve and ease your mapping experience!
In this week's TotW, we're looking at something new to COH2, and WB2.0. Something that I could have only wished for back in vCOH: Rock formations!
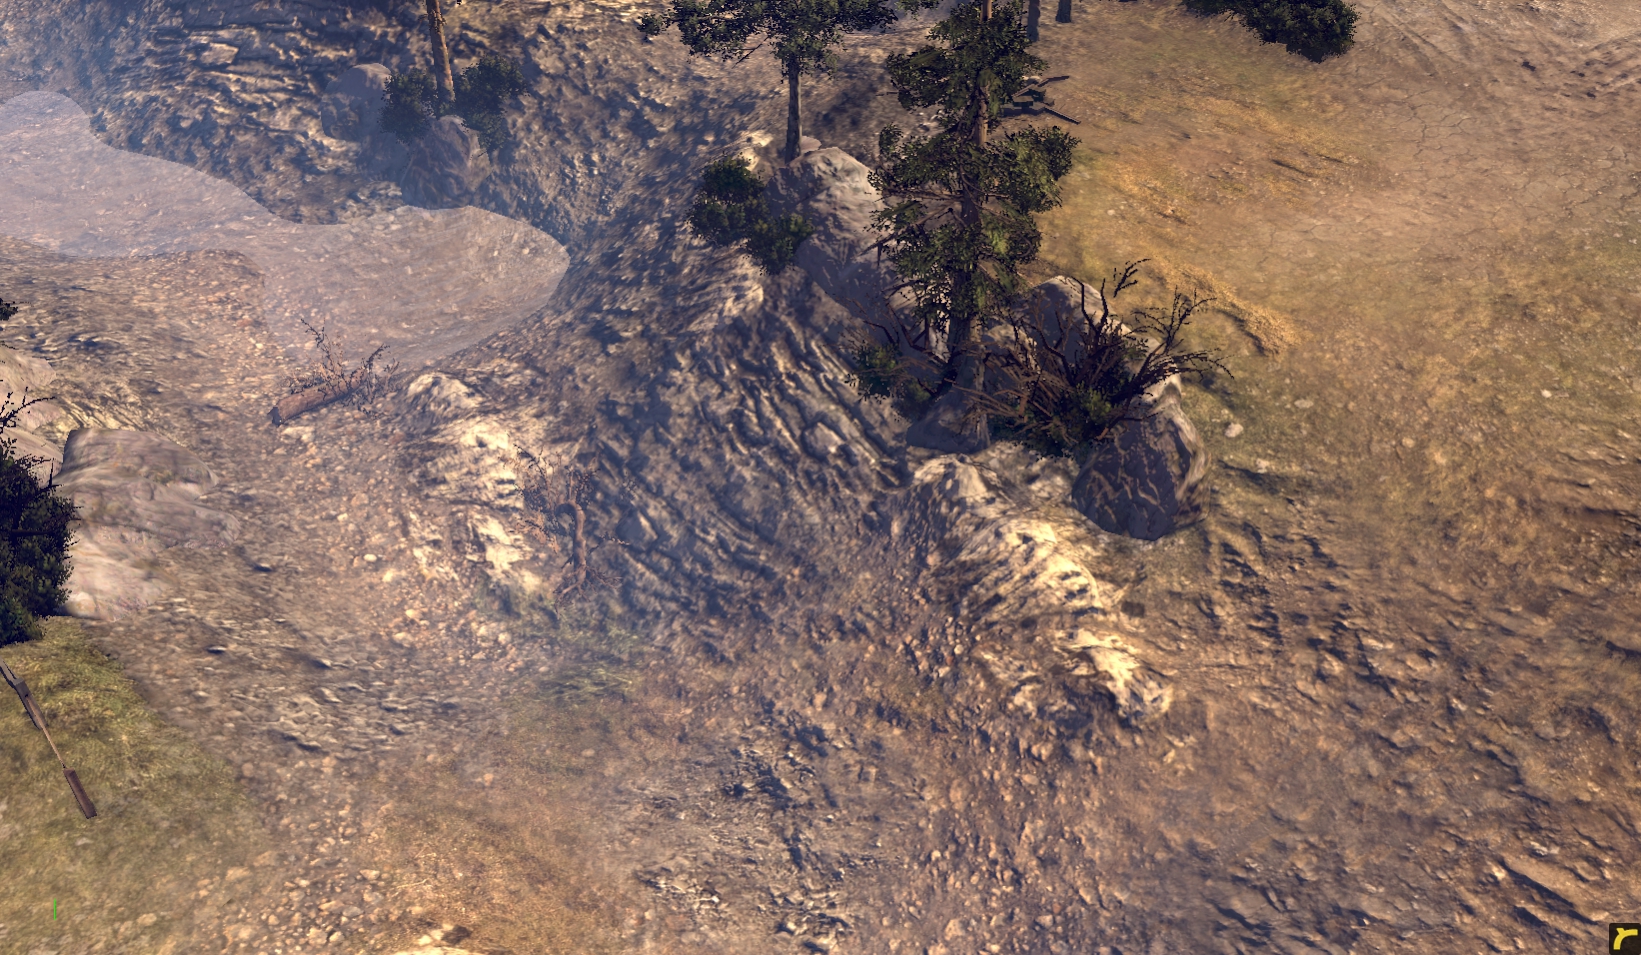
So, here we have something both very subtle and very ingenious to work with, because these rocks, while fleshed out and 3D, are actually nothing more than SPLATS, well shaded, designed and utterly versatile.
To get started, open up the SPLAT menu and turn on Rand Rotation, Rand Mirror X, and Rand Mirror Y, which will place all SPLATS in a completely random form (and since rocks are far from perfect, this is what you'll want!).

Look for the Stone_Natural folder in SPLATS, make sure the Opacity is maxed out...
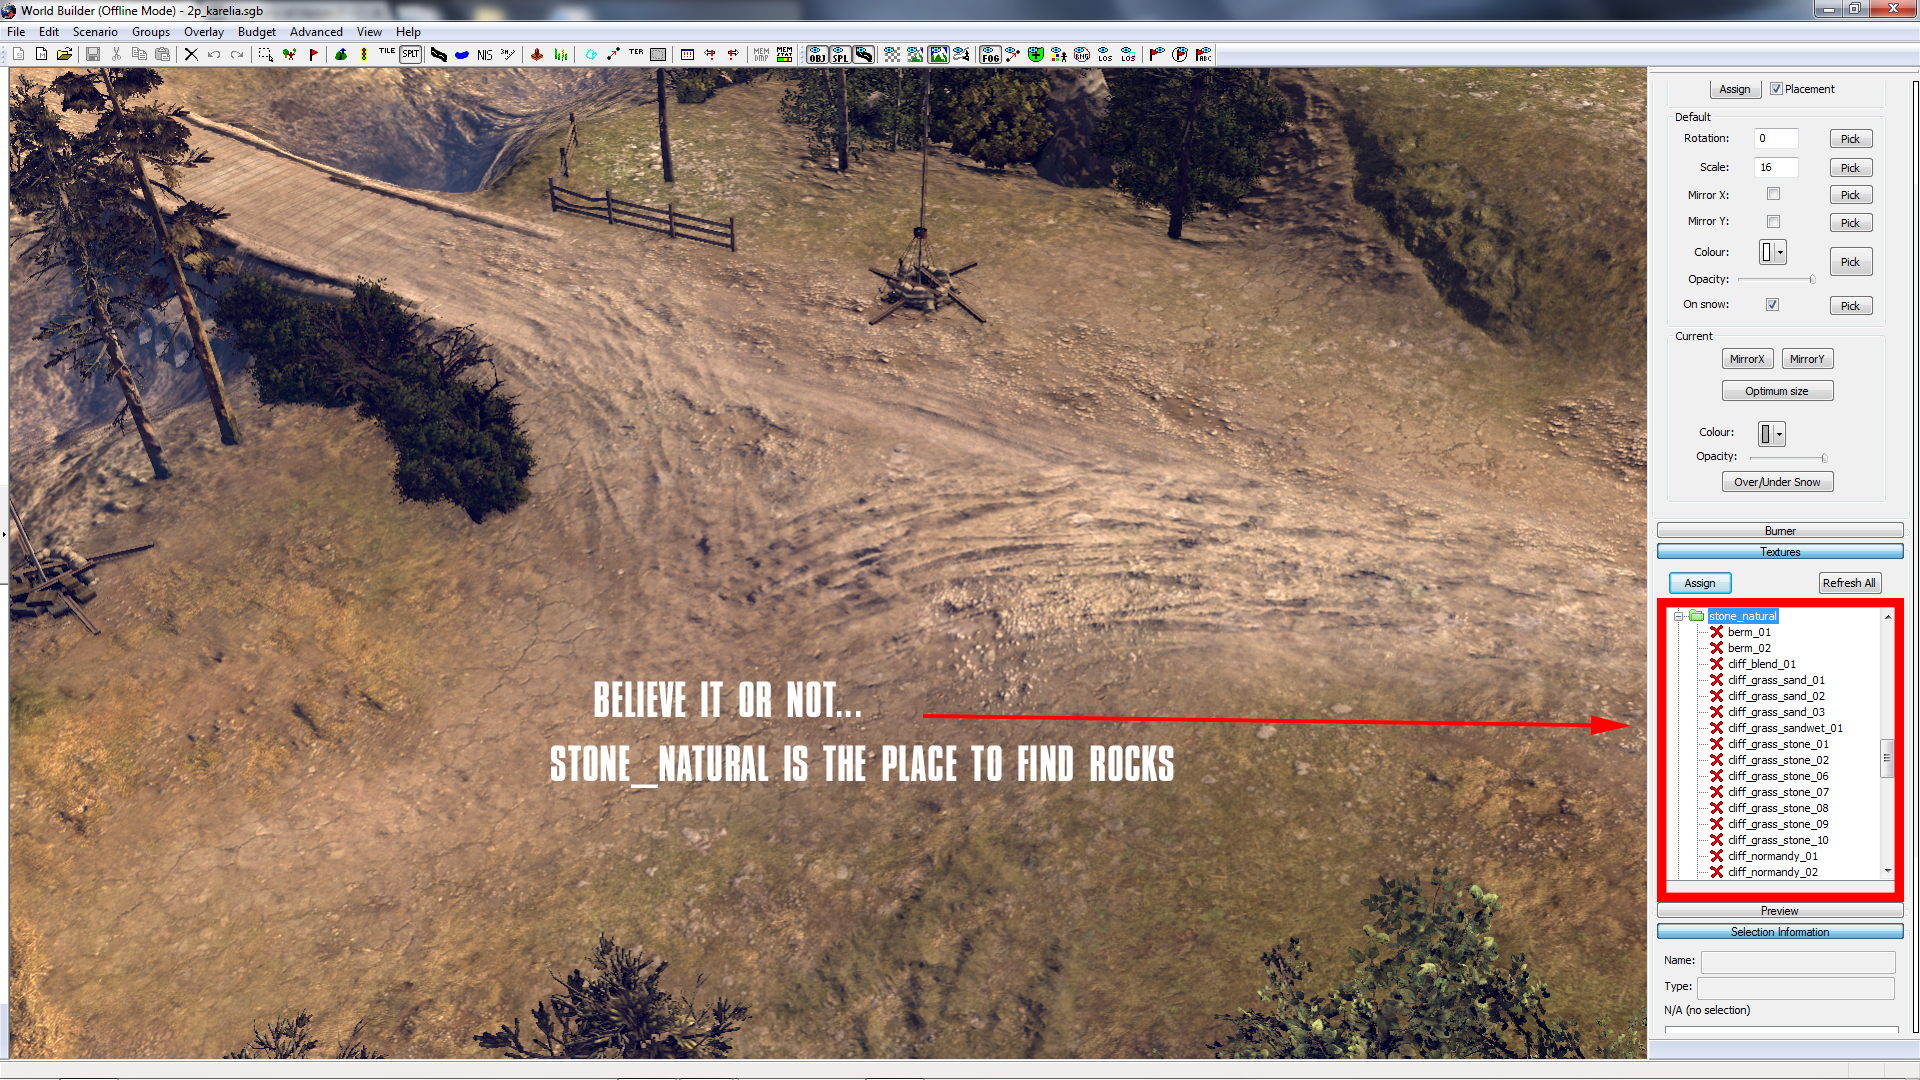
... and select "rock_formation".

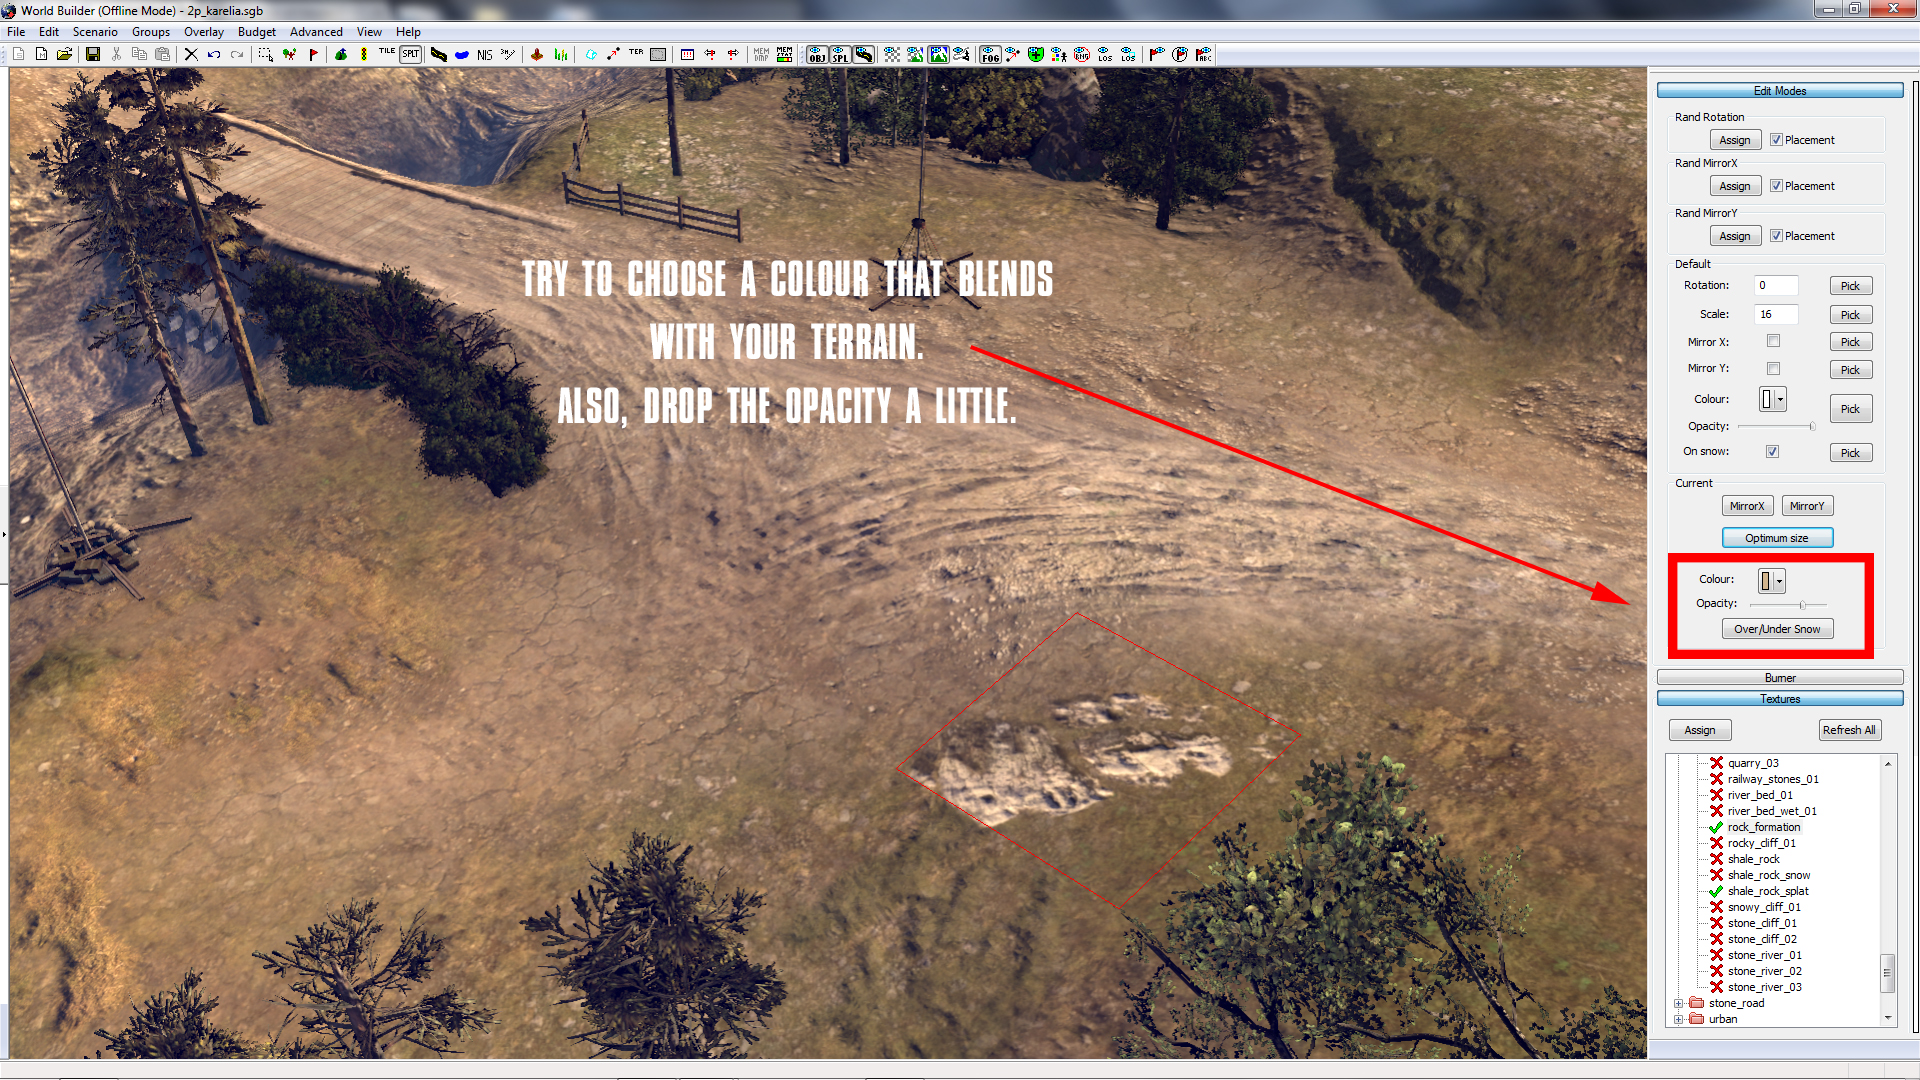
Once your Rock is placed, we have to adapt it. The strength of using SPLAT rocks instead of Objects is that they offer several new effects: SPLATS offer no cover, and can be traversed by vehicles and infantry, as well as the fact that their colour can be changed to suit your map.
With this in mind, try to change the Opacity and Colour of your SPLAT to suit a Tile in your map.
Before we blend the Rock Formation properly, we should add a little more. Rarely will you encounter one rock in the middle of nowhere, so by holding C and Click/Dragging, you can duplicate the SPLAT and then place it nearby your first one. A little rotation and mirroring, and you'll never be able to tell that they're the same SPLAT.

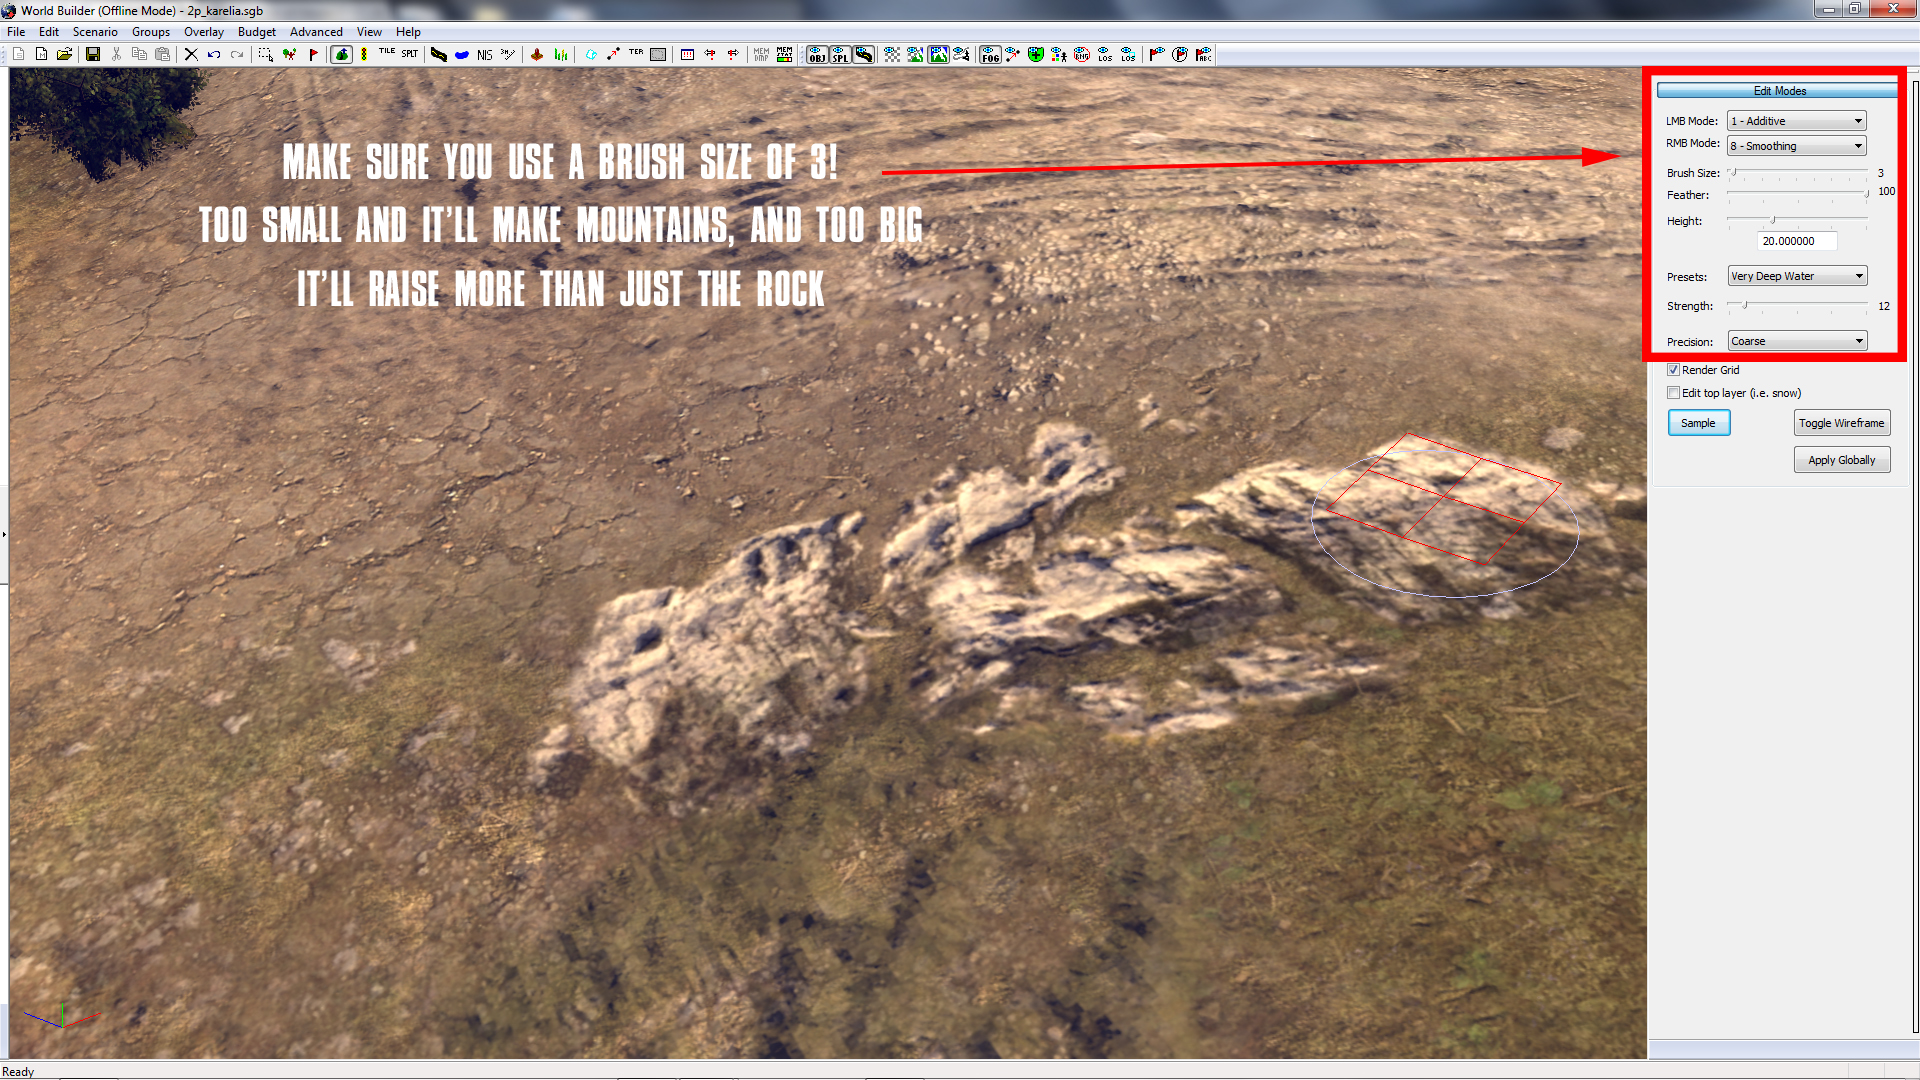
Now the most important step: A 2D texture can never be 3D without a little heightmapping. Setting your Brush Size to around 3, the Feather to 100, and Strength no more than 15, zoom in and raise the SPLAT and its surrounding area.
Once you have raised the SPLAT (remember that the more random the heightmapping the better), it's time to blend it in properly. So long as the SPLAT's Opacity is lower than 100, you will be able to see the Tile texture underneath it, making it easier to blend each rock into the scenery.
With a small brush, use Rubble or Stone Tiles to paint underneath the SPLAT until it appears suitably blended.
Et Viola!
Copy this effect anywhere on a rural map, changing the colour, size or opacity all you like to diversify!
We hope this tip was helpful and you check back next week, when we will provide you with a new Worldbuilder TotW.
In this week's TotW, we're looking at something new to COH2, and WB2.0. Something that I could have only wished for back in vCOH: Rock formations!
Figure 1
So, here we have something both very subtle and very ingenious to work with, because these rocks, while fleshed out and 3D, are actually nothing more than SPLATS, well shaded, designed and utterly versatile.
To get started, open up the SPLAT menu and turn on Rand Rotation, Rand Mirror X, and Rand Mirror Y, which will place all SPLATS in a completely random form (and since rocks are far from perfect, this is what you'll want!).
Figure 2
Look for the Stone_Natural folder in SPLATS, make sure the Opacity is maxed out...
Figure 3
... and select "rock_formation".
Figure 4
Once your Rock is placed, we have to adapt it. The strength of using SPLAT rocks instead of Objects is that they offer several new effects: SPLATS offer no cover, and can be traversed by vehicles and infantry, as well as the fact that their colour can be changed to suit your map.
With this in mind, try to change the Opacity and Colour of your SPLAT to suit a Tile in your map.
Figure 5
Before we blend the Rock Formation properly, we should add a little more. Rarely will you encounter one rock in the middle of nowhere, so by holding C and Click/Dragging, you can duplicate the SPLAT and then place it nearby your first one. A little rotation and mirroring, and you'll never be able to tell that they're the same SPLAT.
Figure 6
Now the most important step: A 2D texture can never be 3D without a little heightmapping. Setting your Brush Size to around 3, the Feather to 100, and Strength no more than 15, zoom in and raise the SPLAT and its surrounding area.
Figure 7
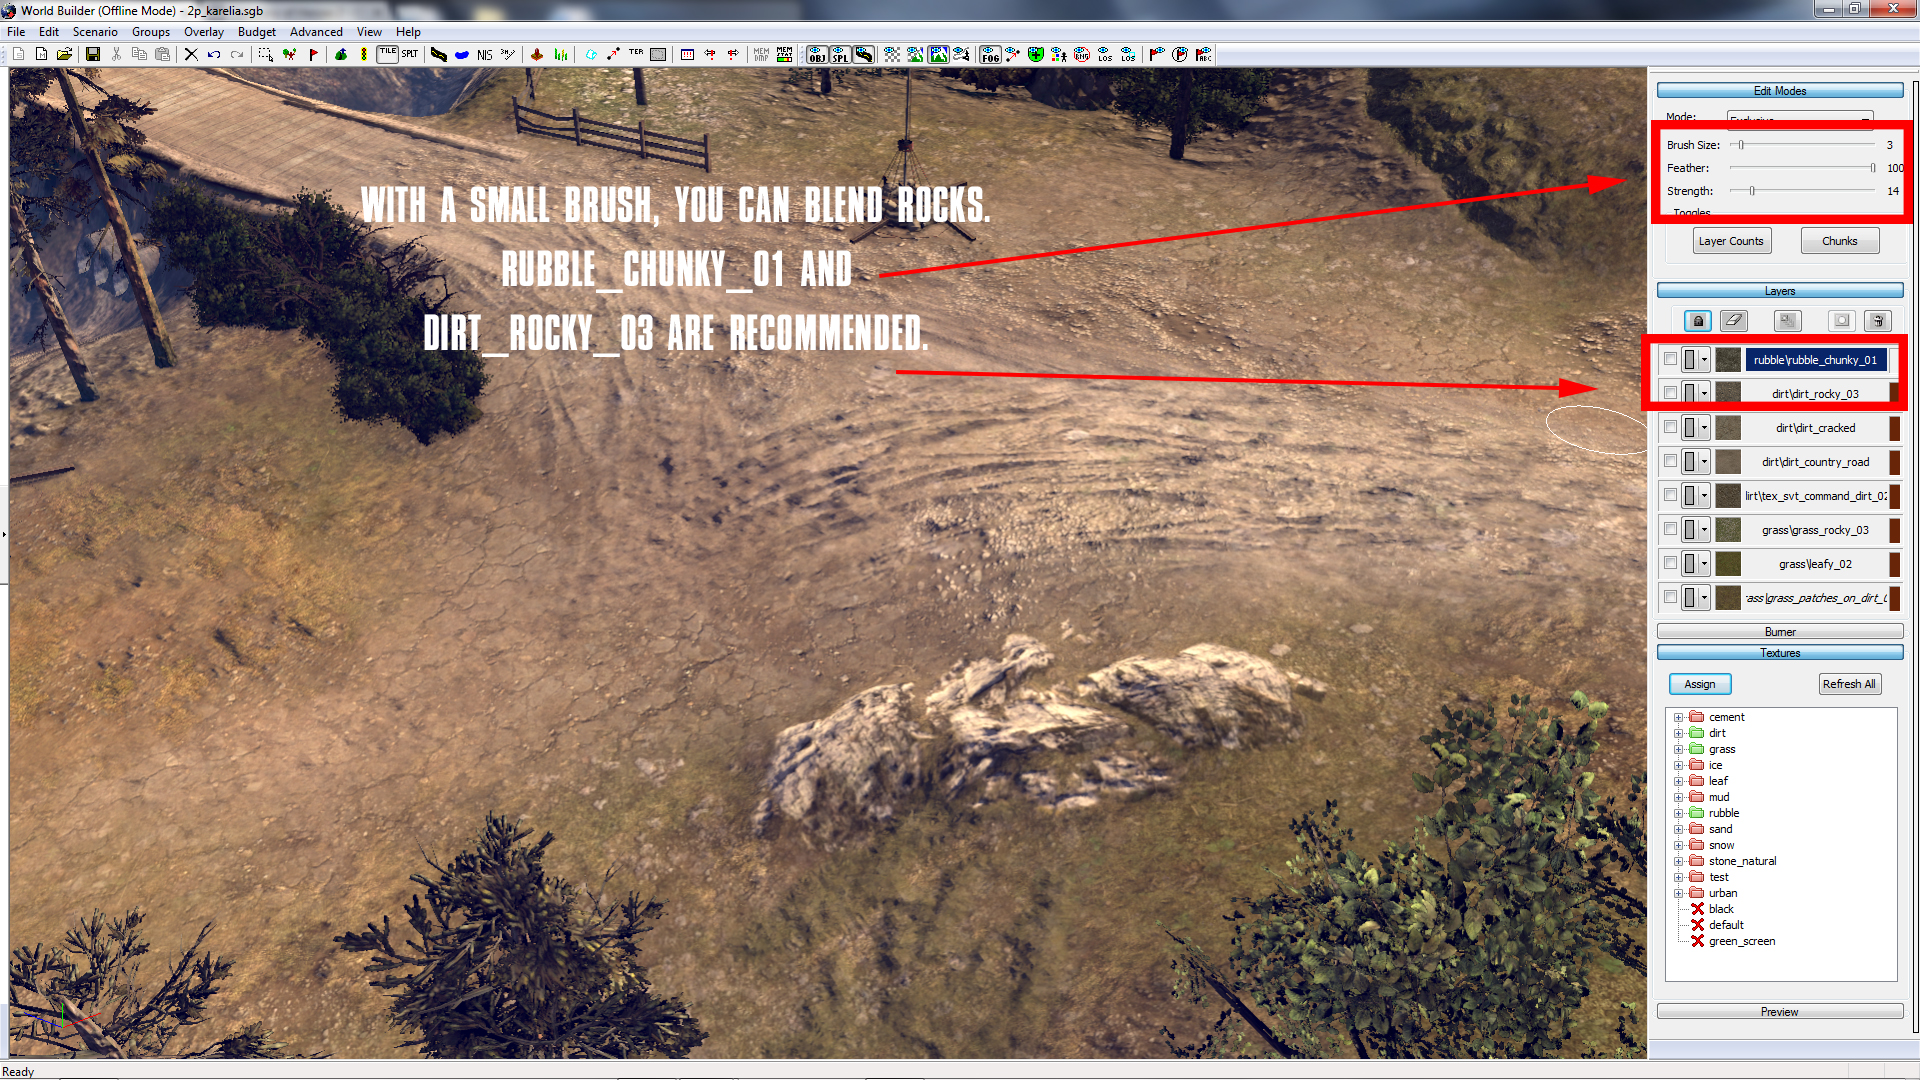
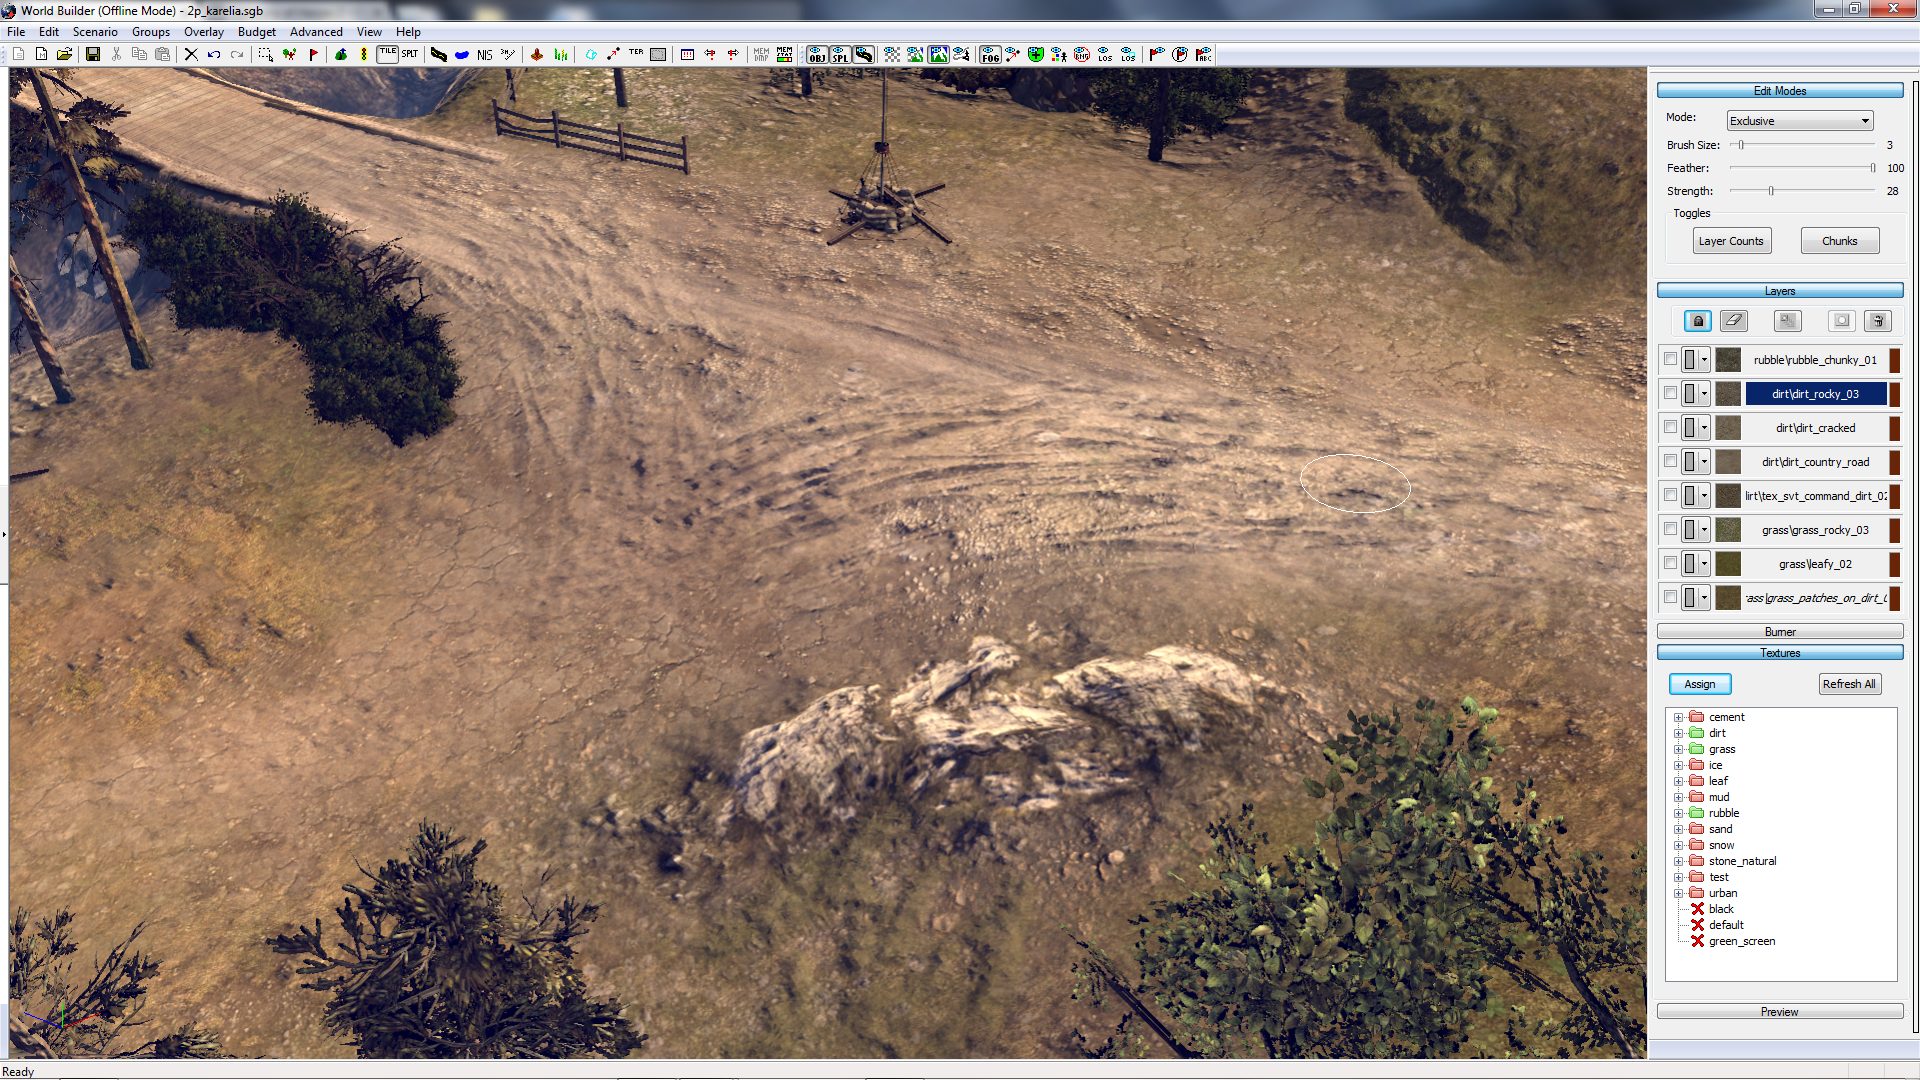
Once you have raised the SPLAT (remember that the more random the heightmapping the better), it's time to blend it in properly. So long as the SPLAT's Opacity is lower than 100, you will be able to see the Tile texture underneath it, making it easier to blend each rock into the scenery.
With a small brush, use Rubble or Stone Tiles to paint underneath the SPLAT until it appears suitably blended.
Figure 8
Et Viola!
Figure 9
Copy this effect anywhere on a rural map, changing the colour, size or opacity all you like to diversify!
We hope this tip was helpful and you check back next week, when we will provide you with a new Worldbuilder TotW.
 MonolithicBacon