
Welcome
Hello everyone, I'm RtN.Momo4sho.
I have been itching to write a strategy guide for COH2.ORG as a way to give back to the community that has been so great and supportive to me and my stream. I have also managed to convince my dear clan leader, the Great Ciez, to co-author this guide with me. We believe USF & UKF to be the best 2v2 allied composition.
United States Forces:Player 1
Before we jump into the build I want to explain the fundamental role USF plays in this composition. Your goal is to provide vital early game support to your British counterpart so that they do not get steamrolled by Axis combined arms. The way you provide this support? Become the aggressor, force your opponents to respond to your moves and create an environment where you dictate the momentum of the game. Harass cutoffs, take crucial garrisons, and provide space for your ally to establish the defensive line / play his side of the map. The micro of your rifleman is crucial to this aggressive pace and even one misstep, such as an early retreat of your rifleman (or god forbid, a squad loss) can cost you your entire momentum for several minutes.
Early Game: 'Maxing the Aggro'

The reason we choose this build is because it is the most hyperefficient, powerful early game USF build there is.
Since our emphasis is on aggression there can be no other alternative.
The M20 is the most key component of this early game build and can force unprepared opponents completely off the most important portions of the map, giving your team space in the vacuum to advance your front line. Use the M20 to counter harass your flanks and to spearhead a counter attack.
You generally want this unit to hit the battlefield before the 5mn mark so that is has the maximum potential impact on the game state. Every other unit in the LT. tier is not considered mandatory but have their potential depending on the map and the game state. Specifically, I would like to address the role that the M15 AA HT can play and in what situations is it appropriate to purchase. If I happen to lose my m20 too early and I know I need a vehicle to maintain or further the pressure, then I will purchase the M15 to fulfill this void. Another reason to purchase it is in the late game when you know your opponent has access to plane oriented call in, specifically Stuka Close Air support.
If your team mate hasn’t been able to keep his initial centaur alive or purchase a new one, then make it an effort to always have a capable AA unit on the field to prevent the loss of vital armor on the front lines.
Mid Game: Cementing your presence and selecting
Now, depending on how events developed in your early game, it’s time to start contemplating your next moves. In most scenarios, I find myself teching to our next officer, the Captain, to provide us with minor AT against light vehicles as well as give us access to the powerful pack howitzer which is an absolute nightmare in and of itself. Another reason to go Captain is to give yourself the ability to create an AT gun between the time your major is created and your first tank is spawned. You do not want to get caught with your pants down against rushed medium tanks and be forced off the field entirely. Also, please do not forget to use the supervise ability on your captain to dramatically decrease the times that ALL USF units are created. I rarely see any player utilize this ability, and it can really make a difference especially when it comes to our tanks in the Major tier.
Now having said that, there are moments when skipping Captain and rushing a T4 vehicle is justified. These moments usually involve an overwhelming dominance of the map to where a ~12mn M4A3 Sherman is feasible. This is your call to make as a player and your game awareness skills can help to influence this decision, but if you feel uncertain just tech to Captain and play it the safe way.
Late Game:
This is where, in my opinion, things get more and more simplified when it comes to your unit composition and goal in mind. Rifleman, Jacksons, Priests, and whatever other support weapons you can scavenge on the battlefield. Overpower your opponent’s infantry with your pimped out rifleman, provide supporting AT fire to your teammates Churchill Variants /Comets/Centaurs with Jacksons in the rear, and blow everything else straight to hell with the Priest. Things do get more intense as the game drags on but continue to make it an effort to keep your units alive and you will be justly rewarded. Stay cool and calm and victory will be yours.
Infantry Company
Now this is the part where I explain why I believe that USF plays the perfect support role for UKF.
This doctrine gives the USF faction the tools it needs to overwhelm the Axis forces with sheer power. M1919 LMGs, even without defensive stance, provide an insane DPS boost to rifleman that blows nearly every other infantry unit out of the water. This, coupled with the significant durability buff vet 3 rifleman received, basically makes our main line infantry an “Elite” infantry squad that can duke it out with the best of them. However, we must emphasize unit preservation with this doctrine. Losing a vet 3 Rifleman with double M1919’s is incredibly devastating and is extremely hard to replace when it comes to the late game with the MP bleed that the faction experiences.
The other main reason this doctrine gives us an edge over the competition? The Priest. This unit is a monster that should never be taken lightly. Having trouble with some filthy Leig spammers? A forward Battlegroup headquarters? Give them a dose of this bad boy and you will make them beg for forgiveness. This unit is one of the undisputed kings of the “grind game”.
You WILL wear your opponents down to NOTHING when it comes to their infantry and static emplacements, granted you keep these precious gems alive. Use your mines provided to you by the doctrine to protect your flanks from an ambitious push by your opponents to clear your Mobile Howitzers and be very conservative of your placement of them unless you are without a doubt certain of their safety. The Priest being a call in unit gives us an edge over our Soviet brethren, having to tech T3 and T4 just to get arty can be very detrimental to our pacing and can leave us open to our opponents armor, which can leave you scrambling to hold the line.
Just a side note: Be very conservative of your usage of the Time on Target artillery barrage as it is very underwhelming for 180 munitions. I usually only use it in an emergency vs pak walls during a hectic engagement and hope my opponent doesn’t notice, or against an OKW truck which is less than half health.
United Kingdom Forces:Player 2
Hello everyone, i'm RtN.CieZ, and welcome to the United Kingdom Forces portion of this guide.
For anyone that does not know me, i'm one of the Senior Strategists on coh2.org and I have been playing the game since the Alpha stage. I am a top level 2v2 player. I primarily focus on the 1 vs 1 and 2 vs 2 game modes. My hope is that this guide will help you take your 2 vs 2 allies game to the next level by unraveling our strategy and reasons behind the choices that we make.
Please note that much of what I say will not necessarily be applicable to 1 vs 1 as team-games are a significantly different environment, and vice versa.
The Early Game
The early game is arguably the most difficult part of the game for the UKF. Infantry sections are relatively strong, but they do not kill quickly, they require green cover/garrisons and given their expense and need to utilize cover they are not strong against heavy machine guns.
It is important to understand your early game role. It is not going to be as flashy or powerful as your USF partner but it is vital. The UKF excel defensively early on - you must take advantage of this. Your primary focus is going to be to lock down the important sectors on your side of the map and then begin to field your powerful units.
At the absolute least, keep control of the fuel on your side of the map so that your ally can get his M20 out on time.
You start with one infantry section and will want one more infantry section plus a Vickers before you tech. I prefer to build the Vickers first so that you have more time to get it set up in a good position but the order of these two units is not highly important. As you are capping points make sure to build sandbags with your Infantry Sections in case you need to fight in the green cover. Send your starting infantry section to your fuel or munitions point and get sandbags set up. You will want to use this unit to secure that point. While standing in green cover you should beat Pioneers, Grenadiers and Volksgrenadiers. Depending on RNG you will probably lose to Sturmpioneers unless you can garrison a good building. Focus on getting your Vickers HMG setup in a good spot to cover this point. Use your second Infantry Section to connect the points to your base and tech as soon as possible.
If you have OKW opponent that opts for an early Kubel it may be necessary to field a Universal Carrier to keep the Kubel at bay. This decision must be made depending on how your ally is doing. If your ally has won his fuel, there should be no need for the UC - his M20 can kill the kubel. If your ally cannot hold the offensive fuel you may need to fuel the UC to secure your part of the map. Be careful not to engage too heavily unless you know you will kill the kubel, you will not be able to repair early on but the OKW will.
I purchase the Medical Supplies upgrade on both of my Infantry Sections, but the pyrotechnics upgrade is also very good, as it increases the sight range of your Infantry Sections.
Tip: The UC will take the least damage from Volks and Sturmpioneers at max range. Use this to your advantage.
It is important to understand your early game role. It is not going to be as flashy or powerful as your USF partner but it is vital. The UKF excel defensively early on - you must take advantage of this. Your primary focus is going to be to lock down the important sectors on your side of the map and then begin to field your powerful units.
At the absolute least, keep control of the fuel on your side of the map so that your ally can get his M20 out on time.
Early Game Build:
You start with one infantry section and will want one more infantry section plus a Vickers before you tech. I prefer to build the Vickers first so that you have more time to get it set up in a good position but the order of these two units is not highly important. As you are capping points make sure to build sandbags with your Infantry Sections in case you need to fight in the green cover. Send your starting infantry section to your fuel or munitions point and get sandbags set up. You will want to use this unit to secure that point. While standing in green cover you should beat Pioneers, Grenadiers and Volksgrenadiers. Depending on RNG you will probably lose to Sturmpioneers unless you can garrison a good building. Focus on getting your Vickers HMG setup in a good spot to cover this point. Use your second Infantry Section to connect the points to your base and tech as soon as possible.
If you have OKW opponent that opts for an early Kubel it may be necessary to field a Universal Carrier to keep the Kubel at bay. This decision must be made depending on how your ally is doing. If your ally has won his fuel, there should be no need for the UC - his M20 can kill the kubel. If your ally cannot hold the offensive fuel you may need to fuel the UC to secure your part of the map. Be careful not to engage too heavily unless you know you will kill the kubel, you will not be able to repair early on but the OKW will.
I purchase the Medical Supplies upgrade on both of my Infantry Sections, but the pyrotechnics upgrade is also very good, as it increases the sight range of your Infantry Sections.
Tip: The UC will take the least damage from Volks and Sturmpioneers at max range. Use this to your advantage.
Mid Game
Once you have secured your part of the map, hopefully with minimal casualties the fun will begin.
The first unit I pick up from my tier 2 is the Scottish .55 cal Sniper. This bad boy is your salvation. There is nothing more important in the middle of the game than keeping your sniper alive, and keeping him killing. His special ability can be used to help the M20 get a jump on the Kubel, if there is one. He also allows the M20 much more freedom against any 222s. If the 222 gets too brave you can engine damage it and then let the M20 bazooka crew finish the job.
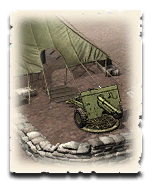
I generally get an AT gun as my second purchase from T2 unless I am against double OKW that opened double battlegroup as there will be no early vehicles you need to deal with. You want to aim for two squads of Royal Engineers with sweepers, two AT guns and at least one sniper before going T3. Make sure your AT gun and sniper work together so that a 222 cannot rush in and kill you. You will most likely want your sniper and AT gun on the offensive side of the map to help your USF partner push for the enemy fuel while your two infantry sections and vickers lock down your defensive points. Your royal engineers should sweep for the M20 as well as plant mines on your side and in places a 222 might rush down.
It is always a good idea to move your sniper back after you shoot. Your sniper can move while
“reloading” and this goes a long way to preventing counter-snipes. Try to always snipe from maximum range. If you’re feeling up to the challenge you can snipe from no cover, max range then backpedal into green cover for an instant camouflage.
If you are floating a lot of manpower and lacking fuel a second sniper may be in order. With two snipers and two AT guns you can kill a Jp4/Stug without it being able to move. With proper micro your two snipers can force important squads like Obers, JLI, Falls, Sturms and LMG grens to retreat quickly - buying you a lot of time and space.
Late Game
Late game is where things really get rolling for the Britsh Forces. Almost every late game unit the UKF can field excels at something. It is also fine to field a Cromwell or Centaur as your first tank, or try and rush Hammer and Anvil, and then a Churchill or Comet if things are looking good. The only tank I would not field first is a Sherman Firefly. Because, even if you are desperate for Anti-Tank, picking up another AT gun might be better.
Regarding specializations
I pick my specialization based on the map and current state of the game. If you need something to absorb shots while Jackson's and Priest's do the dirty work, the Churchill is perfect. The main gun on it is actually good against infantry. You do have to be careful though because it is extremely slow. Letting it get too low on hit-points against a Panther or Jp4 can easily spell death.
The Comet is the king of flanking as far as medium tanks go. It is fast, it is durable(800 Hitpoints), it has solid armor(290) and the main gun is amazingly balanced. The Comet is probably my favorite tank in the game. If you need something to flank Tigers, an Elefant or a Jagdtiger, a couple of these monsters will perform wonderfully.
Vanguard Operations
As far as commanders go, I almost always play Vanguard Operations.
The Churchill Crocodile and Strafing Support are ridiculously good,and unlock at the same time. Use the Churchill Crocodile flare to give line of sight for your airstrike.
You also have the option to deploy the forward logistics glider and in emergencies pop the vehicle crew repair.

NOTE:Commando Regiment is another alternative choice to those that don't believe in DLC.
Putting it all together
Ultimately late-game, I aim to have an Infantry composition that includes:
2-3 Infantry Sections to heal,and support support weapons.
1 Vickers for suppression and area denial.
2 AT guns as a solid,fuel-free anti tank force that screens the retreat paths of your armor.
1-2 Snipers for constant bleed opportunities,and extra sight.
2 Royal Engineers for repairing and "war speed upgrades".
Regarding late-game armor combinations,If vs Heavy Tank Destroyers(Jagdtiger, Elefant, Tiger) Then a comet is a better choice because of its mobility and flexibility in comparison to the Churchill.
However, If you need something to absorb shots while Jacksons and Priests do the dirty work, the Churchill is perfect. The main gun on it is actually good against infantry. You do have to be careful though because it is extremely slow. Letting it get too low on Hitpoints against a Panther or Jp4 can easily spell death.
The armor you choose late-game as the British Forces is largely up to you and the situation at hand.
Thanks
Thanks for reading our guide! We hope we bring your allied 2v2 game to the next level! If you have any questions or concerns feel free to post them in the comments below!
 CieZ
CieZ  momo4sho
  Existant
  CookiezNcreem
  dpfarce