Login

russian armor

How-To: Template images in World Builder [Broken]

24 Nov 2013, 12:27 PM
#1
avatar of Janne252
Admin Black Badge
Patrion 15

Posts: 3421 | Subs: 11

How-To: Using Template Images in World Builder


In this tutorial we'll go through the steps of adding your custom template images to World Builder. These template images can be used for creating a map layout based on real locations. You could also draw fictional designs in Photoshop. It's all up to you!
For example Relic mappers use template images for map layout designs. Take a look at the Official CoH2 World Builder trailer to exactly get what this tutorial is all about.

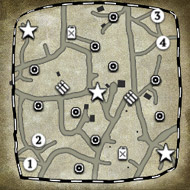
Here is a screenshot of example result:


Basics


Rule #1:
Do not keep World Builder open while doing the steps in this tutorial unless told to.
Rule #2: No other rules.

Required tools:
  • Basic text editor. Microsoft Notepad is great for this. More suitable tool would be notepad++, which you can download from notepad-plus-plus.org
  • Adobe Photoshop with DDS plugin

    Setting Up


    We'll start by setting up a folder system to hold the templates and by downloading a set of example files to test it.

    • Create this folder structure to your CoH2 Installation folder:
      Code

      Company of Heroes 2 Installation folder\CoH2\Data\art\scenarios\textures\splats\templates


    • Download example files and extract the contents of the .zip archive (lyon.dds and lyon.terrainmaterial) to
      Code

      Company of Heroes 2 Installation folder\CoH2\Data\art\scenarios\textures\splats\templates


    • Launch World Builder. You should now be able to access the new splat in Splat placement tool:


      Image #1: Custom Splat


      Place the splat called "lyon" to the map. You will notice the small size of the new splat immediately. To make it larger, set scale to 128 or something similar and place the splat again.

      Image #2: Splat Scale


    Tip: You can use World Builder Ruler tool to determine scale. Ruler measures distance in meters.

    Now that we have a working system, we can continue to creating our own template image(s).

    Adding your own template


    Assuming that you already have a template image, we'll start by saving it as .dds
    In case you have no template image, head to, for example, https://maps.google.com/ and get one by taking a screenshot.

    Load your template image to Photoshop. Make sure the image width and height are multiples of four. Here is a list of few examples (basically any power of 2 is suitable):
    Code

    128, 256, 384, 512, 768, 1024, 2048


    Once you have done necessary adjustments to your image ensuring correct image width and height, save your template image as yourTemplateName.dds to
    Company of Heroes 2 Installation folder\CoH2\Data\art\scenarios\textures\splats\templates
    , using following settings in photoshop:


    Image #3: Exporting DDS


    Now, when your image is successfully exported as .dds, we'll create a .terrainmaterial file to describe the properties of the new splat. You can do that by doing the following steps:

    • Open Notepad/Notepad++ and paste in following content:
      Code

      material = {
      dif = "yourTemplateName",
      nrm = "yourTemplateName",
      spc = "yourTemplateName",
      }

    • Change yourTemplateName to match your .dds file name.

    • Save this text as yourTemplateName.terrainmaterial to the same folder where your .dds image is. Close the file.

    • Launch World Builder. You should now be able to access your new custom template.


    Conclusions


    In this tutorial you learned how to add custom template images to the World Builder. Fell free to share your results in this thread!
24 Nov 2013, 14:35 PM
#2
avatar of IronMedic

Posts: 318

Tried this out, and it works :)
I used Gimp 2 instead of Photoshop, a DDS plugin for gimp can be found here:Gimp Plugin Registry.
The .zip plugin is the simplest one to install.
24 Nov 2013, 14:45 PM
#3
avatar of GeneralHell
Honorary Member Badge

Posts: 1560 | Subs: 1

That's brilliant, keep 'm coming Janne! :thumb:
24 Nov 2013, 15:20 PM
#4
avatar of Janne252
Admin Black Badge
Patrion 15

Posts: 3421 | Subs: 11

Tried this out, and it works :)
I used Gimp 2 instead of Photoshop, a DDS plugin for gimp can be found here:Gimp Plugin Registry.
The .zip plugin is the simplest one to install.


I had some trouble with Gimp so I left it out of the tutorial. Apparently I just didn't try had enough :D
24 Nov 2013, 21:51 PM
#5
avatar of WhiteFlash
Senior Mapmaker Badge
Benefactor 119

Posts: 1295 | Subs: 1

Only Relic postRelic 24 Nov 2013, 23:31 PM
#6
avatar of Eagleheart21
Developer Relic Badge

Posts: 117 | Subs: 5

awesome stuff Janne,

we're hoping to provide an easier way to do this in the future.

25 Nov 2013, 23:07 PM
#7
avatar of Srinidhalaya

Posts: 357

This brings up a question, what is the scaling for distance in WB? ie; 256x256 = sqft?
26 Nov 2013, 06:26 AM
#8
avatar of Janne252
Admin Black Badge
Patrion 15

Posts: 3421 | Subs: 11

You could use the ruler tool in World Builder to determine scale.
26 Nov 2013, 09:47 AM
#9
avatar of Janne252
Admin Black Badge
Patrion 15

Posts: 3421 | Subs: 11

awesome stuff Janne,

we're hoping to provide an easier way to do this in the future.


It seems I haven't noticed World Builder is able to read unapacked data. There is no need for creating SGA archives to make custom template images. I'll update this tutorial later today with the easier way. Basically the .terrainmaterial and .dds file created in this tutorial could just be placed in Company of Heroes 2\CoH2\Data\art\scenarios\textures\splats\templates

You guys did excellent job with updating World Builder. Especially with the ability to read unpacked files.
26 Nov 2013, 17:49 PM
#10
avatar of Deer

Posts: 12

Awesome tutorial this will be usefull :) I was trying to figure out how to do this but i ran out of patience.. here is my solution ^^

27 Nov 2013, 04:55 AM
#11
avatar of Janne252
Admin Black Badge
Patrion 15

Posts: 3421 | Subs: 11

jump backJump back to quoted post26 Nov 2013, 17:49 PMDeer
Awesome tutorial this will be usefull :) I was trying to figure out how to do this but i ran out of patience.. here is my solution ^^
[poiler]


Quite creative :D
6 Feb 2014, 13:34 PM
#12
avatar of Deer

Posts: 12

Doesnt seem to work for me, the expample splat wont appear in the editor for some reason, i checked its in right place for sure. Maybe it needs to be packed again or something ?
6 Feb 2014, 13:58 PM
#13
avatar of Janne252
Admin Black Badge
Patrion 15

Posts: 3421 | Subs: 11

This is not possible at the moment. December 10th update (2013) Disabled modding and WorldBuilder lost the ability to data outside game archivers with that patch.
12 Feb 2014, 23:10 PM
#14
avatar of MrEasyUK

Posts: 34

I it possible to copy all your tiles, splats and splines in to one large overlay? If so would this improve performance?
13 Feb 2014, 11:41 AM
#15
avatar of Janne252
Admin Black Badge
Patrion 15

Posts: 3421 | Subs: 11

I don't think that is possible.
1 user is browsing this thread: 1 guest

Livestreams

New Zealand 88

Ladders Top 10

  • #
    Steam Alias
    W
    L
    %
    Streak
Data provided by Relic Relic Entertainment

Replay highlight

VS
  • U.S. Forces flag cblanco ★
  • The British Forces flag 보드카 중대
  • Oberkommando West flag VonManteuffel
  • Ostheer flag Heartless Jäger
uploaded by XXxxHeartlessxxXX

Board Info

534 users are online: 2 members and 532 guests
temnhan, Brick Top
0 post in the last 24h
37 posts in the last week
146 posts in the last month
Registered members: 44941
Welcome our newest member, temnhan
Most online: 2043 users on 29 Oct 2023, 01:04 AM