Welcome to Behind the Battlefield!
This is a new feature which will attempt to examine the grander context, and shed some light on some of the history behind the battlefields where we pit our valiant troops against each other, game after game.
The first locale we will explore is La Gleize. The landscape is best characterized by the breakout attempted by the elite 1st SS Panzer division led by Joachim Peiper during operation Wacht Am Rhein or “Watch Over the Rhine”. The short lived thrust into the Ardennes forest in December 1944.

The 1st SS, or Kampfgruppe Peiper, was tasked with punching through the poorly defended Ardennes forest, encircling and routing the combined British and American forces along the river Meuse, linking up with other elements of the German 6th Panzer Armee at the strategic junction of Huy, and if possible, carrying on and crippling allied logistics by capturing the port of Antwerp.
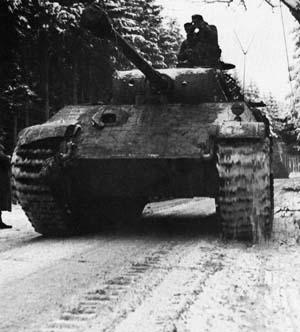
In order to achieve these very ambitious targets KG Peiper was assigned the cream of Germany’s remaining armour, including Tigers from the infamous 501st SS Panzer Battalion, Panthers, and an armoured detachment including the relatively new and shocking Kongistiger.
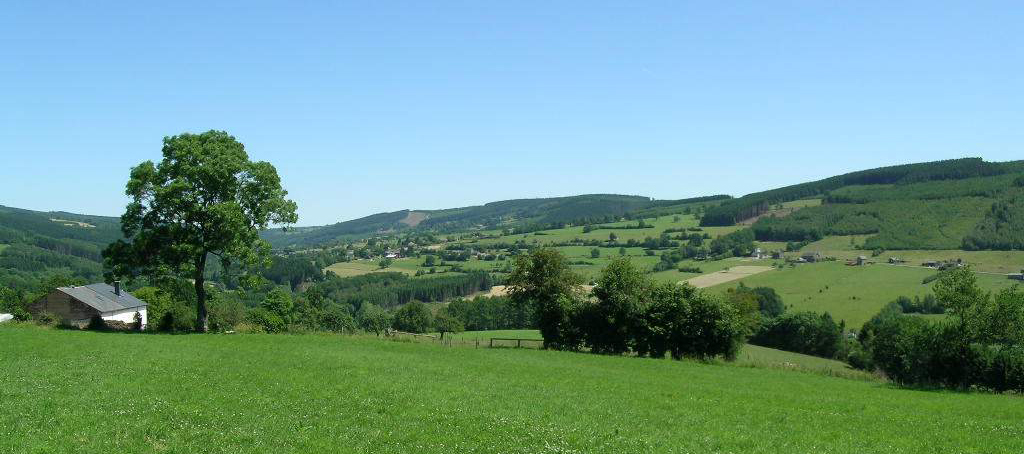
Although these were very powerful weapons in their own right, this heavy armour not only presented a logistic nightmare, but also required specific battlefield conditions to excel, such as open space and clear sight lines, conditions not necessarily provided by the Ardennes forest. Peiper was more than mindful of this when after scouting the suggested routes or "rollbahns" by car, he remarked that the countryside was “suitable for bicycles not panzers".
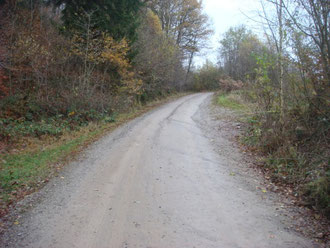
A typical road in the Ardennes, only wide enough for a single column of armour.
In order to lug this vast amount of material through the forest and reach Huy; Peiper had to achieve two strategic targets, the capture of: fuel, and bridges. Standing in the way of Huy in particular was the “cauldron” of La Gleize, west of Malmedy and Stavelot, east of Stoumont and north of Trois Ponts. This area presented a major bottleneck for Kampfgruppe Peiper on the way to the Meuse.
The Route of the 6th Armee, including KG Peiper (center and western most line)

Peiper assembled his forces in a heavily wooded area near Schmittheim. Aided by poor weather, away from the prying eyes of allied air reconnaissance. It is from this staging area that Peiper set forth from on December 16th. Immediately, before facing a single foe, his assault became bogged down, and fraught with obstacles, including comical rear line traffic. Peiper was enraged, before fighting had even commenced, his armour was burning precious fuel and even more precious time.
After hours mired in traffic, under the cover of blizzard, Peiper commenced his assault-- hammering the American lines, routing the 99th and 106th Infantry divisions with relative ease. Thereby creating the “bulge” in the allied lines for which this conflict earns its popular namesake.
Allied prisoners marching past a King Tiger near Malmedy.

By the second day of the breakout Peiper had gathered some momentum, pressing on, and capturing Malmedy. Unfortunately for Peiper, fuel was becoming critical, and time even more so. Peiper, desperate to press his wavering advantage, personally took an armoured spearhead and rushed south to Trois Ponts in an attempt to secure a crossing for the core of his armour which was being refueled by prisoners at a captured Allied fuel depot in Malmedy, only to find that the 291st Engineering Division had already blown the bridges.
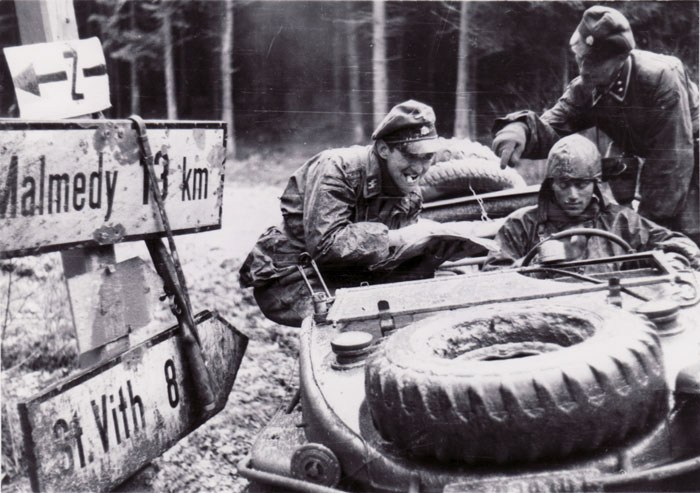
A forward grief team changing signage to delay and divert allied reinforcements headed to Malmedy.
By this time, such a set back had became the status quo for the breakout. Peiper’s initial successes had started to become a distant memory, replaced by delay and turmoil. By December 20th Peiper found himself and his Kampfgruppe in a dire situation. Having no way through the south and Trois Ponts, Peiper pressed northwards and had stalled, only to find himself encircled within the cauldron. With Panzers running on fumes, and personally, under siege in La Gleize fighting off flanking attacks, Peiper is left to reflect on a much different reality than what high command had expected. Following their plans, Peiper should have been dipping his toes in the Atlantic at Antwerp by now.
Instead, Peiper was no longer fighting against shaken, untested reserves. Peiper now found himself face to face with a more than worthy adversary: Maj. Gen. Leland S. Hobbs, and some of America’s crack divisions: the 30th Infantry Division, and 82nd Airborne, supported by armour from the 3rd Armoured Division. Maj. Gen. Leland S. Hobbs
M36 Jackson from the 3rd Armoured Division.

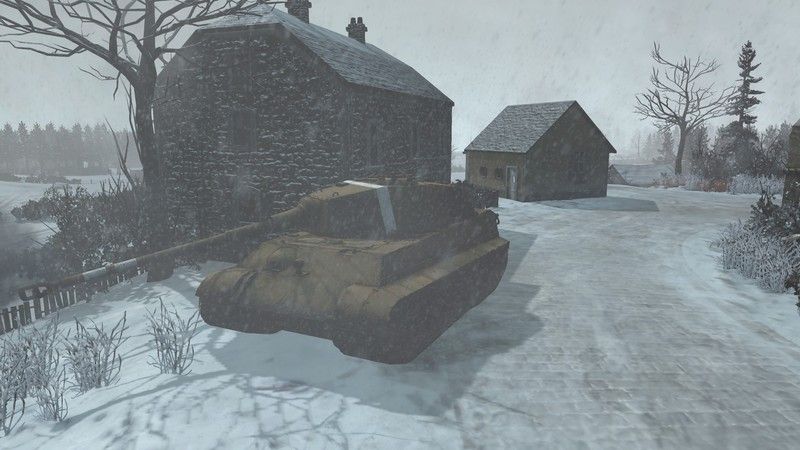
It was a column of M4 Sherman’s from the 3rd Armoured which on December 22nd engaged King Tiger 221, and 213 on the eastern approach to La Gleize. These behemoths were hulled down in position on the eastern outskirts of town near structures which constituted Wérimont farm, as well as a large stone presbytery near the church of La Gleize. These tanks were tasked with guarding the east and southeast approaches. Almost immediately upon coming into contact with the prodding American armour, the King Tiger's not waiting for a better opportunity, opened fire. Initial shots were accurate, inflicting loses on the lead vehicles of the column, but the American's did not waver. Return fire was dogged and relentless, the Sherman's succeeding in disabling Tiger 221’s traverse mechanism, as well as destroying Tiger 213’s cannon by destroying the barrel, forcing both tanks to be abandoned.
The destroyed barrel of abandoned Tiger 213 next to the presbytery.
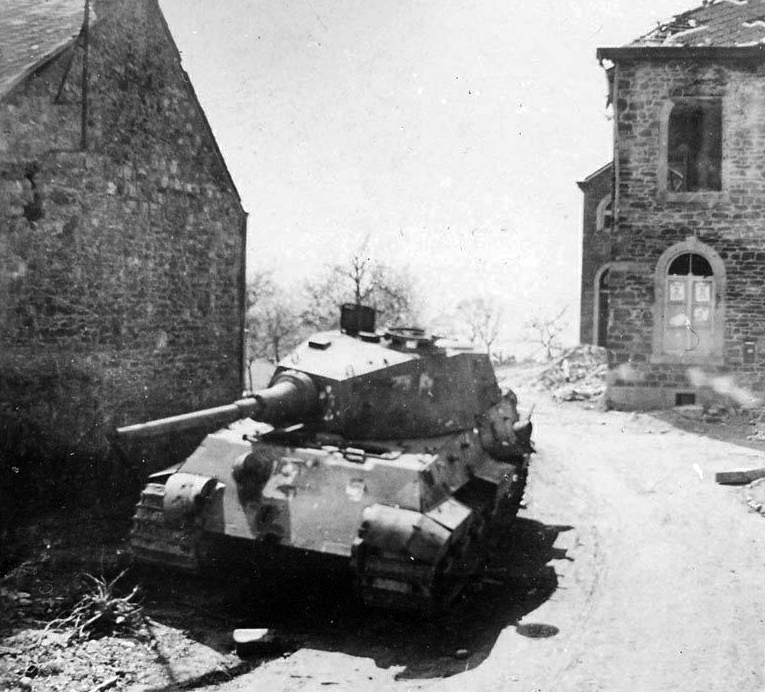
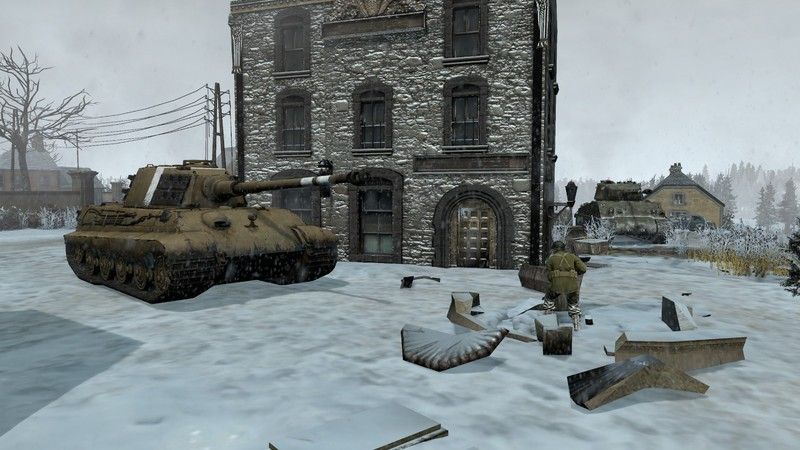
Tiger 221, knocked out, and dragged in front of La Gleize City Hall.

Such skirmishes continued, with Peiper shifting his forces along the northern and eastern outskirts of town as the Americans attempted to overrun his position, only to be pushed back to where he had started by heavy concentrations of artillery fire. 1st KG was out of options. With forces depleted after nearly a week of non-stop fighting, 3 days of which were spent locked down under said artillery fire in La Gleize, and with precious little resupply from the Luftwaffe, and no feasible route forward through the determined allied troops... Peiper was faced with a classic dilemma, stay, or go? Peiper swiftly made his decision.
A day after on December 23rd, under the cover of nightfall, Peiper and a compliment of around 800 men abandoned their equipment, including 135 armoured vehicles, to retreat on foot, thus ending the main offensive thrust of KG Peiper, the 6th Armee, and the last hurrah of the Wehrmacht, and Hitler's Third Reich.
M7 Priests attached to the 3rd Infantry Division, aimed at La Gleize.
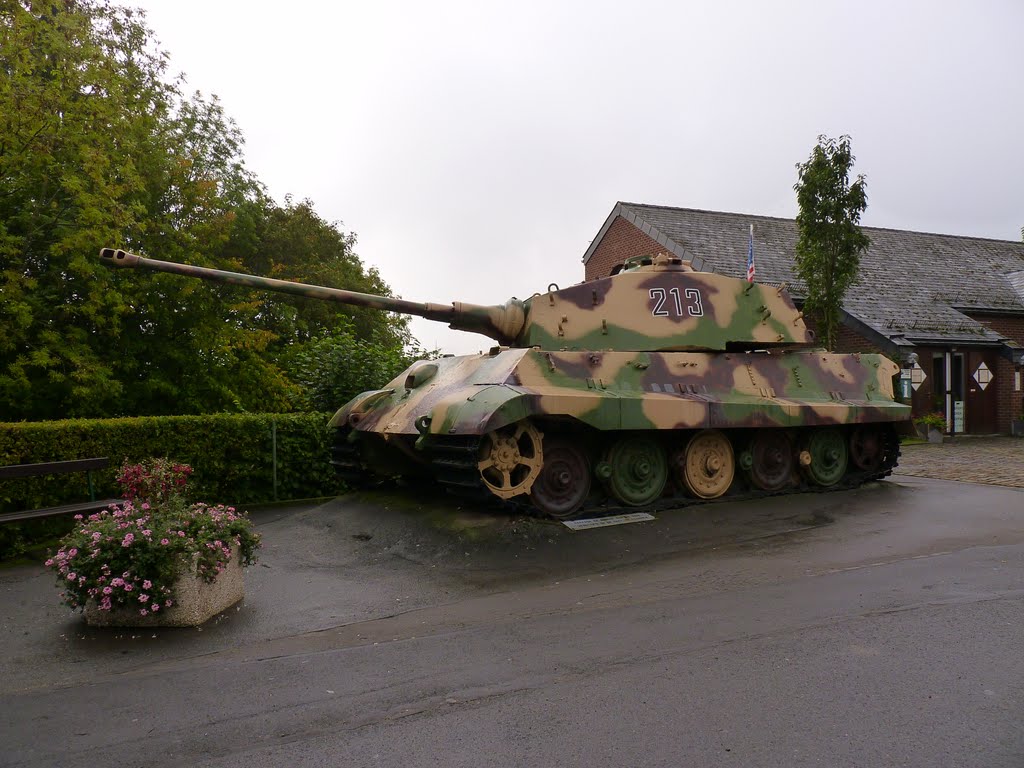
A restored Tiger 213, never recovered by the Wehrmacht, artifact from the war, and "mascot" of La Gleize.

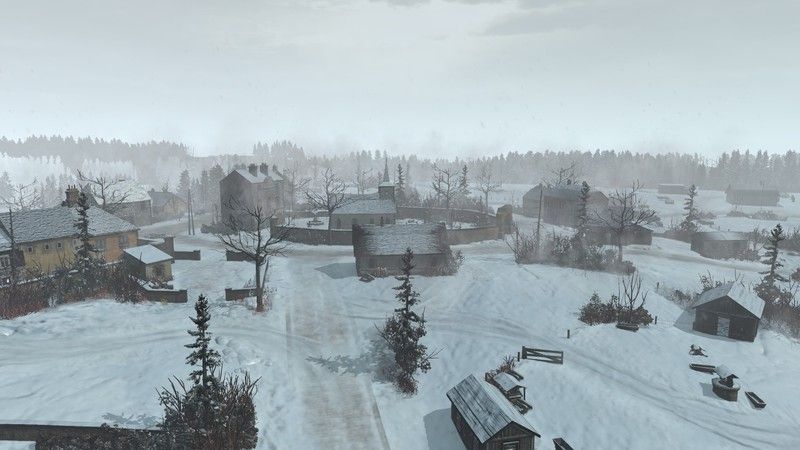
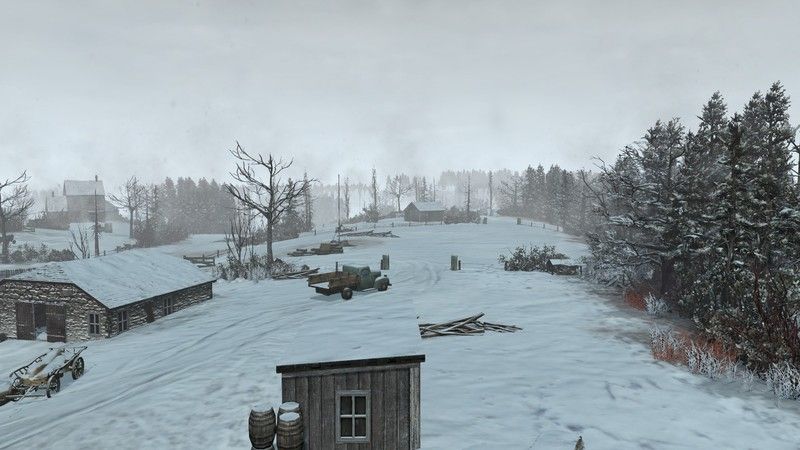
But how does this translate in-game? The siege of La Gleize as a conflict is understandably not exactly well represented in automatch. Fighting occurs laterally across the city, north to south, instead of into and around the city from the outlying forests and flanks. However, the battlefield and landscape itself as inspired by La Gleize can, although not as a facsimile, certainly give a feeling of intensity, and the shifting landscapes from city to open ground, requires a lot of cunning to utilize to ones advantage; replicating the tactical refinement and adaptability that would have had to have materialized from Hobbs and Peiper.
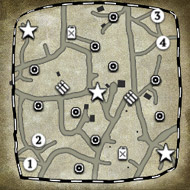
The Tactical Map Compared to Modern La Gleize.
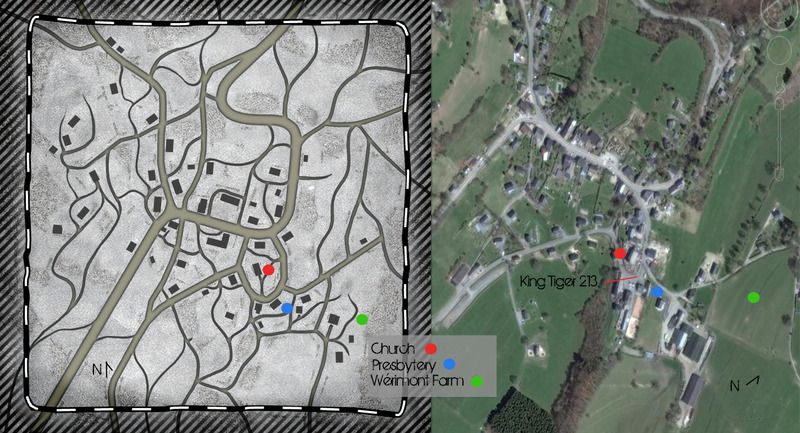
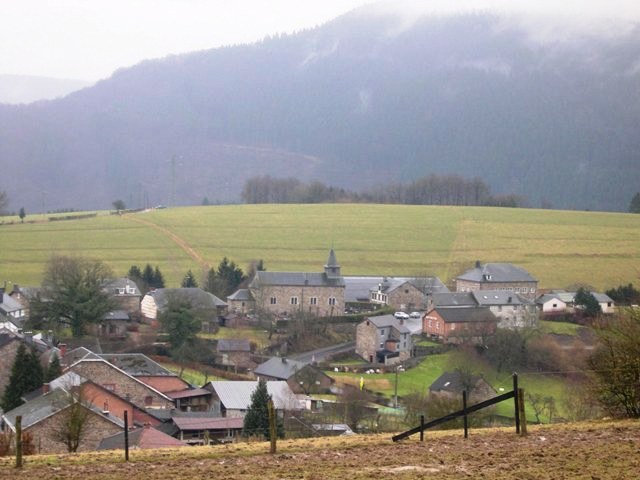
Although La Gleize since the war has experienced a small degree of demographic growth, the structure of the town still retains a similar shape to its wartime configuration. Relic have done a fantastic job taking the motif and theme of the town and creating a layout faithful to its real life counterpart. Pay particular attention to the road network; although, in game the roads are much wider than the width of a single tank, the shape is still suspiciously similar to the modern settlement of La Gleize.
Areas which are particularly well represented include the eastern flank, notably the addition of an area that could serve as Wérimont farm, where Tiger 221 was knocked out. The city center and outlying residences also give off a likeness of a sleepy Belgian town. The most accurate district however in my mind has to be the cluster of stone buildings to the east, centered around the church. This zone includes structures which without much imagination could be the: presbytery, and church, situated at the strategical eastern crossroads into the city, and on the edge of town after Wérimont.
Looking at these structures, there can be no question as to the inspiration of this locale, and it is a bit of a shame that the main resources, and conflict zones are situated on the outer flanks of the map, instead of the more crucial geographical areas of the town, forcing the fight outward or into the direct center, instead of where the classic battle took place. All in all though, I think Relic have done a very admirable job translating a real life locale into a functional, and faithful virtual environment which displays a lot of character.
A comparative overview of La Gleize.
A comparison of Wérimont Farm.
The abandoned King Tigers recreated in game.
Thank you for reading. I hope you found it entertaining and informative. If there is a specific map or conflict you would like covered, please do not hesitate to comment. I will also be happy to answer any questions or find answers to those outside my limited scope, after all, it is feedback from players which helps fuel future projects.
References
Bull, M. (2013). Pics: In Peiper's footsteps (La Gleize-Cheneux). Retrieved from http://www.ww2f.com/topic/49416-pics-in-peipers-footsteps-la-gleize-cheneux/
Byers, D., & Warnock, B. (2013). The Battlefield Then & Now: Kampfgruppe Peiper. Retrieved from http://www.miaproject.net/the-battlefield-then-now/kampfgruppe-peiper-2/
Cole, H. M. (1965). Chapter 5 - The Sixth Panzer Army Attacks. In US Army in World War II - The Ardennes: The Battle of the Bulge (Vol. 8). Washington, D.C: Office of the Chief of Military History Department of the Army.
Cole, H. M. (1965). Chapter 7 - Breakthrough at the Schnee Eifel. In US Army in World War II - The Ardennes: The Battle of the Bulge (Vol. 8). Washington, D.C: Office of the Chief of Military History Department of the Army.
Focus On: Battle of the Bulge. (n.d.). Retrieved from http://www.nationalww2museum.org/see-hear/collections/focus-on/bulge-70th.html
German Spearhead Died at La Gleize. (2013). Retrieved from http://www.december44.com/en/history_battle_of_the_bulgela_gleize.htm
Herzig, J. (2008). Ardennes 2008 - In the Footsteps of Battlegroup Peiper - Then and Now. Retrieved from http://standwheretheyfought.jimdo.com/ardennes-2008-in-the-footsteps-of-battlegroup-peiper-then-and-now/
King Tiger #213. (2013). Retrieved from http://www.december44.com/en/tiger-213.htm
Merriam, R. (1999). Battle of the Bulge Volume 3 of World War II Journal Series. Merriam Press.
Zaloga, S. J. (2011). Battle of the Bulge 1944 (1): St. Vith and the Northern Shoulder. Bloomsbury Publishing.
 turbotortoise
  pigsoup
  Ohme
Ohme 


 cblanco ★
  보드카 중대
  VonManteuffel
  Heartless Jäger