
Introduction
Hello fellow commanders.
The intention of this guide is to give you something different from the other guides in here. Whereas most of the current guides have been written by the top brass on the leaderboards, this one will be from the perspective of someone slightly lower on the ladder.
This guide will be wider compared to most other guides, spanning across all factions with a focus on strategies that will work better against low-mid level opponents rather than more seasoned ones. It will focus on the things with which the less experienced players struggle and how to counter some of the strategies, that lower tier players use against each other.

This may, or may not, be a representation of what you will be able to achive after reading this guide. Single handedly. Oh, quit it with the childish thoughts!
As the title mentions, the main goal of this guide is for players to reach level 10. Players above this, will likely have diminishing returns from this guide, but are of course welcome to latch on and see if there are some things they might want to work on or disagree with.
The first part of this guide focuses on general tips, pointers and strategies that are more common or efficient in low-mid level games, whereas the second part is a walkthrough of the various phases of a match and how players should behave and what they should be aware of.
The intention of this guide is to give you something different from the other guides in here. Whereas most of the current guides have been written by the top brass on the leaderboards, this one will be from the perspective of someone slightly lower on the ladder.
This guide will be wider compared to most other guides, spanning across all factions with a focus on strategies that will work better against low-mid level opponents rather than more seasoned ones. It will focus on the things with which the less experienced players struggle and how to counter some of the strategies, that lower tier players use against each other.
This may, or may not, be a representation of what you will be able to achive after reading this guide. Single handedly. Oh, quit it with the childish thoughts!
As the title mentions, the main goal of this guide is for players to reach level 10. Players above this, will likely have diminishing returns from this guide, but are of course welcome to latch on and see if there are some things they might want to work on or disagree with.
The first part of this guide focuses on general tips, pointers and strategies that are more common or efficient in low-mid level games, whereas the second part is a walkthrough of the various phases of a match and how players should behave and what they should be aware of.
Mid Level Meta
Generally, when talking meta, it is done in the context of what is seen in tournaments and among high level players. While these strategies may also apply to lower rank games, this is not necessarily the case since most players do not have the intuition, micro and general battlefield awareness which the top 100 guys have.
Conversely, the meta of the Wehrmacht Lightning War Doctrine, while very strong in the hands of a good Ostheer player, can almost hamstring a player of lower skill. The reason for this is that three of the abilities that make the doctrine great (Relief Infantry, Tactical Movement, and Stuka Air Support) are munitions dependent and can be completely wasted if not used correctly. As such, doctrines like Elite Troops, Mobile Defense and Spearhead Doctrine might be more forgiving and viable for someone below level 10.
The following points are something that the average player either tends to overlook or might benefit from more than he would in a high level match.
| ! Lend lease is a good example of a meta commander that works well across all skill levels. It consists mainly of call-ins and abilities that are intuitive and easy to use, and doesn't require specific and situational conditions in order to work for the player's benefit. |
Conversely, the meta of the Wehrmacht Lightning War Doctrine, while very strong in the hands of a good Ostheer player, can almost hamstring a player of lower skill. The reason for this is that three of the abilities that make the doctrine great (Relief Infantry, Tactical Movement, and Stuka Air Support) are munitions dependent and can be completely wasted if not used correctly. As such, doctrines like Elite Troops, Mobile Defense and Spearhead Doctrine might be more forgiving and viable for someone below level 10.
The following points are something that the average player either tends to overlook or might benefit from more than he would in a high level match.
Switch to Grid Hotkeys
If you are already completely hardwired on the traditional key bindings, then you might be better off leaving them as they are. The reason I recommend this, is that it will keep your left hand focused on one small area on the keyboard and will also make most (but not all) unit commands easier across all factions.
Tactical Map
If I was to pinpoint one thing that has made my ranking significantly better, it would be my religious usage of the Tactical Map. While top level players are very split on this matter with some players swearing by it and others avoiding it altogether, it is my firm belief that most low-mid level players will benefit immensely from learning to use this.
For some reason, CoH2 does not allow you to manually bind your hotkeys in the game. The standard position of the tac map is all the way over on the “numpad 0” key. This is never a good place for it to be and even less so when you have bound the grid keys. Fortunately there is an ingenious and easy program called “autohotkey”, which will let you rebind any commands whenever a certain program is running.
To use this, just open it and type the simple code that signifies that it should read the “Numpad 0” key as another more conveniant key. I personally rebind it to the CAPS LOCK, but other keys, like the Spacebar, could also be viable options. The only thing you should bear in mind when doing this is that the program will translate any options of that particular key to the new one. So, if you rebind the Numpad 0 to the Spacebar, all your chat messages will have a “0” rather than a space between the text.
There are several simple youtube videos on how to use the autohotkey, also specifically for CoH2, so I will not waste time on explaining this, at least for the time being.
More specifically, watch the video tips by the great guide and caster Tightrope. He can explain it better than I ever could, so there is really no reason for me to elaborate further.
While you’re at it, you should probably also watch the rest of his tips & tricks videos. For the most part they are still relevant to this day.
Download Autohotkey and Rebind Your Tactical Map
For some reason, CoH2 does not allow you to manually bind your hotkeys in the game. The standard position of the tac map is all the way over on the “numpad 0” key. This is never a good place for it to be and even less so when you have bound the grid keys. Fortunately there is an ingenious and easy program called “autohotkey”, which will let you rebind any commands whenever a certain program is running.
- Autohotkey's site
To use this, just open it and type the simple code that signifies that it should read the “Numpad 0” key as another more conveniant key. I personally rebind it to the CAPS LOCK, but other keys, like the Spacebar, could also be viable options. The only thing you should bear in mind when doing this is that the program will translate any options of that particular key to the new one. So, if you rebind the Numpad 0 to the Spacebar, all your chat messages will have a “0” rather than a space between the text.
There are several simple youtube videos on how to use the autohotkey, also specifically for CoH2, so I will not waste time on explaining this, at least for the time being.
Watch Videos on how to Properly use and give Commands in the Tactical Map
More specifically, watch the video tips by the great guide and caster Tightrope. He can explain it better than I ever could, so there is really no reason for me to elaborate further.
While you’re at it, you should probably also watch the rest of his tips & tricks videos. For the most part they are still relevant to this day.
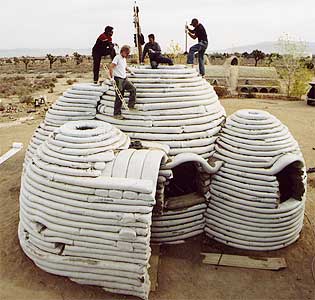
Sandbags
Every faction has core infantry able to place a hardcover object on the map. Even though not all of these are technically sandbags, I will use that word as a general term for any type of hard cover structure buildable by standard infantry. The benefits of hard cover are sadly often forgotten or overlooked by newer players. The fact of the matter is that it will often mean the difference between winning and losing an infantry engagement.
Units behind green cover benefit from 0.5 received accuracy (they are half as likely to be hit) and 0.5 received damage (take half damage once hit). This means that they effectively take 25% damage. Even the weakest of infantry will trade very efficiently with and often beat stronger infantry closing the distance.
With such strong benefits, it is sometimes worth just leaving a unit behind cover at a strategic position (like a cut-off, Fuel Point or Victory Point.) rather than using them aggressively. To some this might seem counterintuitive and a waste of firepower and capping potential, but guarding important points will sometimes be just as important as moving around. It also has the added benefit of not overheating the limited micro and battlefield awareness of the players who will benefit from this guide. A “forgotten” unit placed behind heavy cover will generally be able to fight for longer and will have more time to be “discovered” and evacuated before it is destroyed.
Build sandbags in positions where they are least likely to benefit your opponents. A good and easy example of this would be to place the sandbag up against the centre of a capture point or in a direction that would generally not put your opponent behind cover. Potentially you can also wire off the opposite side of the cover which can be especially beneficial for Soviet and USF who place some odd-sized hard cover structures.
Except for the USF tank trap, a squad cannot build a hardcover structure faster than capping a common capture point. But are able to do so within the time it takes to capture a special point and recapturing an opponent's point. Just be wary that your opponent can see you when you are close to the centre of the point.
Units behind green cover benefit from 0.5 received accuracy (they are half as likely to be hit) and 0.5 received damage (take half damage once hit). This means that they effectively take 25% damage. Even the weakest of infantry will trade very efficiently with and often beat stronger infantry closing the distance.
Use of Sandbags
With such strong benefits, it is sometimes worth just leaving a unit behind cover at a strategic position (like a cut-off, Fuel Point or Victory Point.) rather than using them aggressively. To some this might seem counterintuitive and a waste of firepower and capping potential, but guarding important points will sometimes be just as important as moving around. It also has the added benefit of not overheating the limited micro and battlefield awareness of the players who will benefit from this guide. A “forgotten” unit placed behind heavy cover will generally be able to fight for longer and will have more time to be “discovered” and evacuated before it is destroyed.
Placement of Sandbags
Build sandbags in positions where they are least likely to benefit your opponents. A good and easy example of this would be to place the sandbag up against the centre of a capture point or in a direction that would generally not put your opponent behind cover. Potentially you can also wire off the opposite side of the cover which can be especially beneficial for Soviet and USF who place some odd-sized hard cover structures.
Except for the USF tank trap, a squad cannot build a hardcover structure faster than capping a common capture point. But are able to do so within the time it takes to capture a special point and recapturing an opponent's point. Just be wary that your opponent can see you when you are close to the centre of the point.
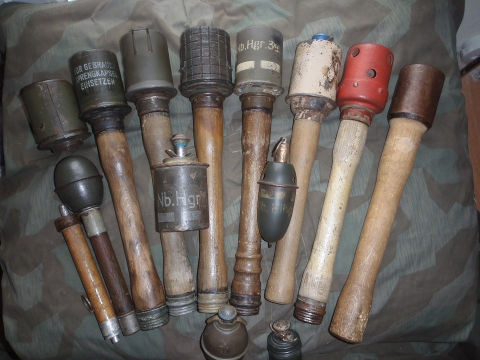
Grenades
In top level games, grenades are often used to clear garrisons, wipe team weapons as they pack up, and force the opponent out of cover. In lower ranked games grenades are a lot more potent, as the micro and battlefield awareness of the players are a lot lower. When you are working to improve, you should therefore work on your knowledge of how and when to use grenades as well as how to avoid your opponent's grenades.
These are the standard grenades. Generally they have a timer and deal direct damage to the opponents within the designated area. Soldiers behind green cover still benefit from the 50% damage reduction from their cover, but bear in mind that this does NOT apply for soldiers behind yellow cover! In fact, yellow cover might do more harm than good when facing a grenade, as units often clump up close. A single grenade can potentially wipe the whole squad. You should always take extra care when you suspect that the opponent has grenades.
For Allies, explosive grenades are either tied to an upgrade or a doctrinal unit, whereas Wehrmacht Grenadiers have immediate access to the rifle grenade. The rifle grenade is arguably the most powerful grenade against low-mid level players, as it has a long range and explodes on impact. It can only be effectively dodged if you see the animation of a Grenadier kneeling with his rifle facing in an upwards direction.
As soon as the grenade is in the air you are unlikely to dodge it, but if in yellow cover the best advice is to hard retreat whereas with green cover it is often best to stay put and “eat it”. The reason for this is that you still benefit from the aforementioned damage reduction, but this bonus is immediately cancelled if you retreat or otherwise move away from the cover.
These come in two varieties: the OKW grenade and the Soviet molotov. They differ from the explosive grenades in the way that they do not do much damage on impact, but rather over time. Because of this they are not well suited for exploiting the opponent's momentary inattention to achieve a squad wipe. However, where a unit can move directly back into the same cover after dodging an explosive grenade, this is not possible with the longer lasting effect of an incendiary grenade. They are therefore ideal for denying the opponent an important building or hiding behind a sandbag. It will often give your men more time to fire at the opponent while his men scamper in the direction of new cover.
Another job they do well is taking out team weapons, as these often take time to pack and unpack. They also tend to move slower. Finally, they have an advantage on stationary targets like emplacements and bunkers as these, obviously, will not move and have to suffer the flames.
Except for USF, smoke grenades are scarcely available and mainly tied to doctrinal units and upgrades. They are best used for blocking the line of sight of an opponent’s MG, so you can close the distance or safely capture a point that the MG covered. Most opponents will also feel compelled to reposition their MG, which makes it easier to break through the opponent's lines. A few smoke grenades also damage over time, so make sure that you do not move through these yourself.
Stun grenades are solely available to the German factions, either through doctrines or veterancy. They deal a small amount of damage and incapacitate an enemy unit for a few seconds which will often force a retreat. They tend to be a cheaper alternative to other grenades and are best used against opponents in cover or buildings, who are already protected from some of the normal grenade damage, but will still suffer the penalties of the stun grenade.
Explosive
These are the standard grenades. Generally they have a timer and deal direct damage to the opponents within the designated area. Soldiers behind green cover still benefit from the 50% damage reduction from their cover, but bear in mind that this does NOT apply for soldiers behind yellow cover! In fact, yellow cover might do more harm than good when facing a grenade, as units often clump up close. A single grenade can potentially wipe the whole squad. You should always take extra care when you suspect that the opponent has grenades.
For Allies, explosive grenades are either tied to an upgrade or a doctrinal unit, whereas Wehrmacht Grenadiers have immediate access to the rifle grenade. The rifle grenade is arguably the most powerful grenade against low-mid level players, as it has a long range and explodes on impact. It can only be effectively dodged if you see the animation of a Grenadier kneeling with his rifle facing in an upwards direction.
As soon as the grenade is in the air you are unlikely to dodge it, but if in yellow cover the best advice is to hard retreat whereas with green cover it is often best to stay put and “eat it”. The reason for this is that you still benefit from the aforementioned damage reduction, but this bonus is immediately cancelled if you retreat or otherwise move away from the cover.
Incendiary
These come in two varieties: the OKW grenade and the Soviet molotov. They differ from the explosive grenades in the way that they do not do much damage on impact, but rather over time. Because of this they are not well suited for exploiting the opponent's momentary inattention to achieve a squad wipe. However, where a unit can move directly back into the same cover after dodging an explosive grenade, this is not possible with the longer lasting effect of an incendiary grenade. They are therefore ideal for denying the opponent an important building or hiding behind a sandbag. It will often give your men more time to fire at the opponent while his men scamper in the direction of new cover.
Another job they do well is taking out team weapons, as these often take time to pack and unpack. They also tend to move slower. Finally, they have an advantage on stationary targets like emplacements and bunkers as these, obviously, will not move and have to suffer the flames.
Smoke
Except for USF, smoke grenades are scarcely available and mainly tied to doctrinal units and upgrades. They are best used for blocking the line of sight of an opponent’s MG, so you can close the distance or safely capture a point that the MG covered. Most opponents will also feel compelled to reposition their MG, which makes it easier to break through the opponent's lines. A few smoke grenades also damage over time, so make sure that you do not move through these yourself.
Stun
Stun grenades are solely available to the German factions, either through doctrines or veterancy. They deal a small amount of damage and incapacitate an enemy unit for a few seconds which will often force a retreat. They tend to be a cheaper alternative to other grenades and are best used against opponents in cover or buildings, who are already protected from some of the normal grenade damage, but will still suffer the penalties of the stun grenade.
How to Counter Grenades
As mentioned, grenades are a serious problem for lower micro players. You should follow these simple tips to avoid them or at least reduce the harm from them:
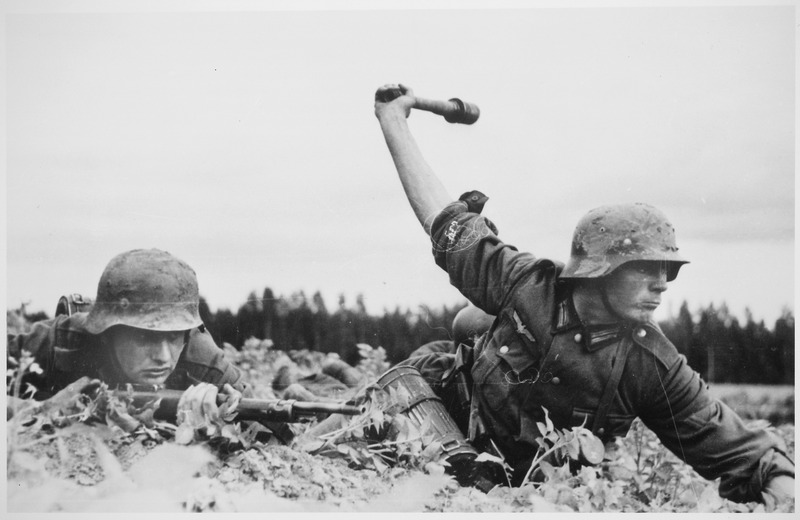
Veterans are able to tell that this man isn't waving hi. Recruits? They blew up, waving hi back.
The German factions have no tech requirements for their normal grenades so expect to meet these as soon as he has sufficient munitions. Against Allies, you are most likely to face grenades from the US player. The UKF has access to a similar grenade upgrade but this is less commonly used, while the Soviets depend on what you are facing. Cons can upgrade molotovs, while penals have powerful satchel charges with long timers.
As the game progresses, both you and your opponent will have an increasing strain on your micro. You should focus on the engagement where you have the most to lose and have the highest risk of suffering a wipe.
Infantry in short to mid distance firefights, clumped up behind yellow cover, against grenade wielding foes are basically begging to be wiped, unless you give it your full attention. But if you have the time, such a scenario might actually work in your favour if you can bait your opponent to burn munitions on a grenade that you handily dodge. For example, every time you dodge a rifle grenade you are effectively stealing 30 munis from an Ostheer player's reserve which will delay his much needed LMG42 upgrades. This can be a risky but effective way to bleed your opponent in the long run.
- Stay behind green cover to reduce the risk of being wiped by an explosive grenade.
- Know what grenades your opponent has available and at what point he is likely to be able to use them.
- Focus your attention on the engagements within grenade throw range.
Veterans are able to tell that this man isn't waving hi. Recruits? They blew up, waving hi back.
The German factions have no tech requirements for their normal grenades so expect to meet these as soon as he has sufficient munitions. Against Allies, you are most likely to face grenades from the US player. The UKF has access to a similar grenade upgrade but this is less commonly used, while the Soviets depend on what you are facing. Cons can upgrade molotovs, while penals have powerful satchel charges with long timers.
As the game progresses, both you and your opponent will have an increasing strain on your micro. You should focus on the engagement where you have the most to lose and have the highest risk of suffering a wipe.
Infantry in short to mid distance firefights, clumped up behind yellow cover, against grenade wielding foes are basically begging to be wiped, unless you give it your full attention. But if you have the time, such a scenario might actually work in your favour if you can bait your opponent to burn munitions on a grenade that you handily dodge. For example, every time you dodge a rifle grenade you are effectively stealing 30 munis from an Ostheer player's reserve which will delay his much needed LMG42 upgrades. This can be a risky but effective way to bleed your opponent in the long run.
Phases of the Game
Broadly, people tend to divide a CoH2 game into three phases: Early, mid, and late game. Each of these play out very differently in terms of priorities, playstyle and available units.
Early Game
Approx Time Period: First 10 minutes
Key Words: Pick your battles, choose your battleground, and read your opponent
The early game is critical. It sets the foundation for how the rest of the game will play out. At this stage of the game you can expect both players to perform at their optimal level in terms of micro and battlefield awareness. This is due to the fact that they have few units to handle and have a high level of energy.
The aim of the early game is to pick good fights and avoid bad fights. Therefore you should not stay in fights that you cannot win. Try to soft retreat and move the unit elsewhere if you cannot expect the engagement to give more than it takes.
The early game is also where scout cars and light vehicles reign supreme and have to optimize their brief window of opportunity.
The argument could be made that the early game starts on the loading screen. Here you are able to see the map you will play on, as well as the faction, doctrines and chosen bulletins of your opponent. All these things can help you choose your initial approach and try to predict your opponent's playstyle. How to do this is described in further detail later.
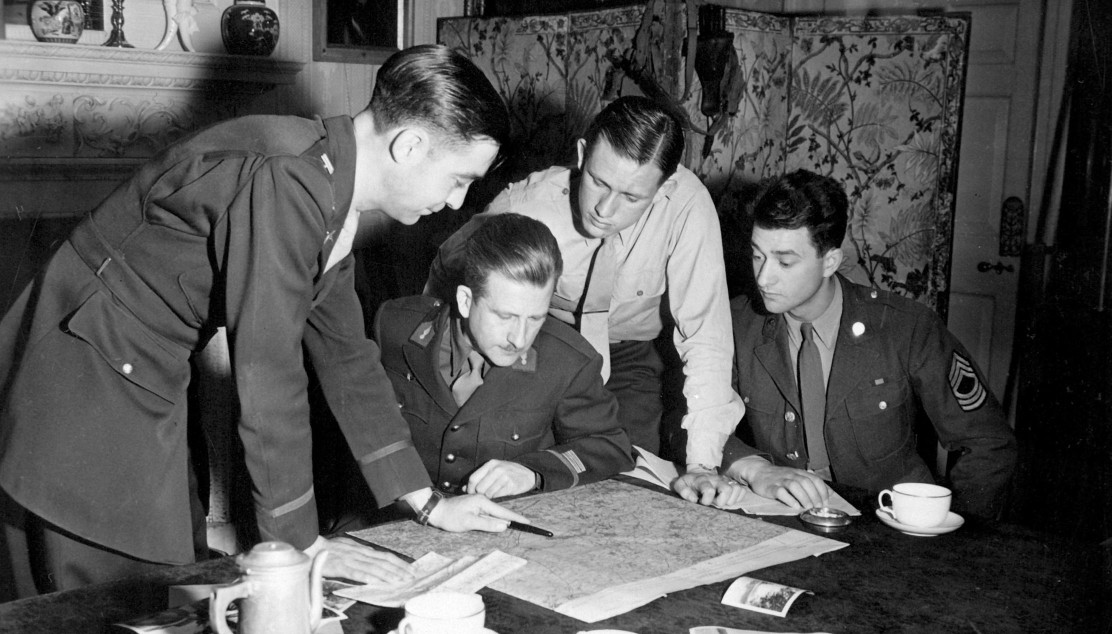
Is that a... tea cup? Goodness. These Americans are treading dangerous waters.
Do you start securing your own cut-offs and resources? Or will you rush up and harass your opponent's strategic resources? As soon as the game fires up you should have devised an opening.
Securing your own side is the default option. It is viable for every faction. In this case, you should generally prioritise your cut-offs, then fuel and munitions, and finally any outer points. Or, you contest your opponent's side. As for securing Victory points, these are of low priority in the early as they do not give resources and also reveal your location on the map!
Opening by harassing your opponent is riskier, but potentially much more rewarding. You seize the initiative and shape the early game. This approach is easier on certain maps and for certain factions.
OKW have the strong Sturmpioneers and fast Kubelwagens. These units have great synergy as the Kubels do not bleed manpower and the Sturmpios are able to repair them when Kubel's health is low. By gunning for your opponent's cut-offs, you can use this combination to keep your opponent busy while the rest of your units capture your side of the map.
Soviets benefit from their large unit size, which can help them hold onto areas. Furthermore, the Conscripts are able to build large walls of sandbags, and merge with other units and team weapons. All of this makes it possible to hold ground for even longer.
While there are ways for the British and Wehrmacht to play aggressive, the factions are generally more defence oriented and need to fight under more controlled conditions. Their small unit size and expensive reinforcement costs make them less than ideal for going deep behind enemy lines.
Kholodny Ferma is a good map for harassment. Especially, for the player starting on the eastern side of the map. The reason for this is the houses placed very close to the opponent's base. By capturing these, it is possible to have a good view of what the opponent is doing. You may also win initial engagements since your garrisoned unit fight under much better conditions than the opponent, who will mainly have to rely on yellow cover.
How do I counter someone using this against me? As mentioned, this strategy is most effective for the person starting on the east side of the map. If you start on the west and suspect someone might use this against you, then use your first unit to occupy the house yourself.
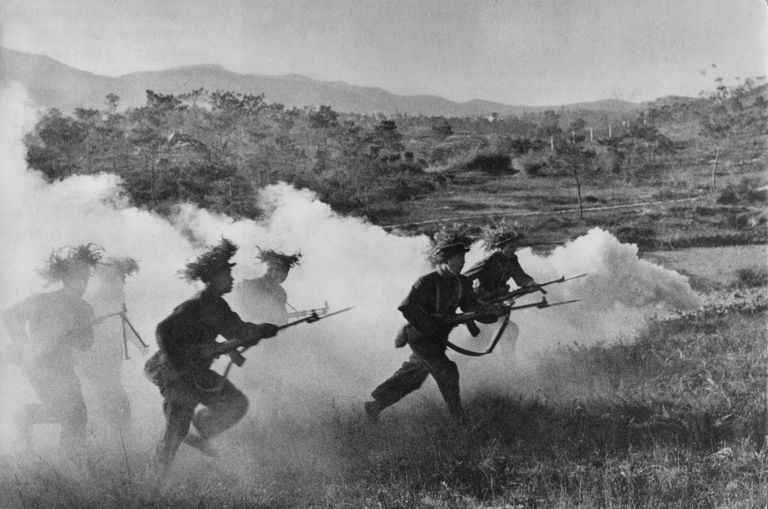
When it comes to aggression, consult these guys. Do note how they scream at the top of their lungs and are charging, bayonet first, at the enemy. In this case, it is their allies... They haven't noticed yet.
Crossroads have a road through the centre of the map, straight to the opponent's cutoff. By acting swiftly, it is possible to catch the opponent off guard with very little cover and even a retreat path on negative cover! These are great conditions to bleed your opponent and delaying their advance.
This strategy can be especially hard to counter when fighting an OKW combination of Sturmpios and Kubels. The best way depends on the faction: UKF or Soviet might counter with light vehicles and sandbags. USF might be altogether better off taking the alternate path out of the base and rush for the opposing fuel point.
Key Words: Pick your battles, choose your battleground, and read your opponent
The early game is critical. It sets the foundation for how the rest of the game will play out. At this stage of the game you can expect both players to perform at their optimal level in terms of micro and battlefield awareness. This is due to the fact that they have few units to handle and have a high level of energy.
The aim of the early game is to pick good fights and avoid bad fights. Therefore you should not stay in fights that you cannot win. Try to soft retreat and move the unit elsewhere if you cannot expect the engagement to give more than it takes.
The early game is also where scout cars and light vehicles reign supreme and have to optimize their brief window of opportunity.
Acquiring Intel First
The argument could be made that the early game starts on the loading screen. Here you are able to see the map you will play on, as well as the faction, doctrines and chosen bulletins of your opponent. All these things can help you choose your initial approach and try to predict your opponent's playstyle. How to do this is described in further detail later.
Is that a... tea cup? Goodness. These Americans are treading dangerous waters.
Capturing the Map
Do you start securing your own cut-offs and resources? Or will you rush up and harass your opponent's strategic resources? As soon as the game fires up you should have devised an opening.
Securing your own side is the default option. It is viable for every faction. In this case, you should generally prioritise your cut-offs, then fuel and munitions, and finally any outer points. Or, you contest your opponent's side. As for securing Victory points, these are of low priority in the early as they do not give resources and also reveal your location on the map!
Opening by harassing your opponent is riskier, but potentially much more rewarding. You seize the initiative and shape the early game. This approach is easier on certain maps and for certain factions.
Good for Aggressive Openings: OKW and Soviets
OKW have the strong Sturmpioneers and fast Kubelwagens. These units have great synergy as the Kubels do not bleed manpower and the Sturmpios are able to repair them when Kubel's health is low. By gunning for your opponent's cut-offs, you can use this combination to keep your opponent busy while the rest of your units capture your side of the map.
Soviets benefit from their large unit size, which can help them hold onto areas. Furthermore, the Conscripts are able to build large walls of sandbags, and merge with other units and team weapons. All of this makes it possible to hold ground for even longer.
Bad for Aggressive Openings: Wehrmacht and UKF
While there are ways for the British and Wehrmacht to play aggressive, the factions are generally more defence oriented and need to fight under more controlled conditions. Their small unit size and expensive reinforcement costs make them less than ideal for going deep behind enemy lines.
Good Maps for Aggressive Openings: Crossroads and Kholodny Ferma
Kholodny Ferma is a good map for harassment. Especially, for the player starting on the eastern side of the map. The reason for this is the houses placed very close to the opponent's base. By capturing these, it is possible to have a good view of what the opponent is doing. You may also win initial engagements since your garrisoned unit fight under much better conditions than the opponent, who will mainly have to rely on yellow cover.
How do I counter someone using this against me? As mentioned, this strategy is most effective for the person starting on the east side of the map. If you start on the west and suspect someone might use this against you, then use your first unit to occupy the house yourself.
When it comes to aggression, consult these guys. Do note how they scream at the top of their lungs and are charging, bayonet first, at the enemy. In this case, it is their allies... They haven't noticed yet.
Crossroads have a road through the centre of the map, straight to the opponent's cutoff. By acting swiftly, it is possible to catch the opponent off guard with very little cover and even a retreat path on negative cover! These are great conditions to bleed your opponent and delaying their advance.
This strategy can be especially hard to counter when fighting an OKW combination of Sturmpios and Kubels. The best way depends on the faction: UKF or Soviet might counter with light vehicles and sandbags. USF might be altogether better off taking the alternate path out of the base and rush for the opposing fuel point.
Mid Game
Approx Time Period: 10-25 minutes
Key Words: High intensity and psychological warfare
The mid game is the meat of the match and is made up of a series of responses and counter responses. Victory points are more important as is bleeding your opponent to help win in the late game.
It is also during the mid game that many low-mid level players will buckle under the psychological pressure of strategic setbacks and loss of units. To level past rank 10, it is in your interest to apply this pressure to your opponent and avoid falling into the same trap of tilt and rage quit when the battle turns against you.
How do you avoid suffering the tilt?
The short answer is simply to keep on playing, no matter what happens and how bad the game is going. While it can be very tempting to throw in the towel early and start anew in another match, it will also severely hamper your learning of the deeper aspects of the game. It only takes watching a few casts on YouTube to realise that CoH2 is designed in a way so there is almost always a way to recover and climb back from the jaws of defeat.
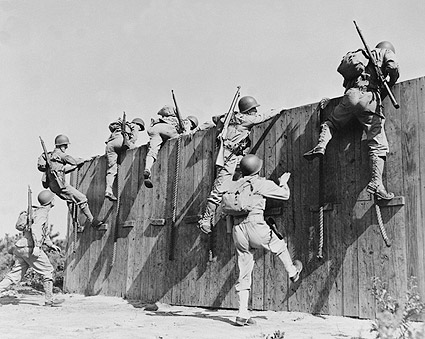
Upper body strength required. Jaws don't tend to open themselves, recruit. You have to lift them up just as you lifted your lady friend downtown. Yes. I saw you. And everything.
Even if you lose in the end, the ability to keep your cool playing on the backfoot, will help you think outside your normal strategies and be more creative in your use of units and abilities.
Because of this, I would recommend that you never surrender or quit a match until defeat. If this is hard to live by then try to instead set a boundary. Like, you will keep playing for at least 25 minutes or fall below 100 VPs. If the game ends with defeat, use the opportunity to thank your opponent for the match and ask them what they felt about your playstyle and what you should have done differently.
A person who won a match will usually feel a small emotional elation and be open to give you a few pointers before leaving the match. This will give you vital intel into how your strategies are perceived by your opponent. It can also be used to better understand what psychological impact you might inflict against your enemies. Finally, it also makes sense to watch replays of your defeats, though it can also be a challenge on your pride. If you feel like you are really stuck, send it into COH2.org for a review.
As mentioned earlier, low to mid range players tend tilt easier and buckle under the pressure. While what triggers it varies from player to player, my experience is that certain units and strategies usually have a higher impact than others:
* The demo charge is harder to use after the latest patch. It will still be effective when placed right next to a building and preferably behind it from the standard point of view. When an opponent enters the building, spring the trap. It will most likely kill the entire squad.
In the mid game, resource points still have a high priority, but it is also at this stage you should focus on draining the opponent's VPs.
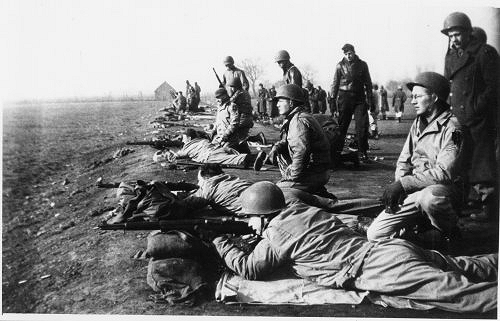
These recruits are being taught to actually shoot their enemy as opposed to giving them a new haircut. For the record: kills are at 1, while haircuts are at steady 102.
A common mistake is to send single units to every corner of the map in order to maximise capping potential. The risk of this strategy is that while you might make short-term territorial gains, you will be outgunned at every encounter and forced to retreat. This will severely reduce the chance of tactical benefits. Furthermore, it is also likely to overload your micro and make you forget about units which will then be wiped.
The flipside of this is to blob up all units and move them around like a biomass of destruction. While this might come as an initial shock to your opponent and force them to pull back, it is also very susceptible to indirect fire, call-in artillery and simply being suppressed by machine guns.
Ideally, you should lock down strategic areas with team weapons and firing platforms, while having a flexible army moving around to watch the enemy movements and attack weaknesses. Often it is best to focus your energy on holding two VPs and skipping the last one unless you see an easy opportunity to take it.
Key Words: High intensity and psychological warfare
The mid game is the meat of the match and is made up of a series of responses and counter responses. Victory points are more important as is bleeding your opponent to help win in the late game.
It is also during the mid game that many low-mid level players will buckle under the psychological pressure of strategic setbacks and loss of units. To level past rank 10, it is in your interest to apply this pressure to your opponent and avoid falling into the same trap of tilt and rage quit when the battle turns against you.
How do you avoid suffering the tilt?
The short answer is simply to keep on playing, no matter what happens and how bad the game is going. While it can be very tempting to throw in the towel early and start anew in another match, it will also severely hamper your learning of the deeper aspects of the game. It only takes watching a few casts on YouTube to realise that CoH2 is designed in a way so there is almost always a way to recover and climb back from the jaws of defeat.
Upper body strength required. Jaws don't tend to open themselves, recruit. You have to lift them up just as you lifted your lady friend downtown. Yes. I saw you. And everything.
Even if you lose in the end, the ability to keep your cool playing on the backfoot, will help you think outside your normal strategies and be more creative in your use of units and abilities.
Because of this, I would recommend that you never surrender or quit a match until defeat. If this is hard to live by then try to instead set a boundary. Like, you will keep playing for at least 25 minutes or fall below 100 VPs. If the game ends with defeat, use the opportunity to thank your opponent for the match and ask them what they felt about your playstyle and what you should have done differently.
A person who won a match will usually feel a small emotional elation and be open to give you a few pointers before leaving the match. This will give you vital intel into how your strategies are perceived by your opponent. It can also be used to better understand what psychological impact you might inflict against your enemies. Finally, it also makes sense to watch replays of your defeats, though it can also be a challenge on your pride. If you feel like you are really stuck, send it into COH2.org for a review.
How to Psychologically Pressure Your Opponent
As mentioned earlier, low to mid range players tend tilt easier and buckle under the pressure. While what triggers it varies from player to player, my experience is that certain units and strategies usually have a higher impact than others:
- Mines
- Demolition Charges*
- Super Heavies
- Grenades
- Snipers
* The demo charge is harder to use after the latest patch. It will still be effective when placed right next to a building and preferably behind it from the standard point of view. When an opponent enters the building, spring the trap. It will most likely kill the entire squad.
In the mid game, resource points still have a high priority, but it is also at this stage you should focus on draining the opponent's VPs.
These recruits are being taught to actually shoot their enemy as opposed to giving them a new haircut. For the record: kills are at 1, while haircuts are at steady 102.
A common mistake is to send single units to every corner of the map in order to maximise capping potential. The risk of this strategy is that while you might make short-term territorial gains, you will be outgunned at every encounter and forced to retreat. This will severely reduce the chance of tactical benefits. Furthermore, it is also likely to overload your micro and make you forget about units which will then be wiped.
The flipside of this is to blob up all units and move them around like a biomass of destruction. While this might come as an initial shock to your opponent and force them to pull back, it is also very susceptible to indirect fire, call-in artillery and simply being suppressed by machine guns.
Ideally, you should lock down strategic areas with team weapons and firing platforms, while having a flexible army moving around to watch the enemy movements and attack weaknesses. Often it is best to focus your energy on holding two VPs and skipping the last one unless you see an easy opportunity to take it.
Late Game
Approx Time Period: 25+ minutes
Key Words: Full arsenal, fatigue, and finishing moves
Late game is endurance, cool-head and exploiting your opponent's lapse of attention. Most casual players feel the strain of having to concentrate for this long and keeping up with the large number of units in the field. Fuel and munitions, while still important, tend to be less of an issue. All focus is now to either capture the Victory points or make an assault that breaks the opponent's will.
As mentioned, fuel and munitions are generally less of a concern at this point, but you will still need your manpower to reinforce your squads. It is not tied to your captured points but instead affected by your units and pop cap. The more units you have on the field, the less manpower you receive each minute. You might want to hold back depleted squads in your base in order to save your manpower for a tank or call-in unit.
Some factions also have ways of converting manpower through abilities. Most notably are the “Rapid Conscription” and “Relief Infantry” abilities by Soviets and the Wehrmacht, which effectively lets you convert munitions into units. Furthermore, the Soviet Conscripts have the “Merge” ability which will let them fill up squads that are more expensive to reinforce. They will retain the stats of a Conscript, but receive the weapon and abilities of the merged unit.
Imagine just having that guy on the horse to fight for you. Your oppenent? The opposite side.
By the late game, you can expect at least one and often both players to have almost maxed out their pop cap. There are a lot of units to keep track of and coordinate, and these units usually also have maximum veterancy. On top of this, you can expect that players have munitions to spare on abilities, off-map support and grenades which will increase the killing potential even further. It is quite common that a bad play or good breakthrough can make or break the game and essentially wipe out most of your own or your opponent's forces in a single push.
There is not any surefire way to prevent this, you should be extra careful in your AT placements and tank movements. Also, keep an eye open and an ear out for smoke or sounds marking indirect fire.
In the late game, it is also crucial to know the opposing faction in terms of what they can field. Recall what units and abilities you have met up to this point, so you have an idea of what late game armour, artillery or off-map support that the enemy might have in his hand.
Building up veterancy takes a long time but grants significant benefits to units. Especially, veterancy 2 tends to increase a unit's stats which will put it above and beyond lower vetted units. Losing max vetted units in the late game often means that new units will not be able to accrue the same amount of veterancy for the remainder of the game. They will struggle severely against your opponent's veterans.
The way to mitigate this risk is to maximise the benefit of your vetted units, without compromising them too much on risky missions.
One way of doing this is to keep veterans for contending the centre VP and sending recruit infantry on stealth capturing missions on the outer VPs. Much of the action often is on the centre, you are more likely to keep attention on your veterans, while lone units on the corners can sometimes be forgotten in the heat of battle. Another approach is to only make heavy commitments and pushes. You consolidate your units in a few specific areas and therefore have a better overview of which units you need to withdraw.
Key Words: Full arsenal, fatigue, and finishing moves
Late game is endurance, cool-head and exploiting your opponent's lapse of attention. Most casual players feel the strain of having to concentrate for this long and keeping up with the large number of units in the field. Fuel and munitions, while still important, tend to be less of an issue. All focus is now to either capture the Victory points or make an assault that breaks the opponent's will.
Manpower is the Critical Resource
As mentioned, fuel and munitions are generally less of a concern at this point, but you will still need your manpower to reinforce your squads. It is not tied to your captured points but instead affected by your units and pop cap. The more units you have on the field, the less manpower you receive each minute. You might want to hold back depleted squads in your base in order to save your manpower for a tank or call-in unit.
Some factions also have ways of converting manpower through abilities. Most notably are the “Rapid Conscription” and “Relief Infantry” abilities by Soviets and the Wehrmacht, which effectively lets you convert munitions into units. Furthermore, the Soviet Conscripts have the “Merge” ability which will let them fill up squads that are more expensive to reinforce. They will retain the stats of a Conscript, but receive the weapon and abilities of the merged unit.
Imagine just having that guy on the horse to fight for you. Your oppenent? The opposite side.
Things Die Faster!
By the late game, you can expect at least one and often both players to have almost maxed out their pop cap. There are a lot of units to keep track of and coordinate, and these units usually also have maximum veterancy. On top of this, you can expect that players have munitions to spare on abilities, off-map support and grenades which will increase the killing potential even further. It is quite common that a bad play or good breakthrough can make or break the game and essentially wipe out most of your own or your opponent's forces in a single push.
There is not any surefire way to prevent this, you should be extra careful in your AT placements and tank movements. Also, keep an eye open and an ear out for smoke or sounds marking indirect fire.
In the late game, it is also crucial to know the opposing faction in terms of what they can field. Recall what units and abilities you have met up to this point, so you have an idea of what late game armour, artillery or off-map support that the enemy might have in his hand.
Veteran Infantry are Irreplaceable
Building up veterancy takes a long time but grants significant benefits to units. Especially, veterancy 2 tends to increase a unit's stats which will put it above and beyond lower vetted units. Losing max vetted units in the late game often means that new units will not be able to accrue the same amount of veterancy for the remainder of the game. They will struggle severely against your opponent's veterans.
The way to mitigate this risk is to maximise the benefit of your vetted units, without compromising them too much on risky missions.
One way of doing this is to keep veterans for contending the centre VP and sending recruit infantry on stealth capturing missions on the outer VPs. Much of the action often is on the centre, you are more likely to keep attention on your veterans, while lone units on the corners can sometimes be forgotten in the heat of battle. Another approach is to only make heavy commitments and pushes. You consolidate your units in a few specific areas and therefore have a better overview of which units you need to withdraw.
Effective and Simple Commanders
I will give you recommendations for commanders that casual players might have the most benefit from. These are based on the consideration that both the player and their opponent have a somewhat limited grasp of the game and/or are having a hard time effectively micromanaging every aspect of the battlefield.
While some commanders will be premium content, I have also ensured to include at least one free commander for every faction. The main focus is on the generalities, so while new patches and developments might shake things up, I do not think this will change much for these choices.
While some commanders will be premium content, I have also ensured to include at least one free commander for every faction. The main focus is on the generalities, so while new patches and developments might shake things up, I do not think this will change much for these choices.
UKF
Being the last faction to be included into the game, the UKF unfortunately also have the least variety to offer in terms of commanders. On the plus side, they are quite a linear faction with a lot of variety in their non-doctrinal roster. They are also a decent faction to learn for new players.

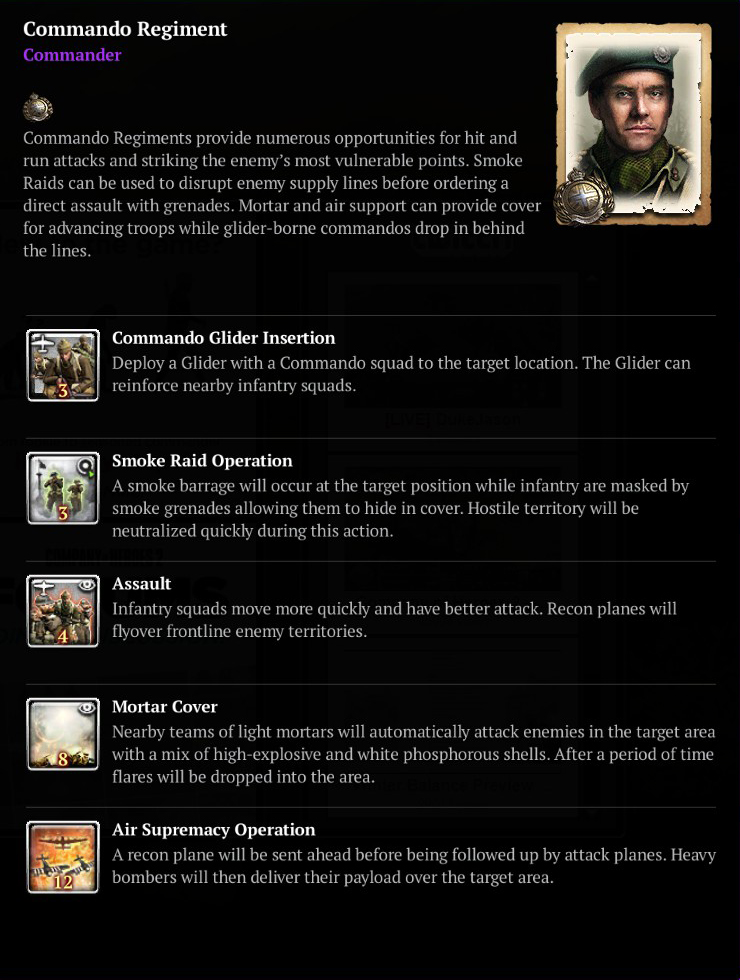
Truth be told most of the best and easiest to use commanders for the British are locked behind a paywall. However, I think that the Commando Regiment is the most beneficial as it will provide both a call-in unit along with a recon glider that doubles as a forward reinforcement point. It also has a variety of munitions based abilities that can provide support. While some of these are situational and take practice from which to benefit. They also have simple offensive support abilities that you can point and click on where to bring the hurt.
One of the primary setbacks for the British is the lack of a vehicle snare. Outside this doctrine, enemy vehicles have to be crippled by either mines, the sniper vet1 ability or the AEC target tread ability. However, with this doctrine, you have the great tank hunter infantry, who can still perform decently against enemy infantry and also both damage and snare vehicles.
On top of this, they have access to the same upgrades as the normal infantry sections and are able to track enemy vehicles in the fog of war, including Goliaths! This unit alone would have made the doctrine worthwhile, but if that was not enough, you also gain access to a resupply halftrack that will let you reinforce in the field and supply you with weapons so you can skip the weapon rack upgrade.
If you are still greedy for more, it has an activated ability that buffs all your infantry and team weapons in friendly territory, and ends by bombarding the enemy borders. There is also another ability which brings down a heavy barrage on a designated area.
The final cherry on the cake is a heavy tank with a forward mounted flamethrower, that can take on both armour and infantry. If you are playing the British and want to spend money or supply on just one doctrine, then this should most certainly be your first priority as it synergises well with some of the natural drawbacks of the British. It also gives you tons of other powerful tools on top of this.
Apart from the standard vehicle snare, the British are also suffering from a lack of easy building clearing options and units that can provide concentrated indirect fire. Both of these issues are solved with this doctrine: Your engineers have the option of flame throwers, and land-mattresses are available for call in. They can saturate a large area with rockets or gas.
Another notable mention, are the Infiltration Commandos that can be spawned from empty buildings (or trenches!) and wreak havoc behind enemy lines. In my games, I almost always have this commander and the Special Weapons doctrine in my standard line'up. My third commander option can be swapped around depending on my strategies and experimentations.
Commando Regiment
Truth be told most of the best and easiest to use commanders for the British are locked behind a paywall. However, I think that the Commando Regiment is the most beneficial as it will provide both a call-in unit along with a recon glider that doubles as a forward reinforcement point. It also has a variety of munitions based abilities that can provide support. While some of these are situational and take practice from which to benefit. They also have simple offensive support abilities that you can point and click on where to bring the hurt.
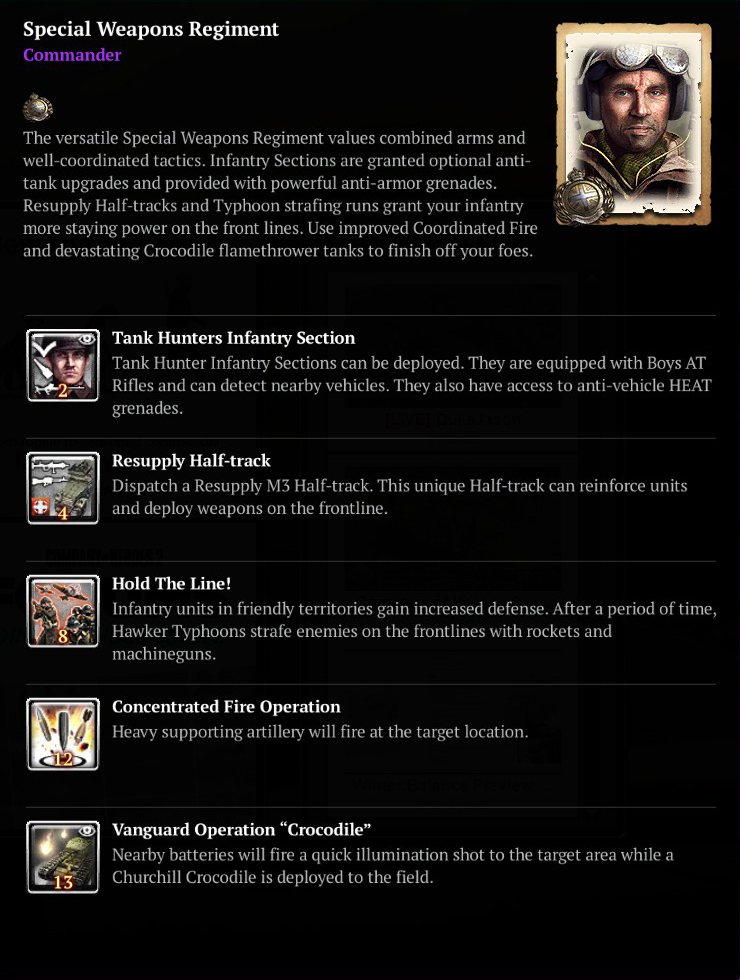
Special Weapons Regiment
One of the primary setbacks for the British is the lack of a vehicle snare. Outside this doctrine, enemy vehicles have to be crippled by either mines, the sniper vet1 ability or the AEC target tread ability. However, with this doctrine, you have the great tank hunter infantry, who can still perform decently against enemy infantry and also both damage and snare vehicles.
On top of this, they have access to the same upgrades as the normal infantry sections and are able to track enemy vehicles in the fog of war, including Goliaths! This unit alone would have made the doctrine worthwhile, but if that was not enough, you also gain access to a resupply halftrack that will let you reinforce in the field and supply you with weapons so you can skip the weapon rack upgrade.
If you are still greedy for more, it has an activated ability that buffs all your infantry and team weapons in friendly territory, and ends by bombarding the enemy borders. There is also another ability which brings down a heavy barrage on a designated area.
The final cherry on the cake is a heavy tank with a forward mounted flamethrower, that can take on both armour and infantry. If you are playing the British and want to spend money or supply on just one doctrine, then this should most certainly be your first priority as it synergises well with some of the natural drawbacks of the British. It also gives you tons of other powerful tools on top of this.
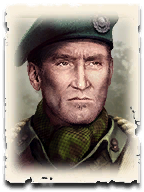
Mobile Assault Regiment
Apart from the standard vehicle snare, the British are also suffering from a lack of easy building clearing options and units that can provide concentrated indirect fire. Both of these issues are solved with this doctrine: Your engineers have the option of flame throwers, and land-mattresses are available for call in. They can saturate a large area with rockets or gas.
Another notable mention, are the Infiltration Commandos that can be spawned from empty buildings (or trenches!) and wreak havoc behind enemy lines. In my games, I almost always have this commander and the Special Weapons doctrine in my standard line'up. My third commander option can be swapped around depending on my strategies and experimentations.
USF
While the USF is also somewhat limited in the actual quantity of commanders, the options they do have are quite diverse and interesting. It can be hard to limit myself to just three picks and I highly encourage that you experiment.
The Infantry Company provides the US with all round utility as well as indirect fire support. The Riflemen ability to build sandbags and mines help make the faction more standardised with the others in the game. Making good use of these abilities will help you immensely in controlling the battlefield.
The mortar halftrack is great as a mobile firing platform and has a phosphorus barrage that is almost certain to force the retreat of enemy team weapons or having them run the high risk of being wiped. The 1919 LMG upgrade changes the Riflemen role into a lethal long range combatant similar to Grenadiers while the barrage and Priest helps punish the opponent for being stationary.
The downside of the Airborne Company is that it puts a hard strain on the manpower resource for a faction which is already very reliant on it. What makes it recommendable, however, is the fact that it will let you delay or skip either Captain or Lieutenant without losing out on any team weapons.
In lower ranked games, it can be significantly harder for players to go without the standard team weapons, which will often lead to them upgrading both Lieutenant and Captain before going for Major. The problem with this is that it will significantly delay the medium armour hitting the field. Without an early start to accrue veterancy, the Shermans will often be outperformed by the German armour.
Apart from the drop of team weapons, the Airborne Commander also gives access to strong and versatile Paratroopers to beef up your mid and late game, to refill the ranks if you have suffered Riflemen losses.
The Pathfinders are a good starter unit for learning how to use snipers as they should be handled essentially the same way as snipers, but are not wiped quite as easily.

USF is arguably the faction that struggles the most with clearing out garrisons. This problem only becomes more serious on densely urban maps like Semoskiy and Arnhem Checkpoint. Because of this, I would generally recommend casual players to either veto these maps or bring the Rifle Company in your line'up.
The Rifle Company has a great balance of infantry with more utility, cost effective indirect fire support and a strong doctrinal Sherman. This doctrine also gives your Rear Echelons a more central role in your game. I would recommend having at least two squads, one with minesweepers (always have sweepers as Allies) and one with a flamethrower for flushing out entrenched Germans. The Phosphorous Barrage should also be used generously on occupied buildings in order to force retreat of team weapons, much like the the mortar-HT ability.
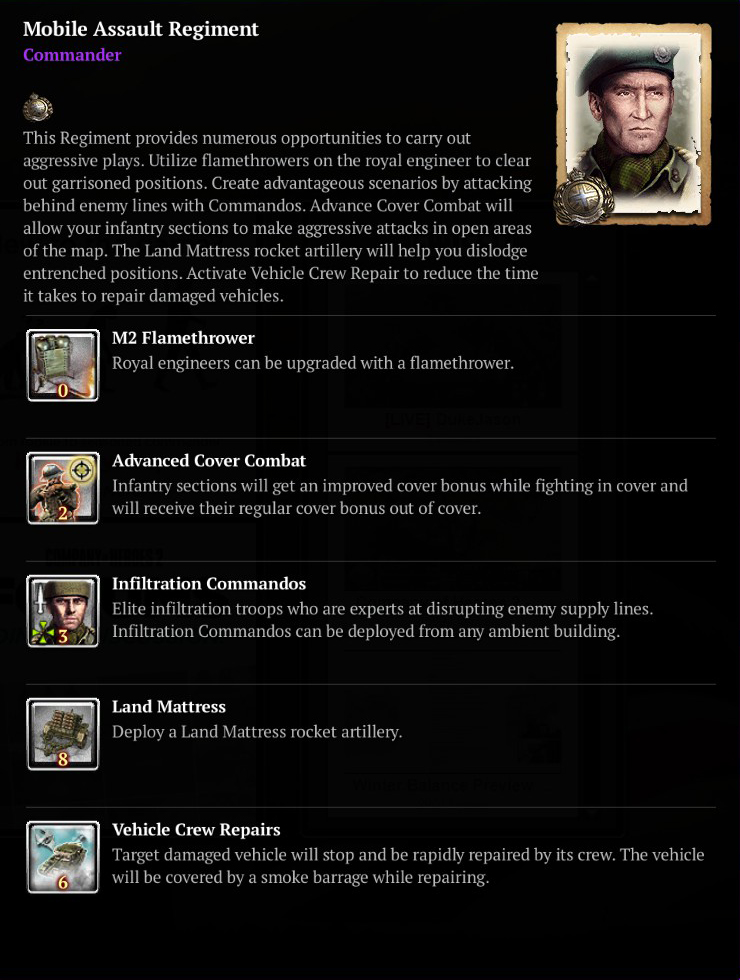
Infantry Company
The Infantry Company provides the US with all round utility as well as indirect fire support. The Riflemen ability to build sandbags and mines help make the faction more standardised with the others in the game. Making good use of these abilities will help you immensely in controlling the battlefield.
The mortar halftrack is great as a mobile firing platform and has a phosphorus barrage that is almost certain to force the retreat of enemy team weapons or having them run the high risk of being wiped. The 1919 LMG upgrade changes the Riflemen role into a lethal long range combatant similar to Grenadiers while the barrage and Priest helps punish the opponent for being stationary.
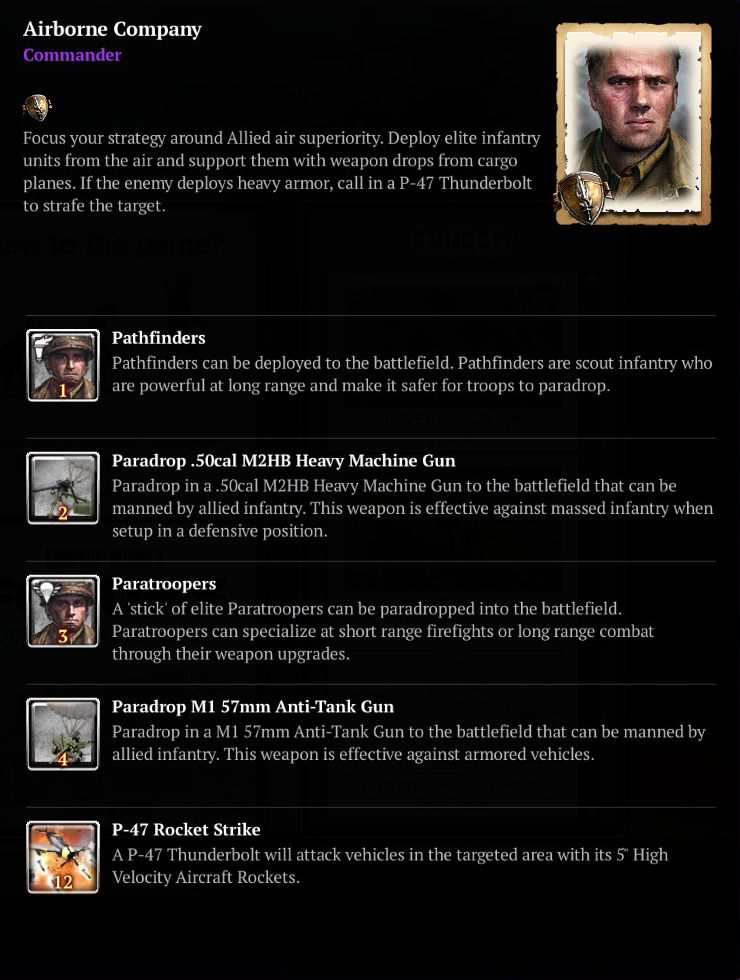
Airborne Company
The downside of the Airborne Company is that it puts a hard strain on the manpower resource for a faction which is already very reliant on it. What makes it recommendable, however, is the fact that it will let you delay or skip either Captain or Lieutenant without losing out on any team weapons.
In lower ranked games, it can be significantly harder for players to go without the standard team weapons, which will often lead to them upgrading both Lieutenant and Captain before going for Major. The problem with this is that it will significantly delay the medium armour hitting the field. Without an early start to accrue veterancy, the Shermans will often be outperformed by the German armour.
Apart from the drop of team weapons, the Airborne Commander also gives access to strong and versatile Paratroopers to beef up your mid and late game, to refill the ranks if you have suffered Riflemen losses.
The Pathfinders are a good starter unit for learning how to use snipers as they should be handled essentially the same way as snipers, but are not wiped quite as easily.
Rifle Company
USF is arguably the faction that struggles the most with clearing out garrisons. This problem only becomes more serious on densely urban maps like Semoskiy and Arnhem Checkpoint. Because of this, I would generally recommend casual players to either veto these maps or bring the Rifle Company in your line'up.
The Rifle Company has a great balance of infantry with more utility, cost effective indirect fire support and a strong doctrinal Sherman. This doctrine also gives your Rear Echelons a more central role in your game. I would recommend having at least two squads, one with minesweepers (always have sweepers as Allies) and one with a flamethrower for flushing out entrenched Germans. The Phosphorous Barrage should also be used generously on occupied buildings in order to force retreat of team weapons, much like the the mortar-HT ability.
SOV
Along with the Ostheer, the Soviets was the first faction in the game. They have more doctrines than the two other Allied factions combined. This means that they have vastly more flexibility and you can go in many directions. Another good thing about this faction is that you will have a lot of versatility and different potential even from the common commanders that you have already available.
Throughout the history of the game, the GMCT has arguably been the doctrine that has best stood the test of time. Regardless of patching and game balance, this particular doctrine has never been in the fringe, and has more often than not defined the Soviet meta and been a staple in the Soviet line'up.
The abilities and units range from useful to nearly essential: The most powerful mortar in the game. The well-rounded Guard Rifle troops. The Mark Vehicle ability to better cut through the German heavy armour with the cost efficient T-34/85. Even though the crew repair is a good ability in its own right, it nearly comes in as a side note because this doctrine already has so much to offer.
This one might be more of a wild card. It relies heavily on capitalising on the early game and relying on an intense use of Conscript utility.
The Rapid Conscription is not as good as it used to be, but if you manage to time it correctly, it is an excellent way to effectively convert munitions float into manpower. This helps even further as additional Conscripts can be used to merge with team weapons and more veteran infantry, so you can reinforce your men in the field rather than bringing them home. While it takes a bit of practice to master, the floods of conscripts with PPSH will often be enough to quickly break the will of >10 lvl players.


While Shock Troops are not seen too often in high level games, they are disproportionately more powerful against players with lower level of attention. As once they are close, they wipe squads and team weapons in a matter of seconds.
The incendiary barrage combined with the charge of a KV-8 is often enough to cause widespread panic. Especially, for an unprepared OKW player as they often have no real counter to a base attack from this versatile tank. If the game drags on, the IS-2 is a nice response to go head to head with the German Tiger that otherwise tend to be a few steps above the Soviet tanks.
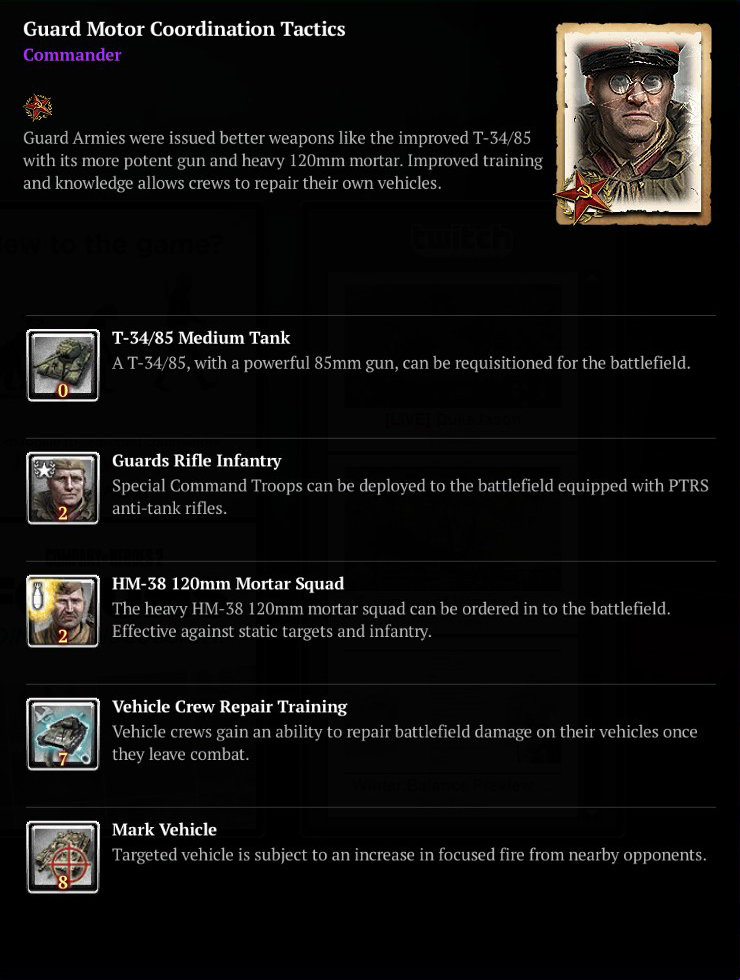
Guards Motor Coordination Tactics
Throughout the history of the game, the GMCT has arguably been the doctrine that has best stood the test of time. Regardless of patching and game balance, this particular doctrine has never been in the fringe, and has more often than not defined the Soviet meta and been a staple in the Soviet line'up.
The abilities and units range from useful to nearly essential: The most powerful mortar in the game. The well-rounded Guard Rifle troops. The Mark Vehicle ability to better cut through the German heavy armour with the cost efficient T-34/85. Even though the crew repair is a good ability in its own right, it nearly comes in as a side note because this doctrine already has so much to offer.
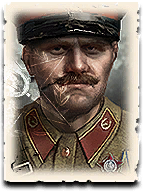
Soviet Reserve Army
This one might be more of a wild card. It relies heavily on capitalising on the early game and relying on an intense use of Conscript utility.
The Rapid Conscription is not as good as it used to be, but if you manage to time it correctly, it is an excellent way to effectively convert munitions float into manpower. This helps even further as additional Conscripts can be used to merge with team weapons and more veteran infantry, so you can reinforce your men in the field rather than bringing them home. While it takes a bit of practice to master, the floods of conscripts with PPSH will often be enough to quickly break the will of >10 lvl players.
Shock Rifle Frontline Tactics
While Shock Troops are not seen too often in high level games, they are disproportionately more powerful against players with lower level of attention. As once they are close, they wipe squads and team weapons in a matter of seconds.
The incendiary barrage combined with the charge of a KV-8 is often enough to cause widespread panic. Especially, for an unprepared OKW player as they often have no real counter to a base attack from this versatile tank. If the game drags on, the IS-2 is a nice response to go head to head with the German Tiger that otherwise tend to be a few steps above the Soviet tanks.
OST
As is the case for Soviets, Ostheer doctrines are numerous, diverse and give a wide variety of strategies. On top of this, Ostheer is arguably the most well rounded faction in terms of infantry, team weapons and tanks. They are generally less reliant on doctrines compared to the Soviets. One thing in common for all commanders, is the Panzer Tactician upgrade which will be elaborated upon in the first recommendation.

This call-in heavy doctrine is the kind that just gives you a bit of everything which is useful for a low to mid level player. One thing that is especially beneficial for newer players is the Panzer Tactician, which grants a smoke ability for every motorised vehicle in your roster.
This is just great utility across the board, but even more so for lower skilled players, as they are worse at predicting their opponent's moves and overcomitting vehicles where better players would think the better of it. With the smoke ability, all your vehicles are given a second chance to survive your mistakes and pull out of harm's way.
Another easy and noteworthy option of this doctrine is the Osttruppen Reserves which gives you a quick and affordable way to refill your ranks if you have suffered a lot of wipes. Do not expect these guys to hold out for long on their own, but their six-man squad makes them harder to wipe. Their cheap and quick reinforcement cost makes them great for recrewing abandoned team weapons.
Finally, the Command Tank call-in will make your soldiers survive longer in the field by reducing the damage taken by 20% when within the radius of the tank. It also performs decently against infantry and light vehicles. But the snub nosed barrel of this early model Panzer 4 will not be able to duke it out with enemy medium armour.
The Puma is also a good vehicle. Albeit harder for lower tier players to manage cost effectively, the counteroffensive tactic is good enough for the price, but also forgettable in the heat of battle. The true lack of this doctrine is fire support, but other than that it will give you a lot of wiggle room.
This doctrine has a central focus on giving Ostheer more utility and mitigate some of their weaknesses. The G43 will make your Grenadiers much more mobile and better at all ranges which makes them a lot more flexible than the LMG42 upgrade. The stun grenades are a cheap way to incapacitate an enemy squad and the Stormtroopers are good for sneaking behind team weapons, while also providing a stealth unit with flexible options.
Finally, there is the Tiger Ace which can be deployed for 800mp, but will have to be used very aggressively to compensate for the resource penalties that come with it.
While this is not a commander you will see often in the top level games, it does provide an effective and well-rounded toolkit for casual players, which also nicely benefit the Ostheer roster.
If you are struggling against British emplacements, the mortar HT can use an incendiary barrage that will saturate an area with flames and make it impossible to repair a damaged emplacement. The mortar along with other indirect fire will also benefit from the line of sight provided by the recon plane, which also makes it easy for you to use the cluster bombs to maximum effect.
In the end, you can supplement your army with the well-rounded Tiger tank that (along with all your other vehicles) will have the added strategic benefit of the smoke ability. On paper this doctrine pretty much gives you everything you could ask for without straining a single type of resource. So, if you have it or have the supply for it, then give it a spin.
Mobile Defense Doctrine
This call-in heavy doctrine is the kind that just gives you a bit of everything which is useful for a low to mid level player. One thing that is especially beneficial for newer players is the Panzer Tactician, which grants a smoke ability for every motorised vehicle in your roster.
This is just great utility across the board, but even more so for lower skilled players, as they are worse at predicting their opponent's moves and overcomitting vehicles where better players would think the better of it. With the smoke ability, all your vehicles are given a second chance to survive your mistakes and pull out of harm's way.
Another easy and noteworthy option of this doctrine is the Osttruppen Reserves which gives you a quick and affordable way to refill your ranks if you have suffered a lot of wipes. Do not expect these guys to hold out for long on their own, but their six-man squad makes them harder to wipe. Their cheap and quick reinforcement cost makes them great for recrewing abandoned team weapons.
Finally, the Command Tank call-in will make your soldiers survive longer in the field by reducing the damage taken by 20% when within the radius of the tank. It also performs decently against infantry and light vehicles. But the snub nosed barrel of this early model Panzer 4 will not be able to duke it out with enemy medium armour.
The Puma is also a good vehicle. Albeit harder for lower tier players to manage cost effectively, the counteroffensive tactic is good enough for the price, but also forgettable in the heat of battle. The true lack of this doctrine is fire support, but other than that it will give you a lot of wiggle room.
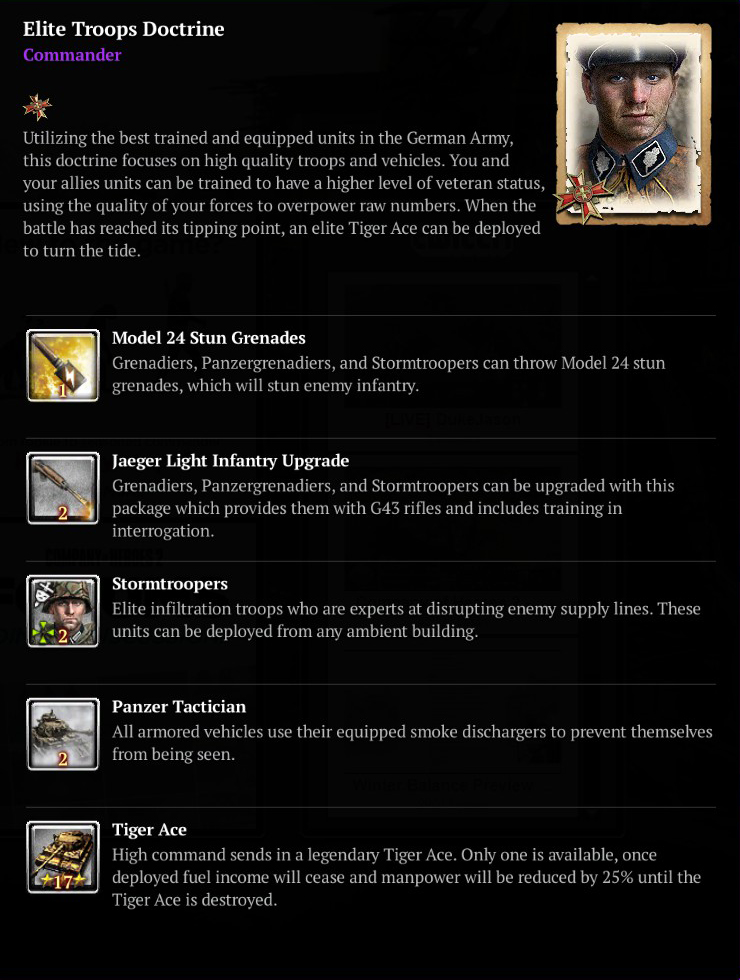
Elite Troops Doctrine
This doctrine has a central focus on giving Ostheer more utility and mitigate some of their weaknesses. The G43 will make your Grenadiers much more mobile and better at all ranges which makes them a lot more flexible than the LMG42 upgrade. The stun grenades are a cheap way to incapacitate an enemy squad and the Stormtroopers are good for sneaking behind team weapons, while also providing a stealth unit with flexible options.
Finally, there is the Tiger Ace which can be deployed for 800mp, but will have to be used very aggressively to compensate for the resource penalties that come with it.
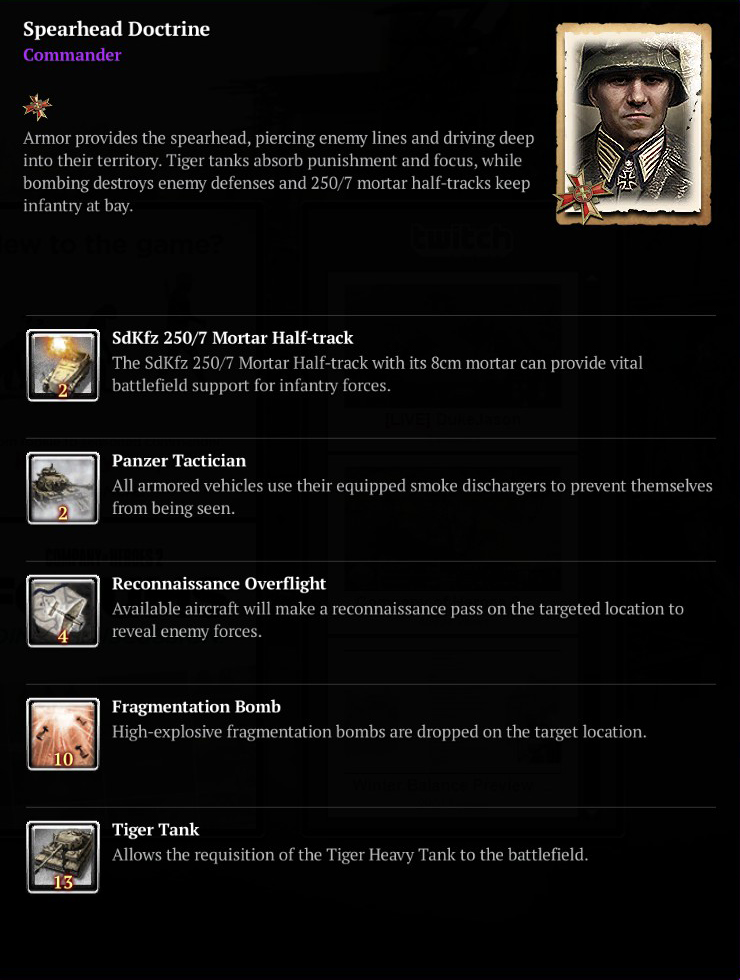
Spearhead Doctrine
While this is not a commander you will see often in the top level games, it does provide an effective and well-rounded toolkit for casual players, which also nicely benefit the Ostheer roster.
If you are struggling against British emplacements, the mortar HT can use an incendiary barrage that will saturate an area with flames and make it impossible to repair a damaged emplacement. The mortar along with other indirect fire will also benefit from the line of sight provided by the recon plane, which also makes it easy for you to use the cluster bombs to maximum effect.
In the end, you can supplement your army with the well-rounded Tiger tank that (along with all your other vehicles) will have the added strategic benefit of the smoke ability. On paper this doctrine pretty much gives you everything you could ask for without straining a single type of resource. So, if you have it or have the supply for it, then give it a spin.
OKW
The OKW army is somewhat limited in doctrines, but on the plus side, all three starting doctrines are among the best available.
In my opinion, the Spec Ops commander is a good choice to have in your arsenal, but should only be picked when certain developments happen during the game.
While all the abilities range from decent to good, the centrepiece of the doctrine is the Panther call-in. This is espcially important if you find yourself in a situation where your Schwere truck is delayed.
Usually, this happens when you have teched for Mechanized and spend fuel on light tanks, while also being behind on fuel or unfortunate enough to lose a truck while it is setting up for the Schwere HQ. In general, if you find yourself in a situation where you are facing medium tanks without having a Schwere HQ set-up, it can be a good idea to delay it and instead dig your heels in until you have the CP and resources for the call-in.
Breakthrough is a call-in heavy commander that also has an useful ability together with artillery support. In this doctrine, the Panzerfusiliers are the main attraction. It is hard to overemphasize how versatile these guys are.
As the only OKW six-man squad, they are harder to wipe, they have access to a weapon upgrade that will make them top-notch fighters at all ranges and on the move. On top of this, they have both an AT and AI grenade, and with veterancy, they receive a flare and passive sprint. However, the temptation of these guys can also be an Achilles Heel as some people will be so enthusiastic about having them, that they will commit to recruiting them even when they are already well stocked on infantry.
This can lead to serious setbacks when your opponent starts pumping out light armour. The AT snares will generally not be sufficient to take out tanks and the lack of proper anti armour will make the mid game problematic.
It is therefore best to pick this doctrine if you have not opened up with a heavy Volks build or potentially suffered some unlucky wipes early in the game. Another important ability from this doctrine is the often forgotten Breakthrough Tactics. It should be used exclusively for attacking your opponent's cut-offs and vital resources in the early game, and for exerting VP control in the late game.
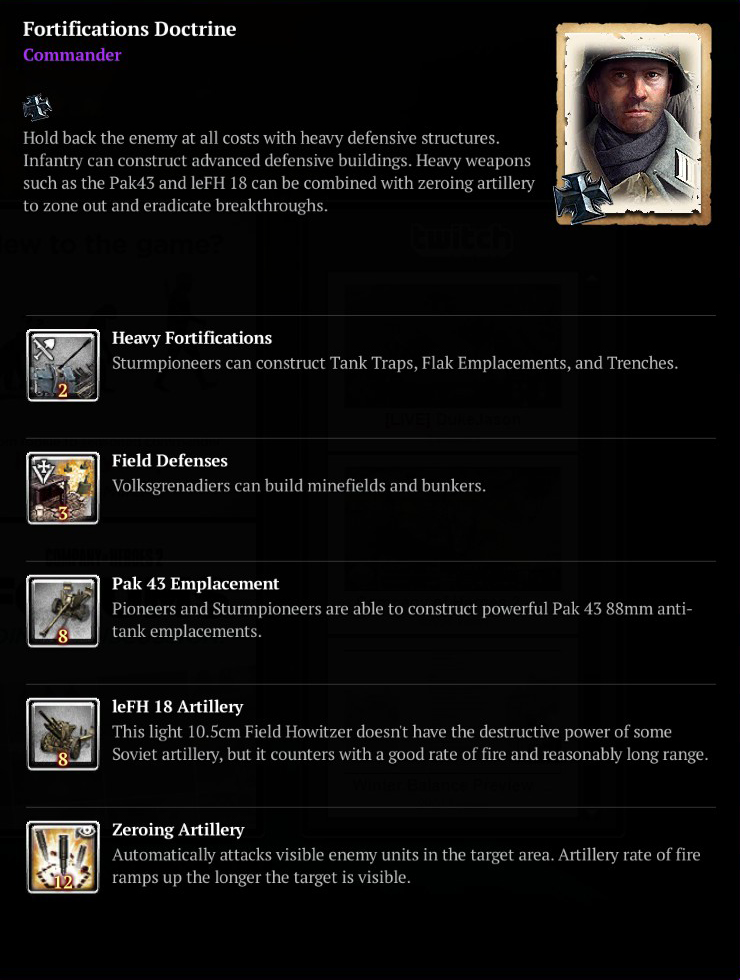
If you already have some experience as the Ostheer, and find that you miss some of their strategic edges, this doctrine might be just the thing. The Flak Emplacement has become a lot more viable in recent patches and if built early, it can pretty consistently fend off infantry and light armour alike. They are best used defensively for an exposed cut-off or fuel point. While the Flak Emplacement has its occasional use, the s-mines and MG bunkers are a central reason for picking the Fortifications Doctrine. The bunkers are a good way to both lock down an area, and also make good use of manpower and munitions without spending pop-cap.
The s-mines are especially useful in areas where you expect infantry rather than tanks to make their move. And while it requires that you have 60 munitions in the bank, you can spend as little as 15 munitions to place a single patch and then cancel the order, making it by far the most cost-efficient anti-infantry mine in the game.
The Pak43 is a rare sight in 1v1, but has great range, damage output and can shoot through shotblockers when you use attack ground. That makes it a deadly anti-tank emplacement which synergises well when defended by one or two Flak Emplacements.
Other than that, the leFH 18 is often what the doctrine is picked for, as this can rain down destruction over most of a 1v1 map even when placed immediately outside your own base. The Zeroing Artillery is also good, but expensive and often not needed as the leFH will often be a more consistent, and the cheaper choice.
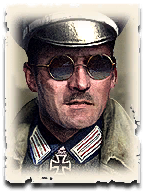
Special Operations Doctrine
In my opinion, the Spec Ops commander is a good choice to have in your arsenal, but should only be picked when certain developments happen during the game.
While all the abilities range from decent to good, the centrepiece of the doctrine is the Panther call-in. This is espcially important if you find yourself in a situation where your Schwere truck is delayed.
Usually, this happens when you have teched for Mechanized and spend fuel on light tanks, while also being behind on fuel or unfortunate enough to lose a truck while it is setting up for the Schwere HQ. In general, if you find yourself in a situation where you are facing medium tanks without having a Schwere HQ set-up, it can be a good idea to delay it and instead dig your heels in until you have the CP and resources for the call-in.
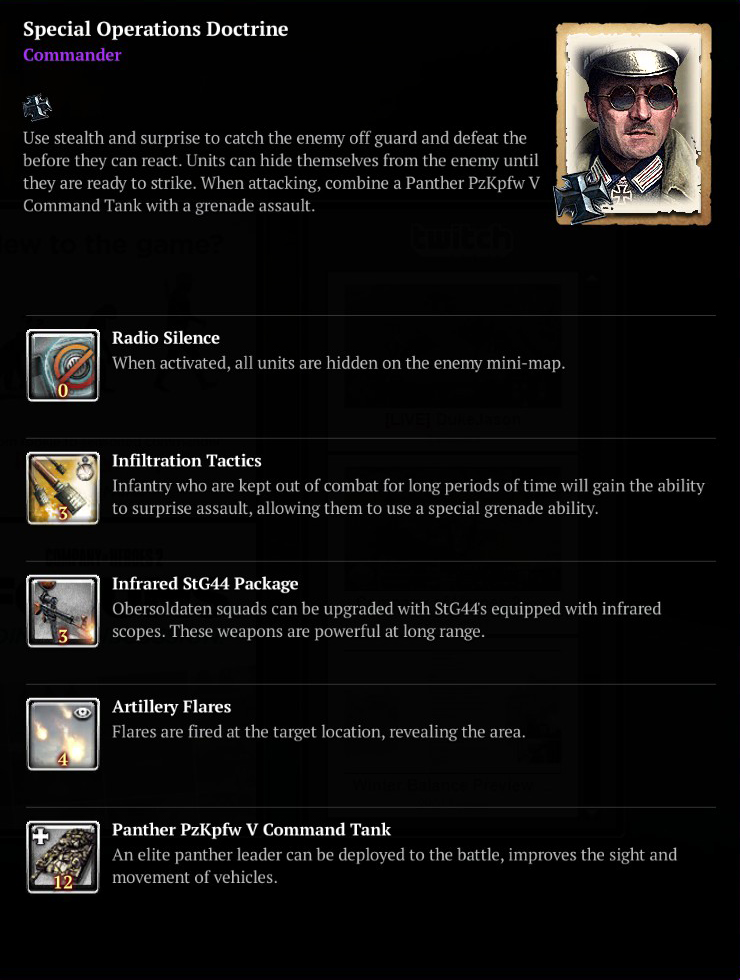
Breakthrough Doctrine
Breakthrough is a call-in heavy commander that also has an useful ability together with artillery support. In this doctrine, the Panzerfusiliers are the main attraction. It is hard to overemphasize how versatile these guys are.
As the only OKW six-man squad, they are harder to wipe, they have access to a weapon upgrade that will make them top-notch fighters at all ranges and on the move. On top of this, they have both an AT and AI grenade, and with veterancy, they receive a flare and passive sprint. However, the temptation of these guys can also be an Achilles Heel as some people will be so enthusiastic about having them, that they will commit to recruiting them even when they are already well stocked on infantry.
This can lead to serious setbacks when your opponent starts pumping out light armour. The AT snares will generally not be sufficient to take out tanks and the lack of proper anti armour will make the mid game problematic.
It is therefore best to pick this doctrine if you have not opened up with a heavy Volks build or potentially suffered some unlucky wipes early in the game. Another important ability from this doctrine is the often forgotten Breakthrough Tactics. It should be used exclusively for attacking your opponent's cut-offs and vital resources in the early game, and for exerting VP control in the late game.
Fortifications Doctrine
If you already have some experience as the Ostheer, and find that you miss some of their strategic edges, this doctrine might be just the thing. The Flak Emplacement has become a lot more viable in recent patches and if built early, it can pretty consistently fend off infantry and light armour alike. They are best used defensively for an exposed cut-off or fuel point. While the Flak Emplacement has its occasional use, the s-mines and MG bunkers are a central reason for picking the Fortifications Doctrine. The bunkers are a good way to both lock down an area, and also make good use of manpower and munitions without spending pop-cap.
The s-mines are especially useful in areas where you expect infantry rather than tanks to make their move. And while it requires that you have 60 munitions in the bank, you can spend as little as 15 munitions to place a single patch and then cancel the order, making it by far the most cost-efficient anti-infantry mine in the game.
The Pak43 is a rare sight in 1v1, but has great range, damage output and can shoot through shotblockers when you use attack ground. That makes it a deadly anti-tank emplacement which synergises well when defended by one or two Flak Emplacements.
Other than that, the leFH 18 is often what the doctrine is picked for, as this can rain down destruction over most of a 1v1 map even when placed immediately outside your own base. The Zeroing Artillery is also good, but expensive and often not needed as the leFH will often be a more consistent, and the cheaper choice.
Closing
With these words, I hope you will have better insight next time you head for the battlefield. And will feel your opponents tremble before you, as your level keeps racing towards the 10 benchmark, and possibly... even beyond.
Godspeed Commander!
Godspeed Commander!
 Joshua85
  RitaBrush
  MajorBloodnok
  FichtenMoped
  Yukiko
  Jae For Jett