
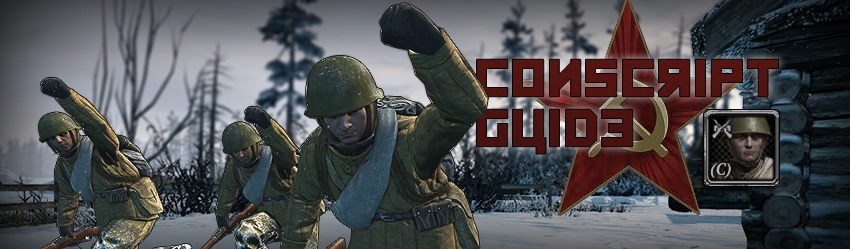
Introduction

Cost: 240 manpower
Build-time: 25 seconds
Pop cap: 6
Health: 480
Conscript squads are the backbone infantry of every Soviet army. In almost every 1v1 game either you or your opponent will make Conscripts. This guide will teach you exactly how to use conscript squads to your advantage and how to play against them.
Build Order
First of all, how many Conscript should be made in a single game? Production varies upon playstyle and ties in with your overall build order. Players range from building only 1 squad to 4 or more squads. Each number of squads you make has it’s advantages and disadvantages. If you make 4+ squads you can expect an easier early game, being able to take most of the map, given that your opponent is not good at stopping flanks. However, if they are good at stopping your flanking, you may very well end up not being able to penetrate the Ostheer army early. Having pumped too much resources into your early game, you will fall behind in the mid and late game. 1-2 squads will allow you to build your Tier 1 and Tier 2 very quickly. However, within that stage of building you will be vulnerable: with the Ostheer player possibly making up to 3-4 T1 units of his own, you may well end up being pushed off the map before better units arrive.
Currently the best option for the majority of games as Soviets is producing 3 conscript squads. This number will allow you to hold your side of the map and exploit weaknesses in your opponent's formation, as well as tech up within a decent time frame. You will not be overextending in the early game, and you will also not be very vulnerable. Note that making your second Engineer earlier than 3 Conscripts is usually pointless since engineer squads are not very good in combat until they get the flamethrower upgrade. If you make an engineer squad after only 2 Conscripts, your Engineer will have to wait a while before it can be upgraded, so long that you may as well have bought that 3rd conscript squad anyway.

Sepha's build order
Keep in mind that having only 3 squads instead of 4 is also great because at only 1 Command Point you will open up the option to field Shock Troops or Guards Rifle Infantry. 3 squads + 1 of these powerful units is better than 4 Conscripts in the mid game. Playing for the long game rather than the early game will allow you to win more consistently against good players.

Or

What will you choose?
Currently the best option for the majority of games as Soviets is producing 3 conscript squads. This number will allow you to hold your side of the map and exploit weaknesses in your opponent's formation, as well as tech up within a decent time frame. You will not be overextending in the early game, and you will also not be very vulnerable. Note that making your second Engineer earlier than 3 Conscripts is usually pointless since engineer squads are not very good in combat until they get the flamethrower upgrade. If you make an engineer squad after only 2 Conscripts, your Engineer will have to wait a while before it can be upgraded, so long that you may as well have bought that 3rd conscript squad anyway.
Sepha's build order
Keep in mind that having only 3 squads instead of 4 is also great because at only 1 Command Point you will open up the option to field Shock Troops or Guards Rifle Infantry. 3 squads + 1 of these powerful units is better than 4 Conscripts in the mid game. Playing for the long game rather than the early game will allow you to win more consistently against good players.
Or
What will you choose?
Tactics
Now that we have our 3 conscript squads on the field, you’ll want to assign to each of them a hotkey; usually CTRL+1, CTRL+2 and CTRL+3 so that when you press 1, 2 or 3 you instantly select the respective squad. Double tap to instantly go to a squad. This will help in times when you need to split your focus over multiple fights on the battlefield: you can simply double tap the number to instantly pan the camera to your unit's location.
Rarely will you want to keep 2 squads together when entering into the fog of war: having a machine gun facing you ready to instantly pin 2 squads is much worse than having it pin just 1 squad. Make sure you move with one squad in front and the other a little further behind it. You can always Ooorah! the squad behind to catch up if you've pulled off a successful flank.
Try to approach potential Ostheer unit positions from different angles and always expect an MG team to be facing one of your approaches. This will allow you to pull off a lot more flanks than if you were to group up all of your units, or only attempt to flank units that you already have vision of. If one of your squads is being pinned by an MG and you leave it there, your opponent will assume that you’re going to flank him and he’ll turn his MG around. You can counter this by already having timed and pulled off that flank before your opponent can react. This takes quite a bit of practice, but it can mean the difference between losing or winning early game battles.
Ooorah!

The Ooorah! ability can help you in combat in multiple ways. Ooorah! gives your squad a +1 speed bonus for a short duration at the cost of 5 munitions. Use this ability to flank, storm a machine gun that is setting up or to reach an important house before your enemy. It can also be used to chase a vehicle to get in range for an AT Grenade or to force enemy snipers to retreat.
Merge

The Merge ability allows you to reinforce your support weapons on the field and thus save time. Merge with a 3 man mortar crew and the squad will be at full size again. Make sure however that you never Merge an under-strengthened Conscript Squad: losing a whole squad to refill a support unit is not worth the cost!
Trip Wire Flares

The Tip Wire Flares ability can be used as soon as your Conscripts reach veterancy level 1. It allows you to plant a small anti-personal mine that launches a flare into the sky when it's triggered. The flare reveals a large area of the map where you placed the trap. Use it to protect your flanks or to keep an eye on high-traffic areas of the battlefield.
Upgrades
The Molotov Cocktail
When to upgrade molotovs is a very important decision, don't neglect it! Way too often players upgrade molotovs before even seeing any enemy unit, which is almost the worst thing you can do. First of all, a great way to judge if you should purchase molotovs early is to play a fair amount of games as Ostheer against Soviets who use them early on. If you are able to dodge your units out of most molotov throws with ease, then it’s safe to say you are within the skill range of players who can easily dodge early game molotovs. Thus, you should not be purchasing molotovs yourself because Ostheer players of your skill level will also be able to dodge them. If you find yourself often getting caught in molotovs and losing units to them, then you can feel free to upgrade molotovs in the early game and use them whenever possible.
For those who are able to dodge most molotovs (it has a very long casting time and the conscript squad will often come out of cover and walk over to you to throw it) you should not be upgrading molotovs before you get your three conscript squads on the field. There are a few exceptions to this such as when the Ostheer player has decided to put every single unit he has in buildings and you are unable to get him out. Usually you can go somewhere else to capture points on the map but when you can’t, molotovs are invaluable.
Once you have your three conscript squads on the field, you may still not want to buy molotovs depending heavily on your opponent. If you can tell that your opponent has quick reflexes and maneuvers his army into great positions, don’t buy them. If your opponent has 2 or more MG squads, likes to put most of their units into buildings or often has bad positioning, then you will want to upgrade molotovs. When using a molotov in the open, try to get as close as possible to the unit you’re going to throw it at (they’re usually standing in cover anyway) and then throw it. If you order a conscript to throw it from too far away, your squad will stand out in the open and make your intention very obvious.
AT Grenades

This upgrade along with molotovs is done very quickly. You will often not even have to pre-emptively upgrade AT Grenades. Once you see a vehicle and start that upgrade, you can either survive long enough to throw one, or you're caught out of position and have to instantly retreat anyway.
There is not much decision making to be done here: the upgrade is cheap and the ability is cheap as well. When you see enemy vehicles you hear a tank in the fog of war, upgrade. AT Grenades are only available to conscript squads, have a decent range and do engine damage to any vehicle hit by them, snaring the unit to be hit by more AT Grenades or any anti-tank firepower you have on the field.
Unit Healing

This upgrade is particularly hard to time right because of it’s large cost of 250 Manpower. You don't want to get it too early since having an extra squad or teching early on is more important. However, you will want to make sure that you upgrade it within the first 10 minutes because it will be healing all of your squads back to full health whenever they retreat to your base. It’s an essential economic upgrade that will give you staying power in the mid and late game stages.
Commander Abilities
Hit the Dirt!

A very powerful ability that I don't recommend using nonetheless. When active, your conscript squad loses the ability to move while gaining defensive bonuses and becoming immune to suppression. However, you are unable to deactivate the ability for a short period of time, so a good Ostheer player can move back into decent cover or throw a grenade on top of you, forcing you to either retreat or hope the grenade doesn't do enough damage. Mortar fire is also an excellent counter. Note that Hit the Dirt! cannot be activated if the squad is being suppressed.
Conscript Assault Package

To be used in sync with Hit the Dirt! as they are in the same commander tree. This individual upgrade grants 2 PPSh sub-machine guns to a conscript squad. However, currently Shock Troops do a much better job at killing enemy infantry at close range. In the mid game, this makes Conscripts only really useful to throw AT Grenades to snare vehicles, and to provide long range firepower while shock troops do a lot of damage up front.
Conscript Repair Kit

Allows your Conscripts to repair vehicles and is in the same commander tree as Shock Troops: the Shock Motor Heavy Tactics. Pretty much self explanatory, it makes this commander tree more appealing Shock Frontline Heavy Tactics: while the latter also has Shock Troops, it lacks the precision bombing strike of the former. The big question is, are you playing team games or 1v1s? If 1v1s then pick the Shock Frontline Heavy Tactics with it's IS-2; if team games then get the ISU-152 of the Shock Motor Heavy Tactics.
Bulletins Affecting Conscript Squads
- Recruit Training: Infantry - Concripts have 2% increase accuracy

- Oorah! - Concripts have 5% increased damge

- Officer Training: Infantry - Concripts have 3% increased health

- Infantry Production I - Concripts build 10% faster

- Burn Baby Burn - Concripts' Molotov Cocktail ability has 5% increased range

- Veterancy Training: Infantry - Concripts have 2% increased accuracy and 3% increased health

Final Words
All in all this guide still remains just a guide, and you won't become a better Soviet player until you send your troops to the battlefield yourself! Now you know all the ins and outs of basic strategies, doctrines affecting Conscripts, their abilities and upgrades, how to use them, and of course the various bulletins that apply to Conscripts and the advantage they give. All you have to do to apply all this knowledge on the battlefield is to obtain the needed experience, and you'll see yourself improve and become a true Soviet commander!
 Sepha
Sepha  OnkelSam
  Marcus2389
  Twister
  Symbiosis