
WorldBuilder TotW #6: Burning Trees
Welcome back once more, ladies and gents, to the WorldBuilder tip of the week. This week, we over at COH2.ORG are continuing to provide you with small hints and tips to use in WorldBuilder, helping to improve and ease your mapping experience!
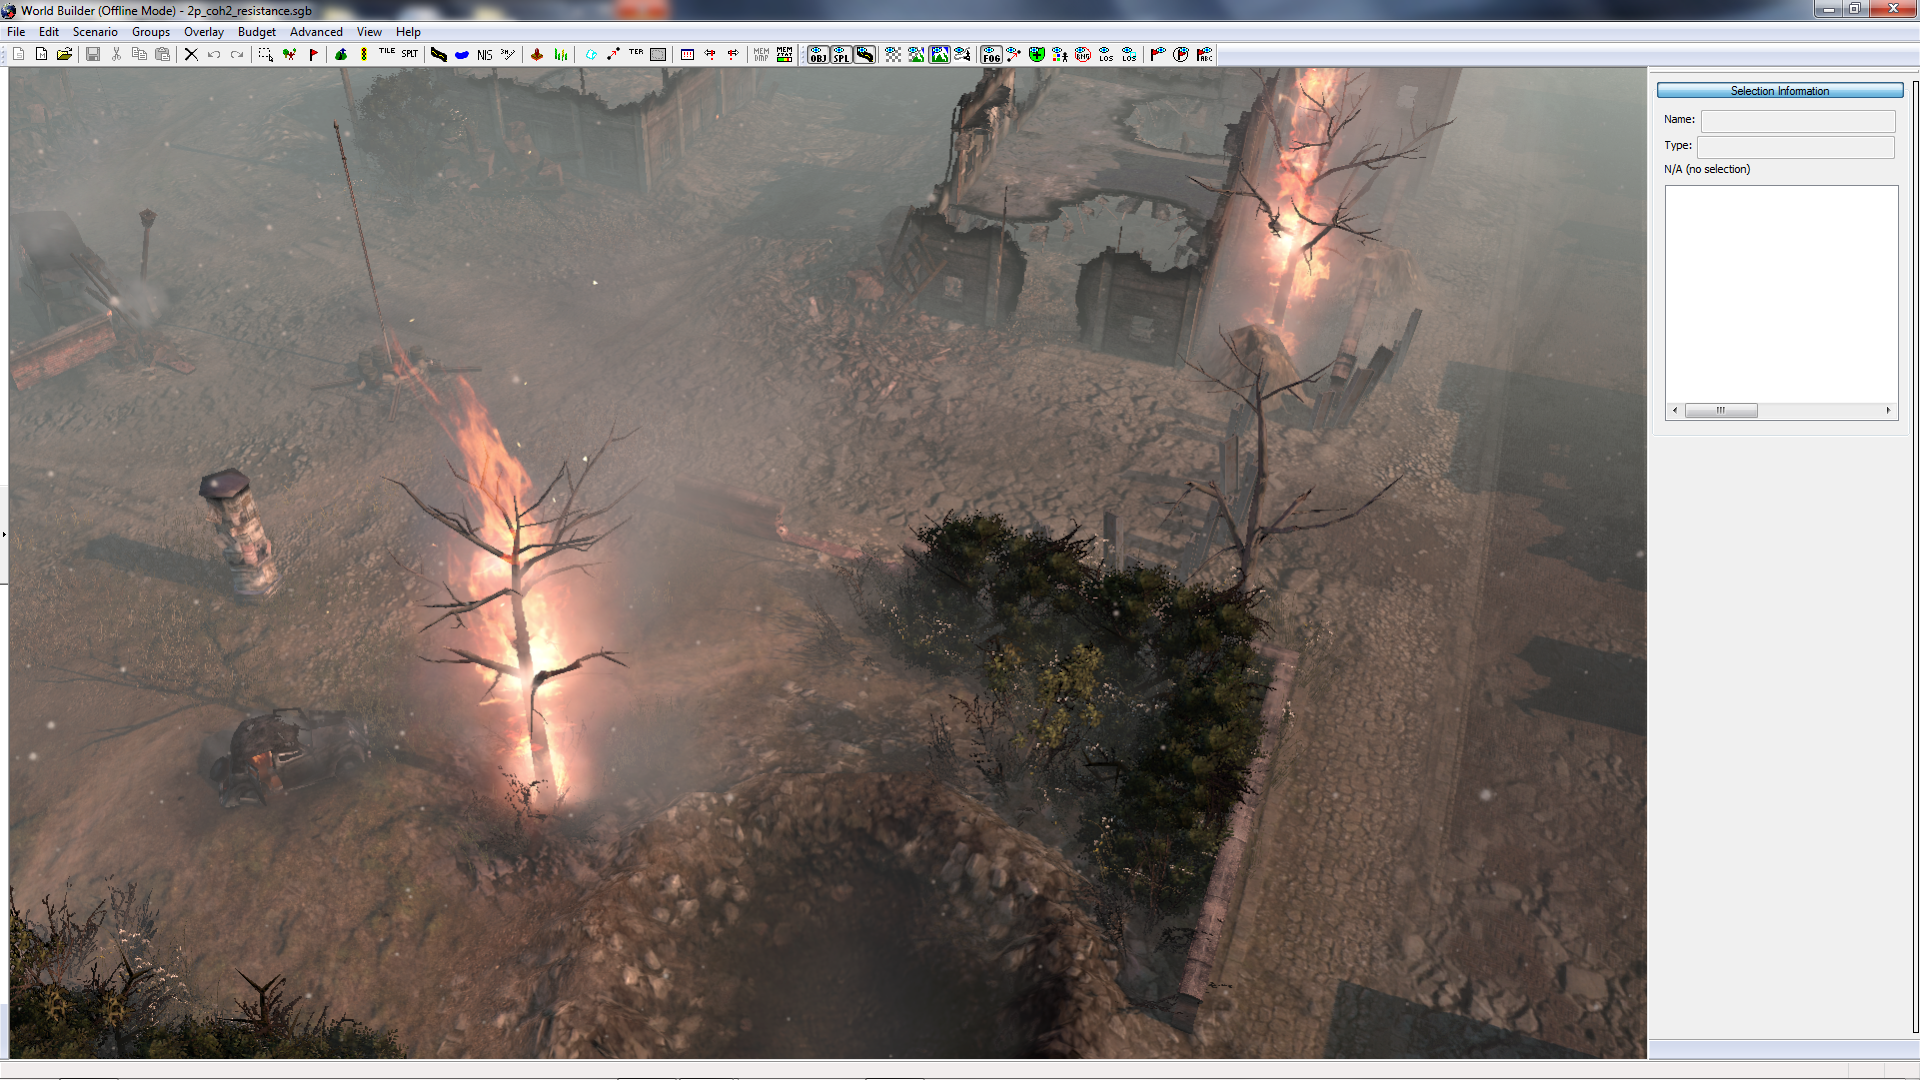
In this week's TotW, we're having a look at an oddity. There are certain items within Relic's maps that are otherwise unavailable (or have coding within them that make them unique), which I hope you will all take advantage in using. Namely, in this case, we have burning trees.
Do you feel that your maps lack something? Do you have a BURNING desire for fire? Your only ream in life is to make grown men weep, openly, at the mere sight of your creation?Then look no further! Also, if trees aren't your bag, you can create burning crates. No, that wasn't a typo. Crates!
To begin with, we'll have to load up a very specific map, which will first need to be extracted from the game itself. In order to do this,* save the following text as "Extract_MP.bat" to your COH2 installation folder:
and run it. A command prompt will appear and the whole extraction process begins. Command prompt will close once the process is complete
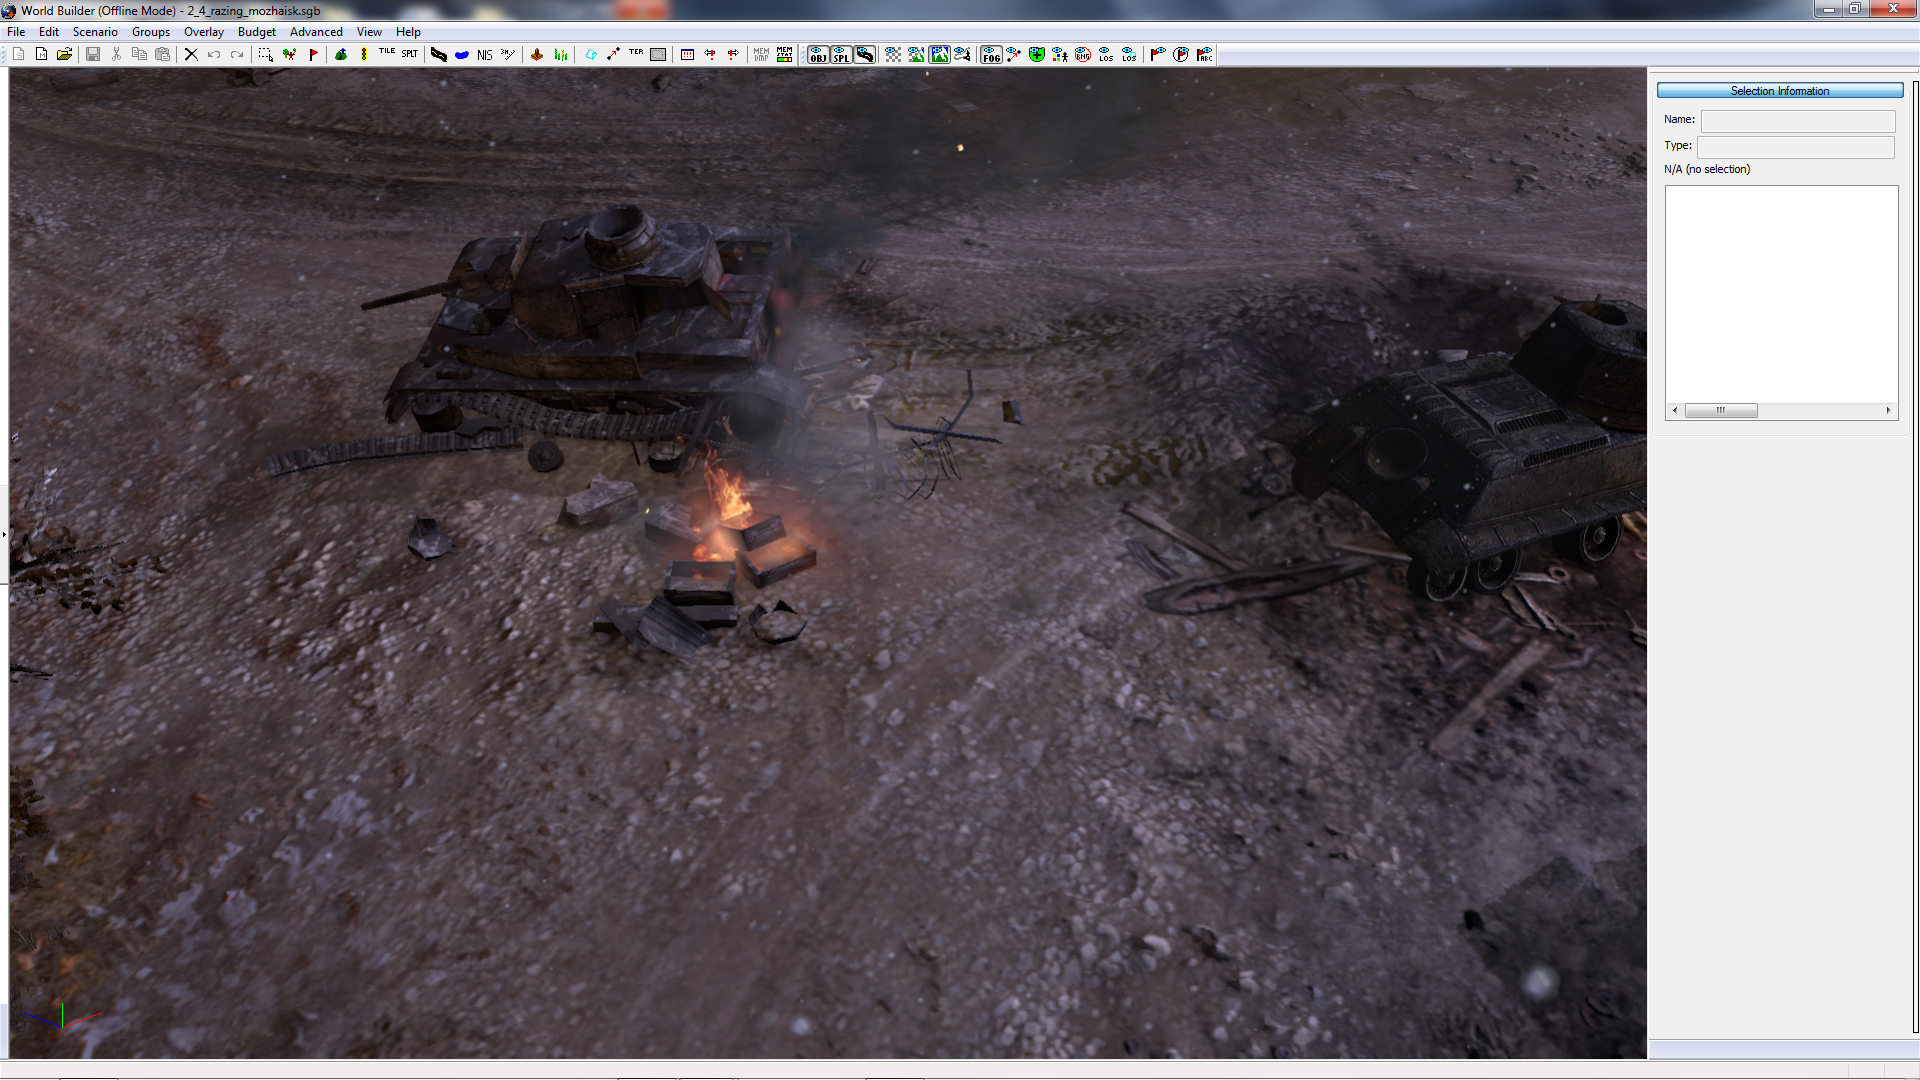
Once the extraction is complete, click the load button and look for (2)_resistance_dlc_1_test, which should be the very first map folder in the list. Open it up, and have a look at the map itself.
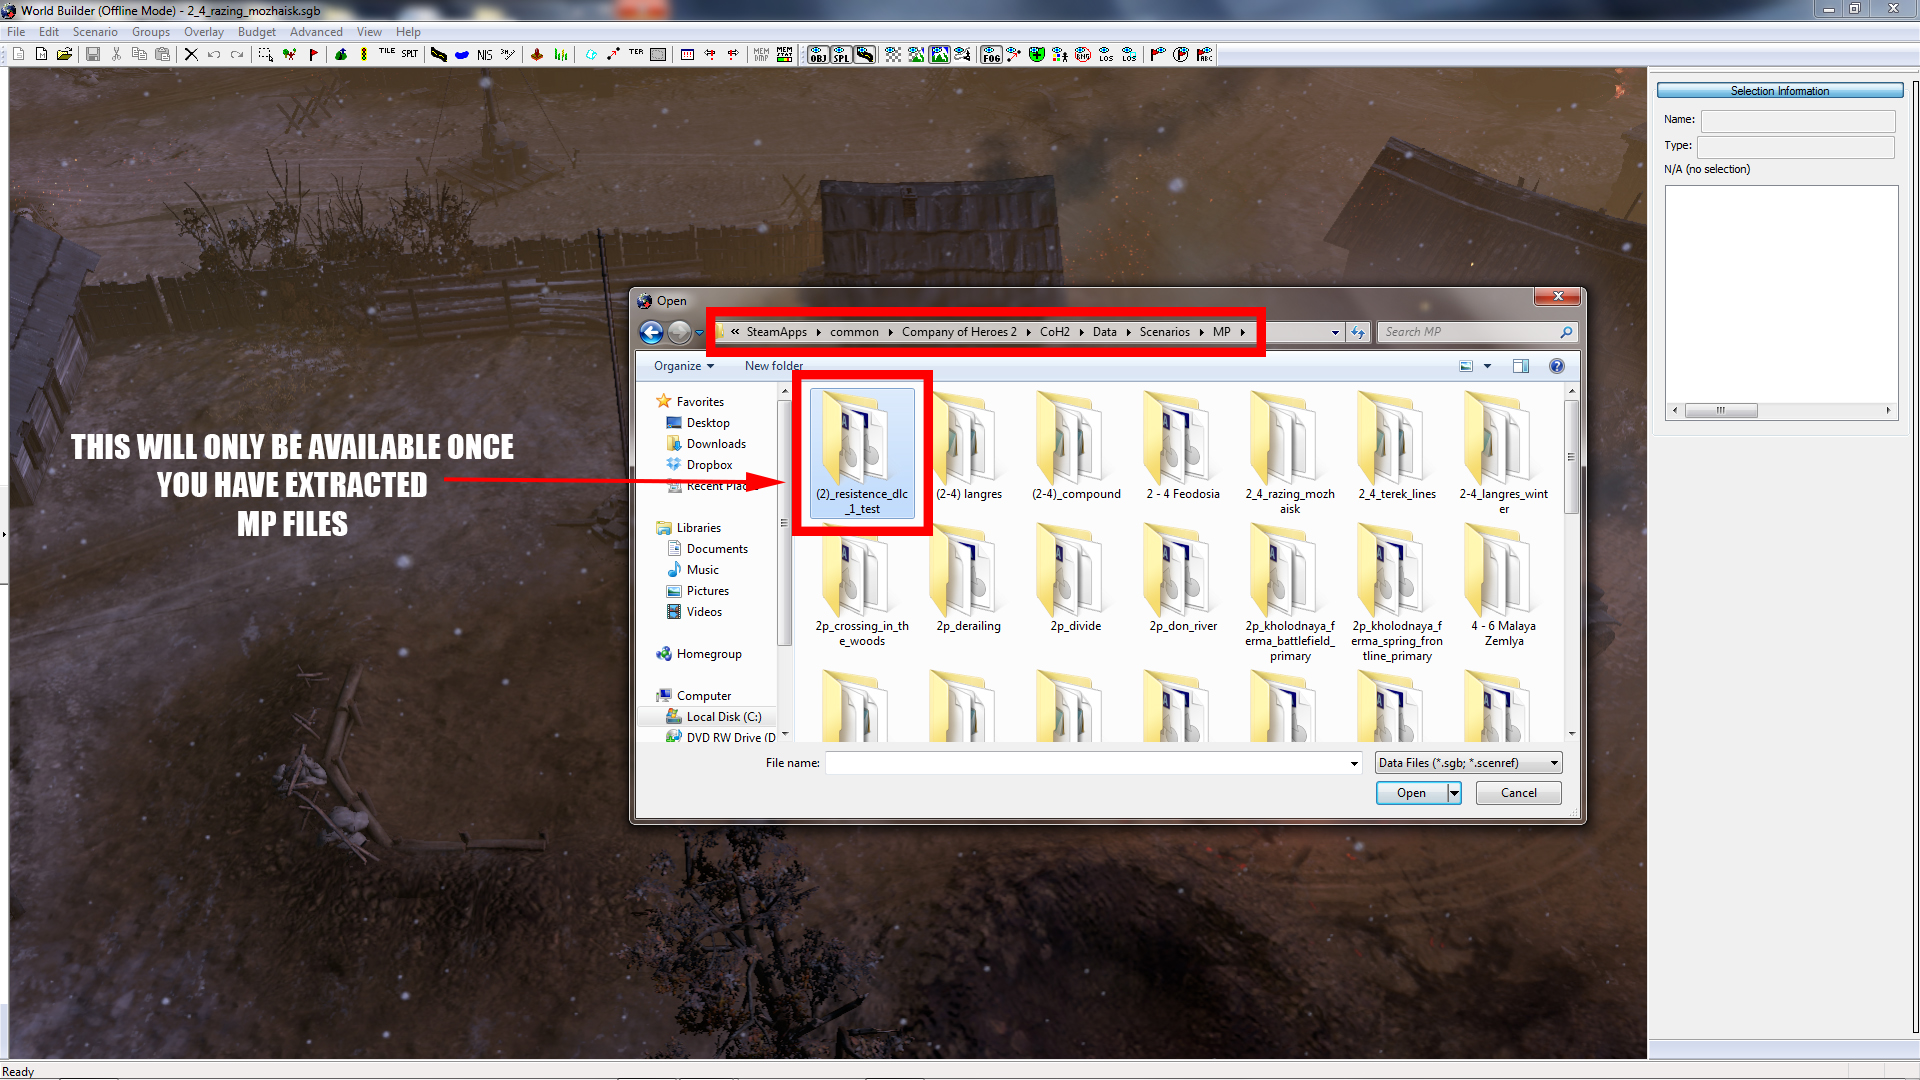
Once you're in, move towards the far eastern corner of the map, within the playable area, and you'll see the very same burning tree. Also in the same area is the burning crate, but for the purposes of this tip, we'll only cover the tree. I don't think you could handle the excitement of both.
Now that you have your tree in sight, open up the Stamp Tool. It should be noted that in this tool, you can select any Object, Splat or Spline. Try to avoid clicking anything.
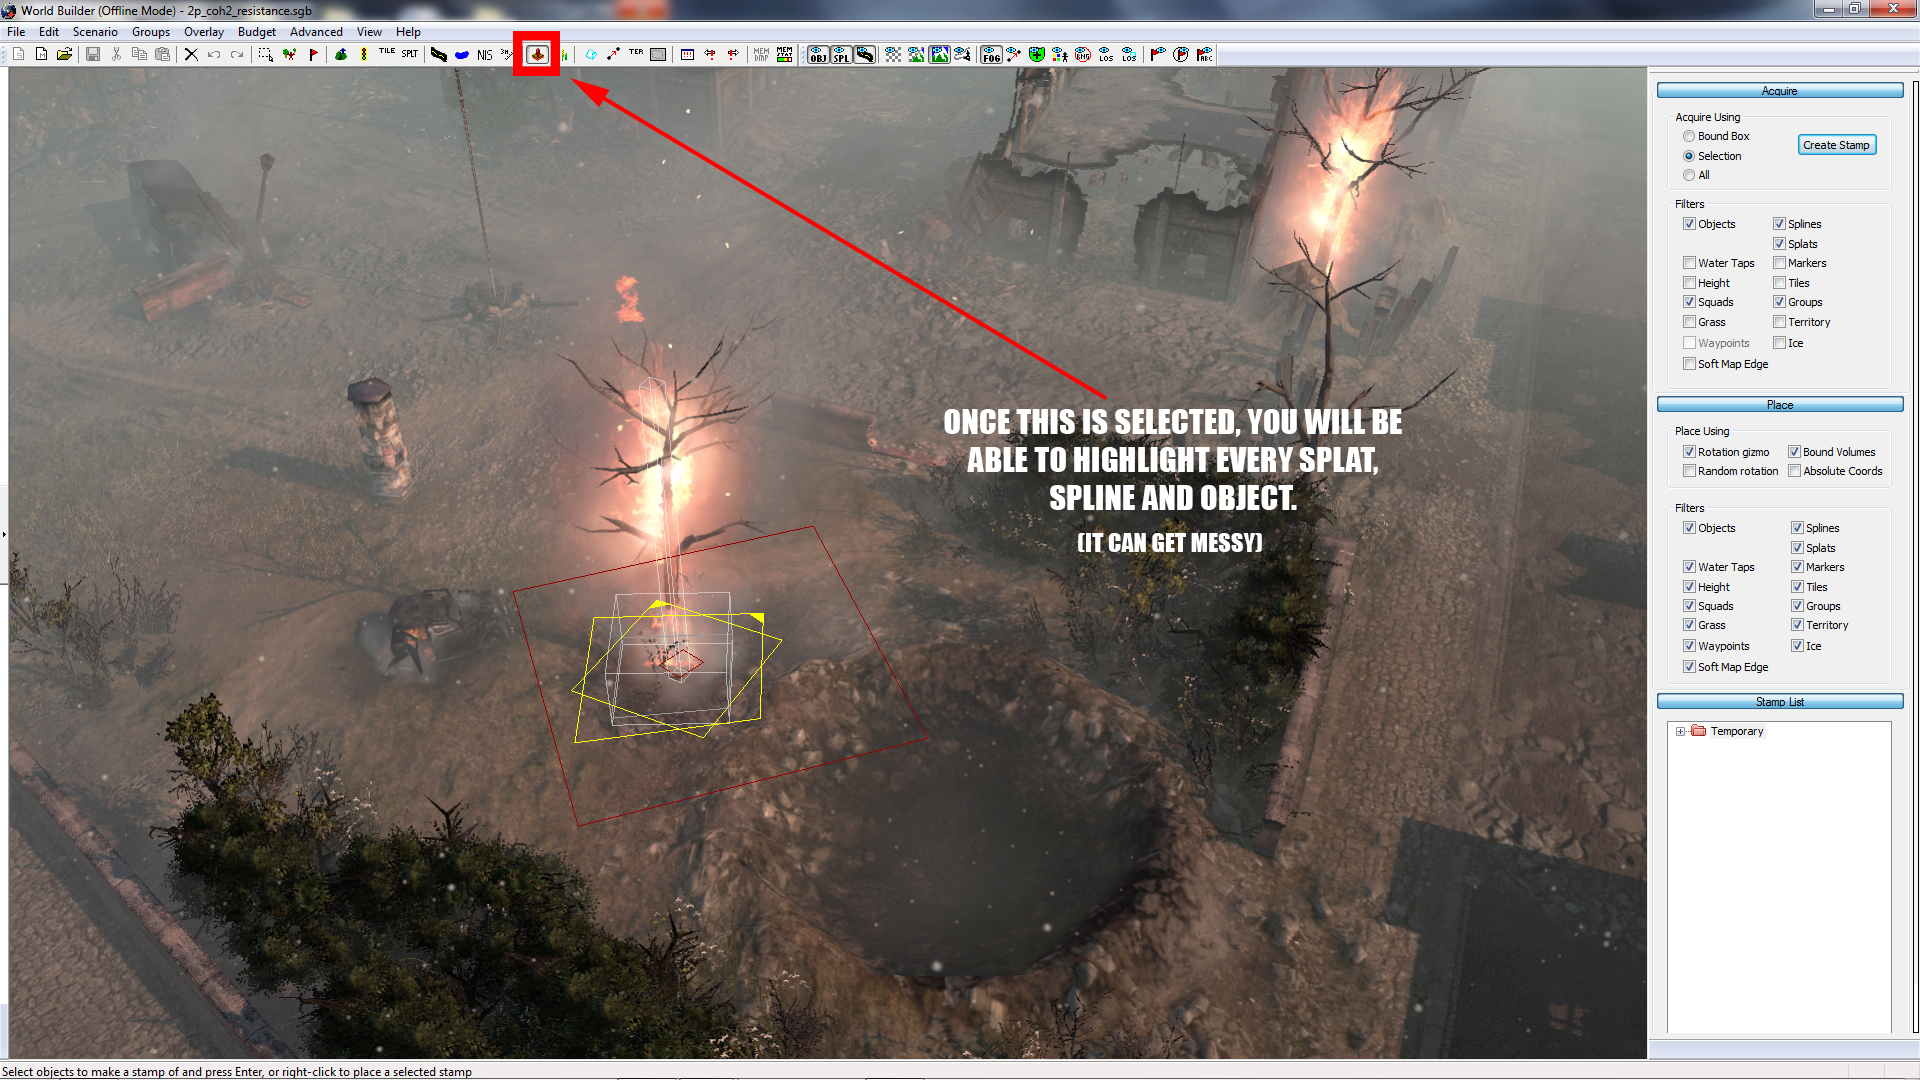
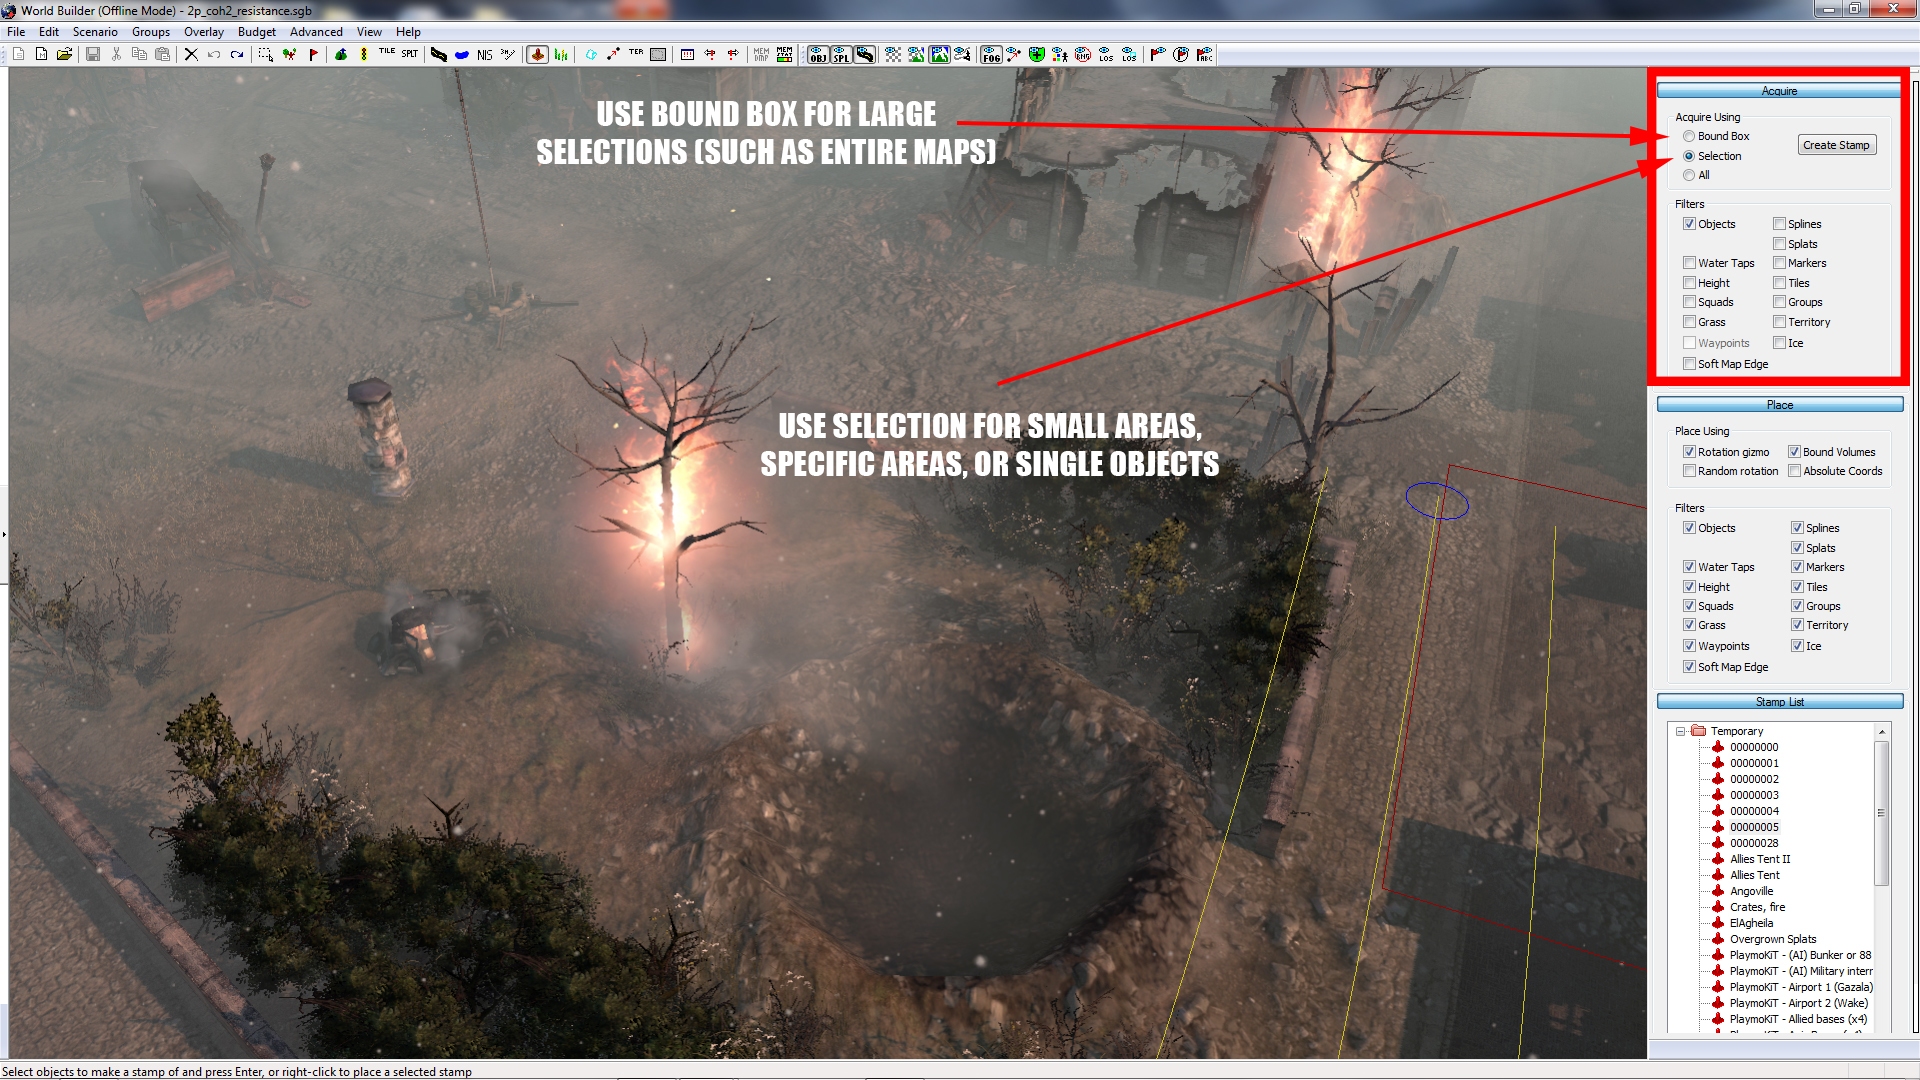
On the new menu that opens on the right-side, click "Selection", and untick everything in the "Aquire" category besides Objects. After all, we only want the tree for this example, not the Splats around it.
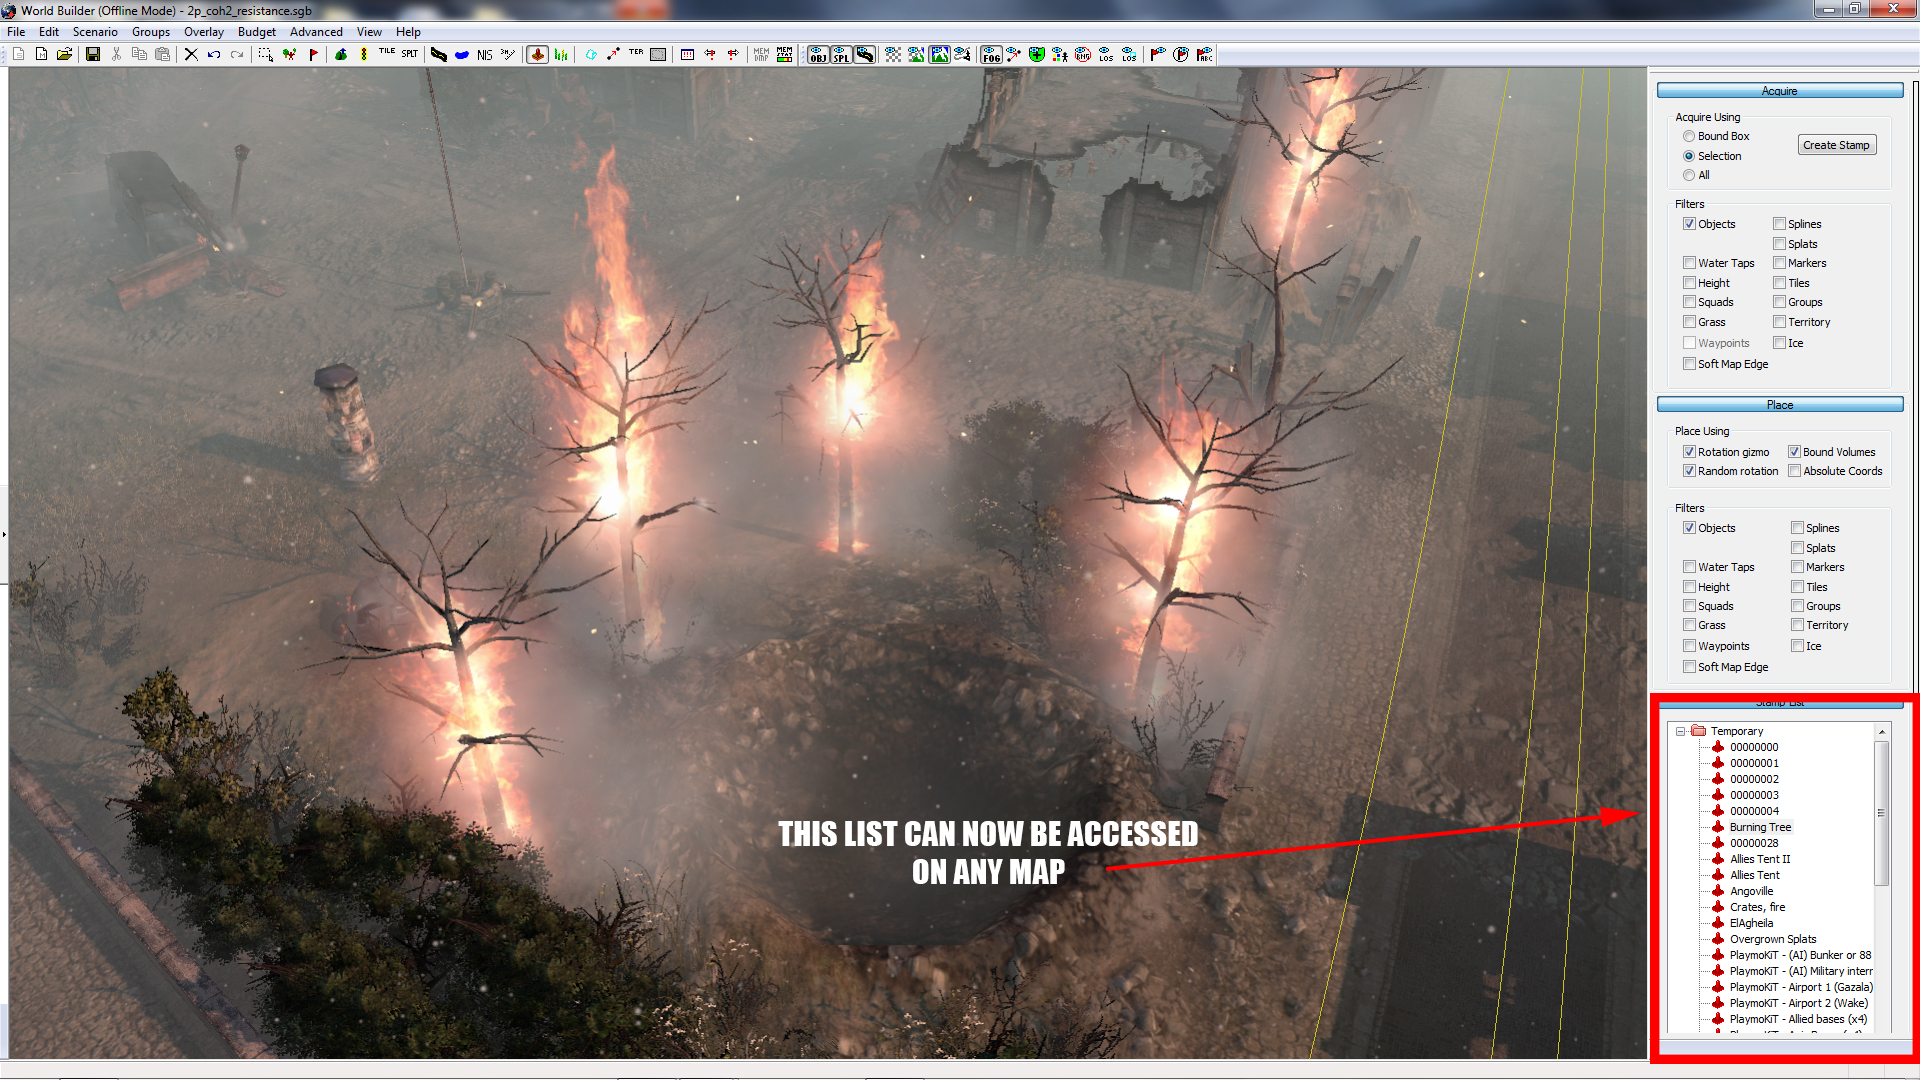
Once you click "Create Stamp", a new Stamp will be added to the Stamp List, under a number (usually 00000001 if you haven't created any stamps before). Double-clicking this number will allow you to change the name of the stamp to make it more memorable. From now, you should only need the "Place" menu, in which you can choose exactly how your selected Stamp is placed.
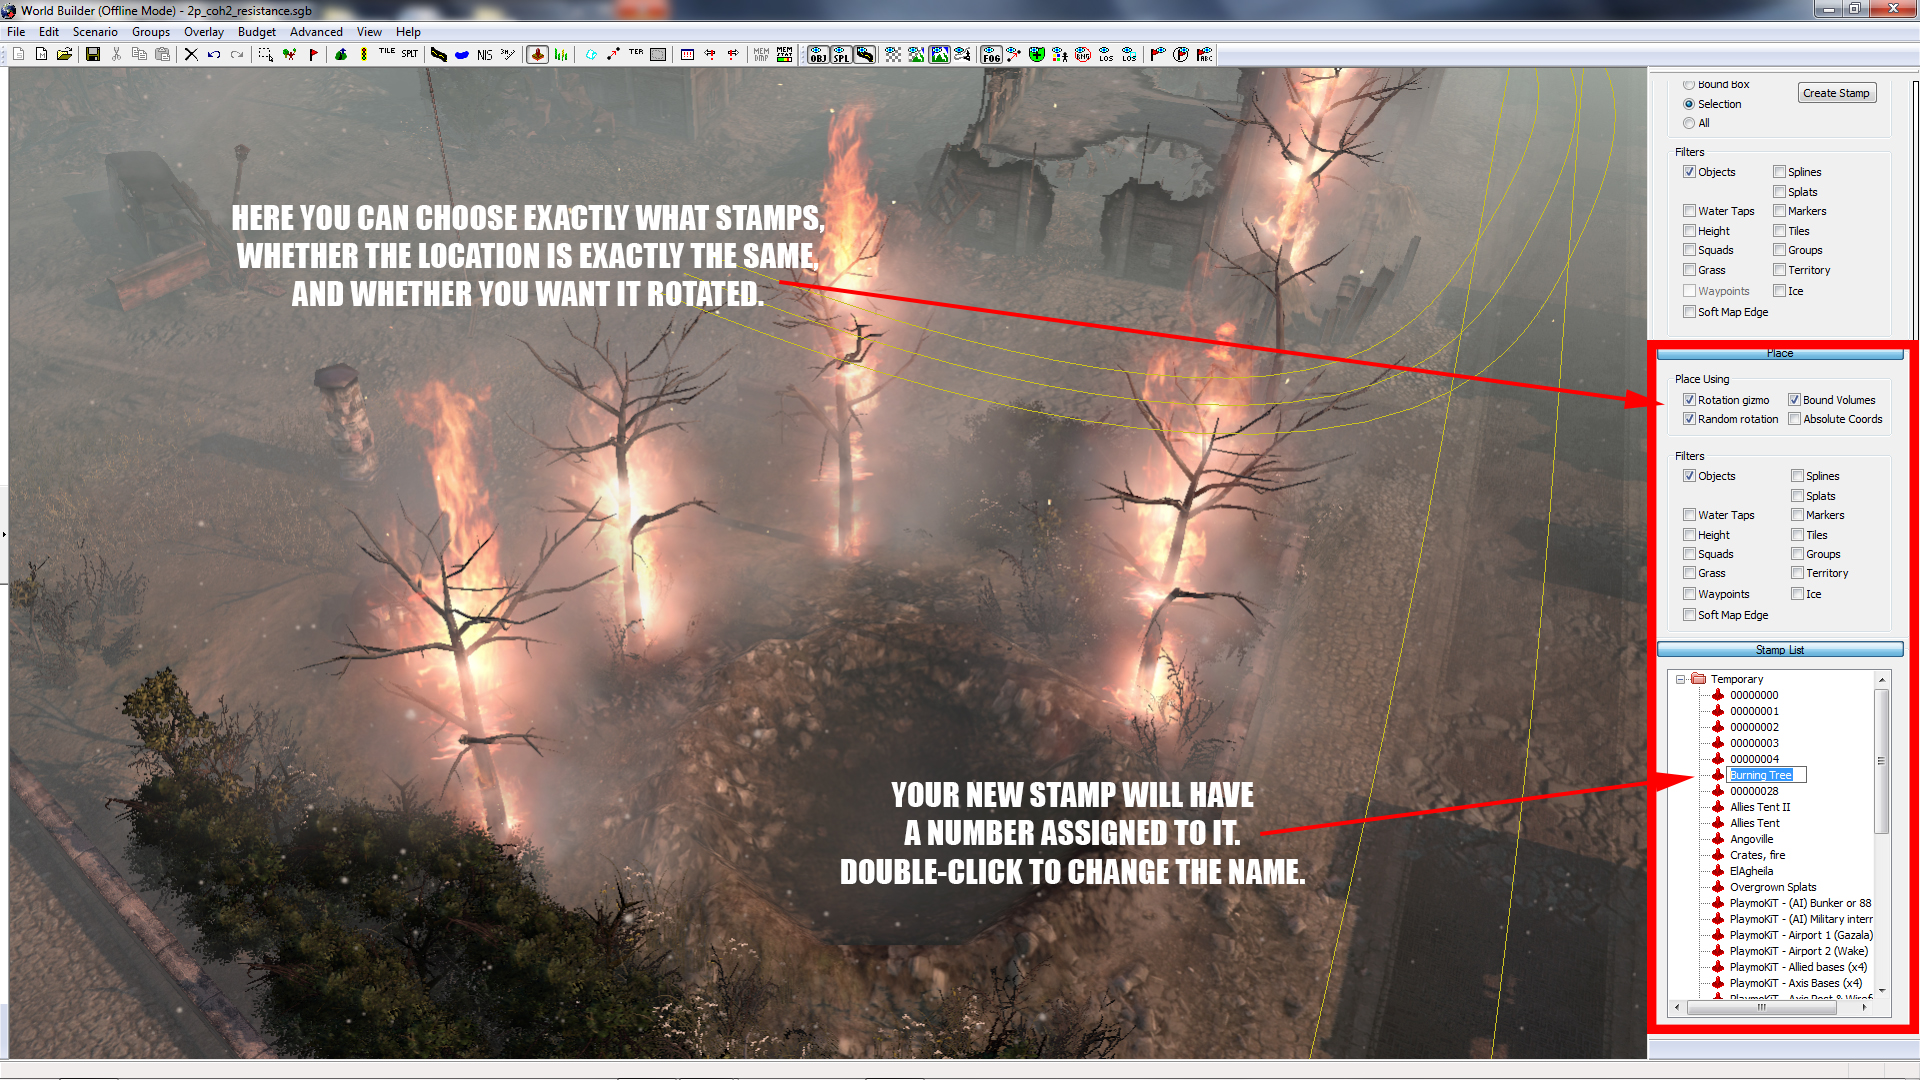
As Figure 7 suggests, you can place your Stamp randomly, or very accurately, as well as filter what is placed. As we have only Stamped an Object, we only need the "Object" category ticked.
Now, simply by right-clicking on anywhere on the map, you will leave a blueprint of the Stamp, and with the press of your Enter Key, it will appear. Note, however that larger stamps may take some time. DO NOT ATTEMPT TO CLICK ANYTHING ELSE WHILE YOU ARE STAMPING. After all, nobody likes corrupting their saves.
We hope this tip was helpful and that you check back next week, when we will provide you with a new Worldbuilder TotW.
In this week's TotW, we're having a look at an oddity. There are certain items within Relic's maps that are otherwise unavailable (or have coding within them that make them unique), which I hope you will all take advantage in using. Namely, in this case, we have burning trees.
Figure 1
Do you feel that your maps lack something? Do you have a BURNING desire for fire? Your only ream in life is to make grown men weep, openly, at the mere sight of your creation?Then look no further! Also, if trees aren't your bag, you can create burning crates. No, that wasn't a typo. Crates!
Figure 2
To begin with, we'll have to load up a very specific map, which will first need to be extracted from the game itself. In order to do this,* save the following text as "Extract_MP.bat" to your COH2 installation folder:
Code
archive.exe -a CoH2\Archives\MPScenarios.sga -e CoH2\Data
archive.exe -a CoH2\Archives\SPScenariosEF.sga -e CoH2\Data
and run it. A command prompt will appear and the whole extraction process begins. Command prompt will close once the process is complete
Once the extraction is complete, click the load button and look for (2)_resistance_dlc_1_test, which should be the very first map folder in the list. Open it up, and have a look at the map itself.
Figure 3
Once you're in, move towards the far eastern corner of the map, within the playable area, and you'll see the very same burning tree. Also in the same area is the burning crate, but for the purposes of this tip, we'll only cover the tree. I don't think you could handle the excitement of both.
Figure 4
Now that you have your tree in sight, open up the Stamp Tool. It should be noted that in this tool, you can select any Object, Splat or Spline. Try to avoid clicking anything.
Figure 5
On the new menu that opens on the right-side, click "Selection", and untick everything in the "Aquire" category besides Objects. After all, we only want the tree for this example, not the Splats around it.
Figure 6
Once you click "Create Stamp", a new Stamp will be added to the Stamp List, under a number (usually 00000001 if you haven't created any stamps before). Double-clicking this number will allow you to change the name of the stamp to make it more memorable. From now, you should only need the "Place" menu, in which you can choose exactly how your selected Stamp is placed.
Figure 7
As Figure 7 suggests, you can place your Stamp randomly, or very accurately, as well as filter what is placed. As we have only Stamped an Object, we only need the "Object" category ticked.
Figure 8
Now, simply by right-clicking on anywhere on the map, you will leave a blueprint of the Stamp, and with the press of your Enter Key, it will appear. Note, however that larger stamps may take some time. DO NOT ATTEMPT TO CLICK ANYTHING ELSE WHILE YOU ARE STAMPING. After all, nobody likes corrupting their saves.
We hope this tip was helpful and that you check back next week, when we will provide you with a new Worldbuilder TotW.
 MonolithicBacon
  OnkelSam
  IrishHugo