

WorldBuilder TotW #5: Frost
Welcome back once more, ladies and gents, to the WorldBuilder tip of the week. This week, we over at COH2.ORG are continuing to provide you with small hints and tips to use in WorldBuilder, helping to improve and ease your mapping experience!
In this TotW we’re saying goodbye to the snow, and looking at, drum roll please, frost!... All the cold, without the deep snow to get in your way. However, in doing this, there are a number of steps that we must make sure we take!
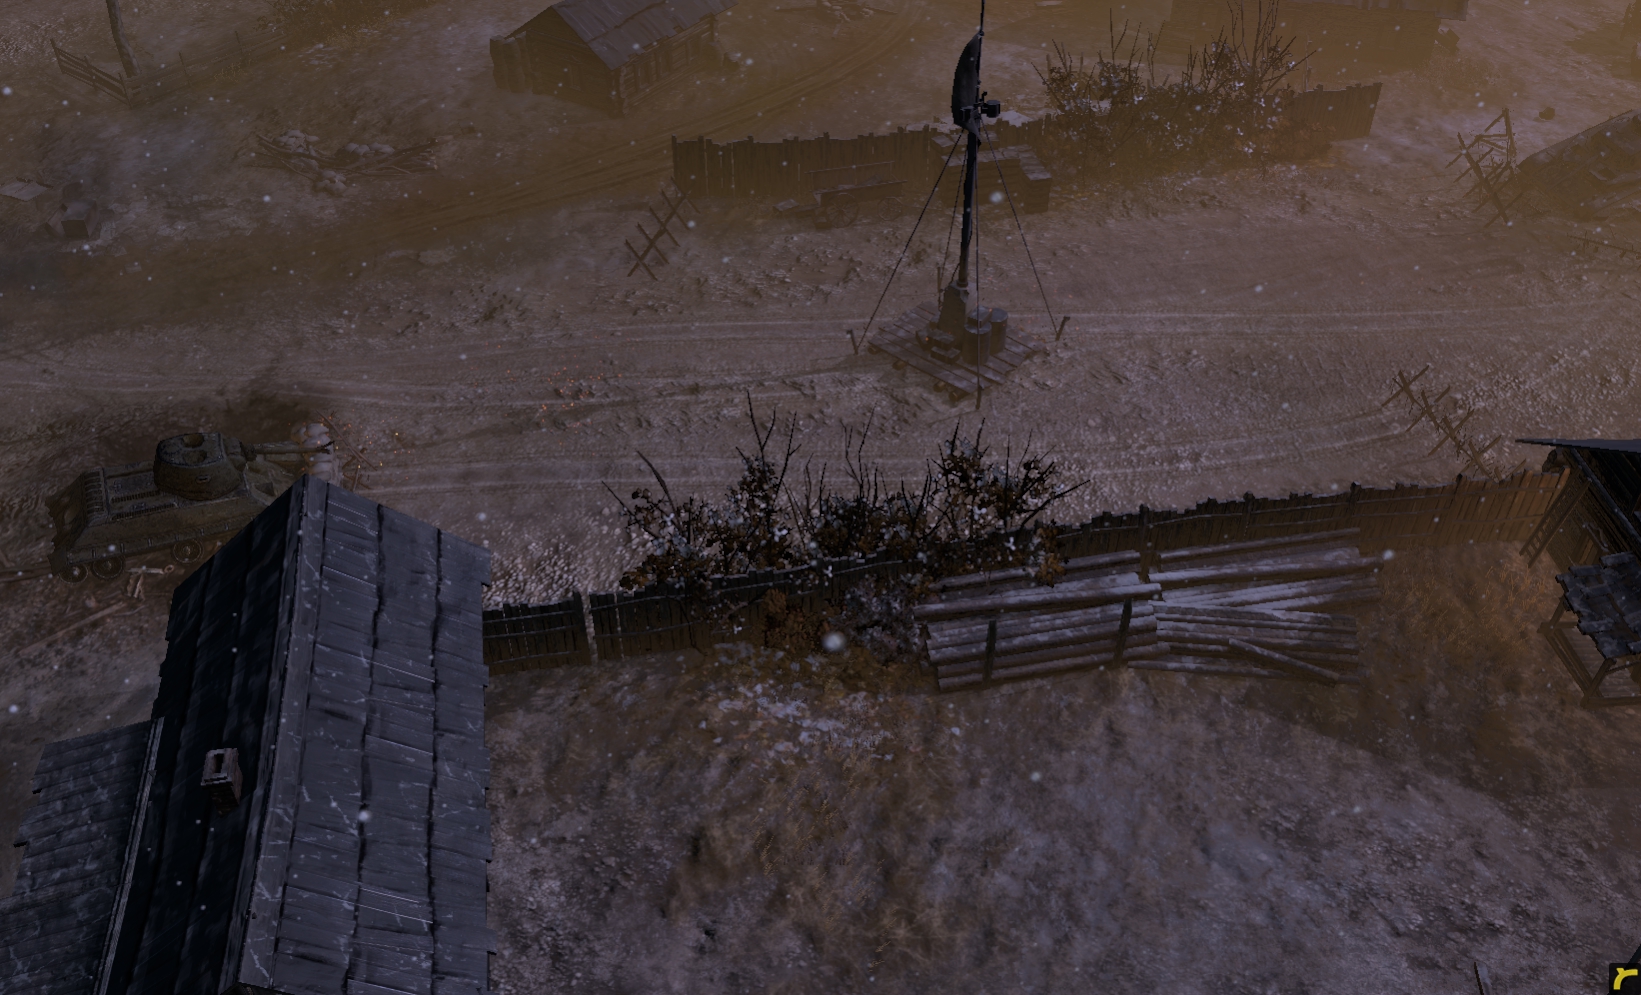
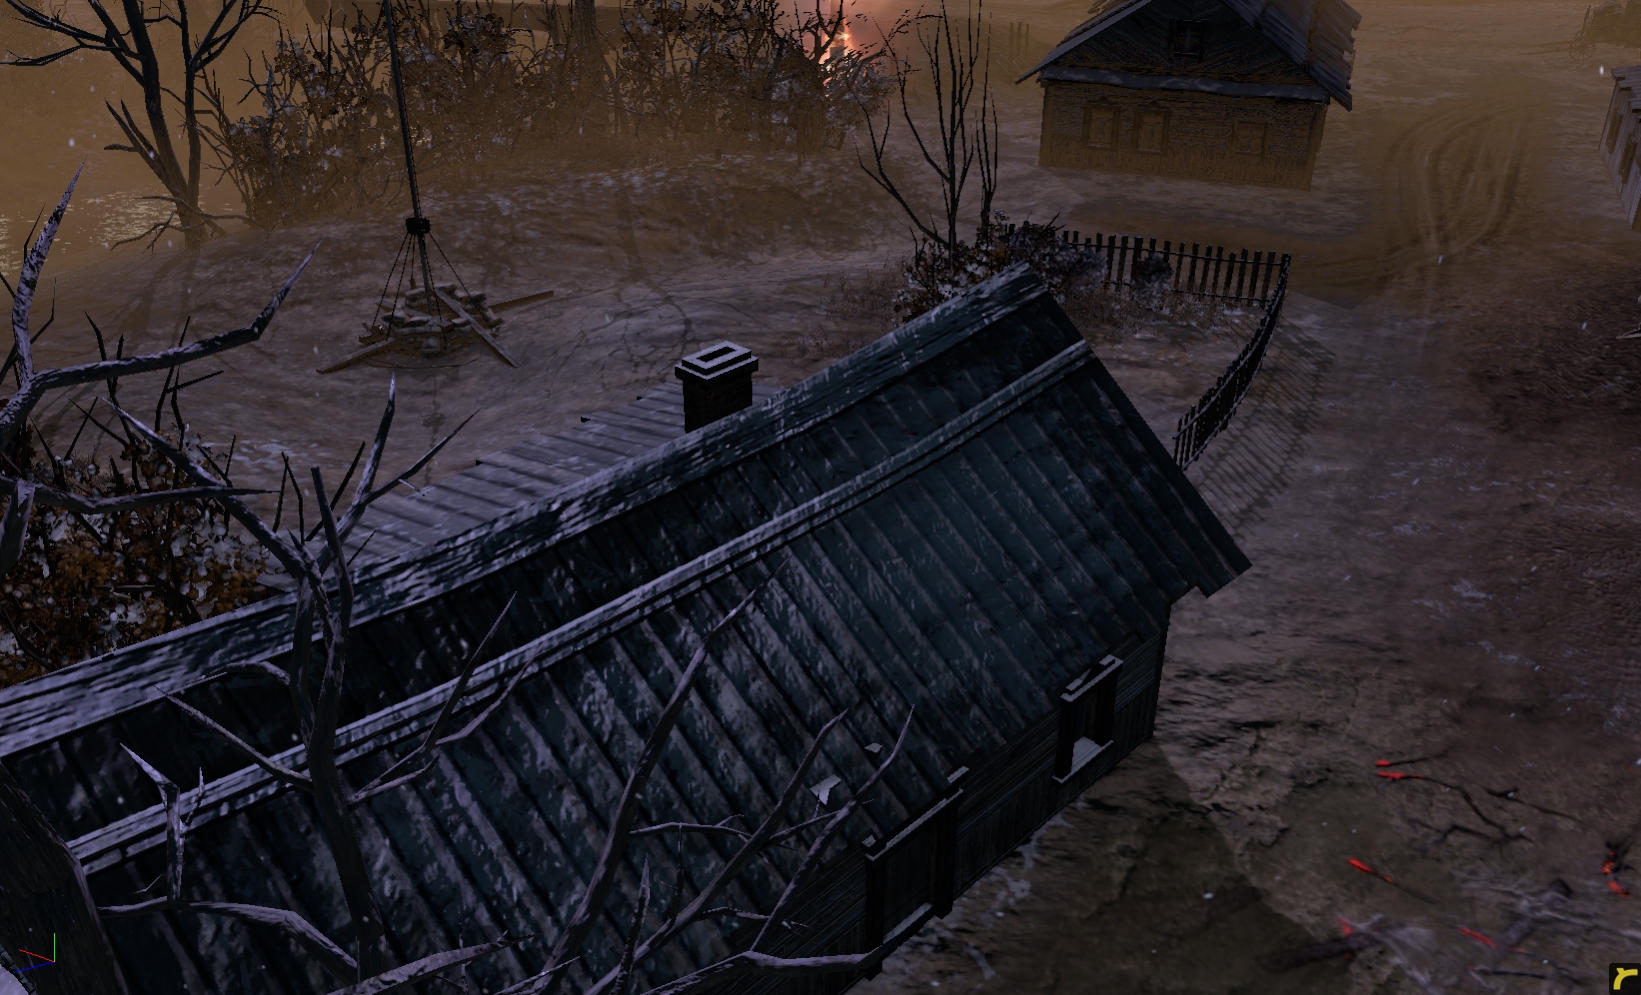
So, if you fancy a light flurry on the ground and frosted rooftops on your buildings, without committing to a map covered with deep snow, follow these simple steps!
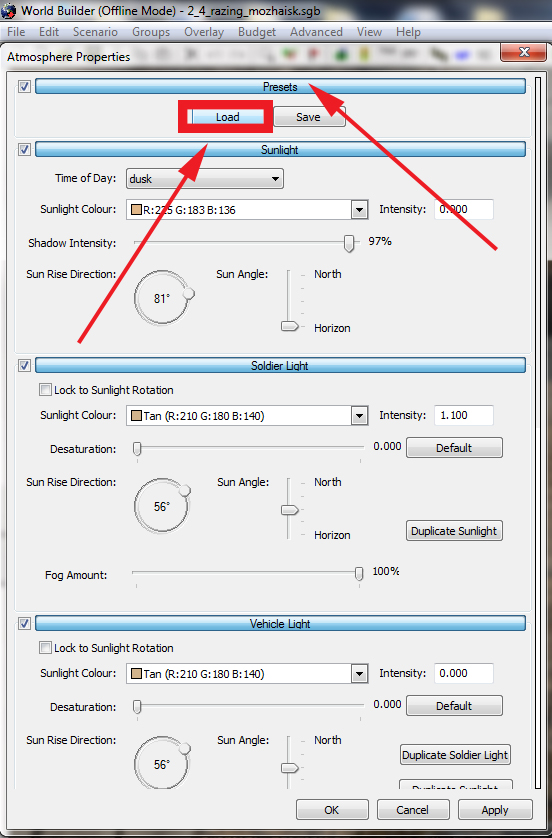
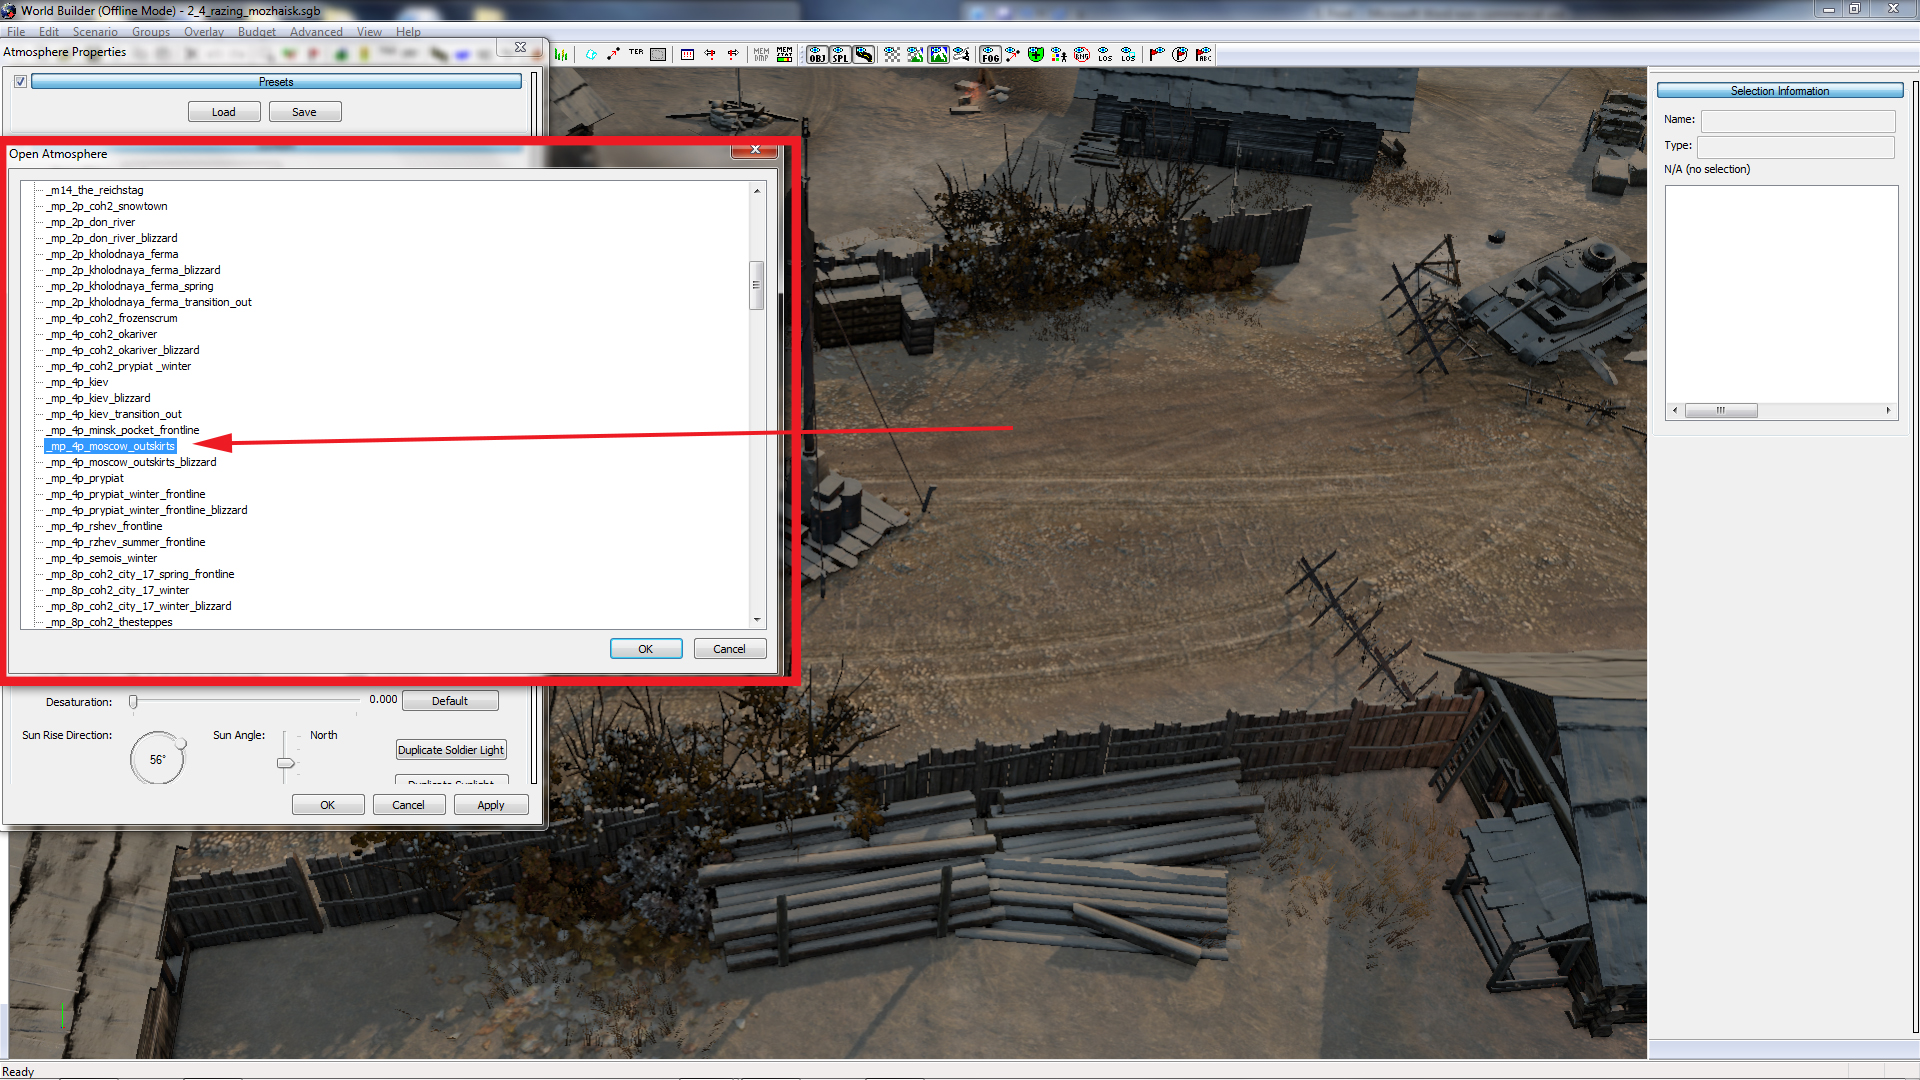
To get us started, we’ll have to import some weather settings from Relic’s roster. Open up the Atmosphere Settings window, and click Load under the Presets tab (See Figure 3). Personally, I find that “_mp_4p_moscow_outskirts” is the best starting point. Bear in mind that any weather setting that has snow configured will work, but I like this one for the light spattering of snow that is has in the air.
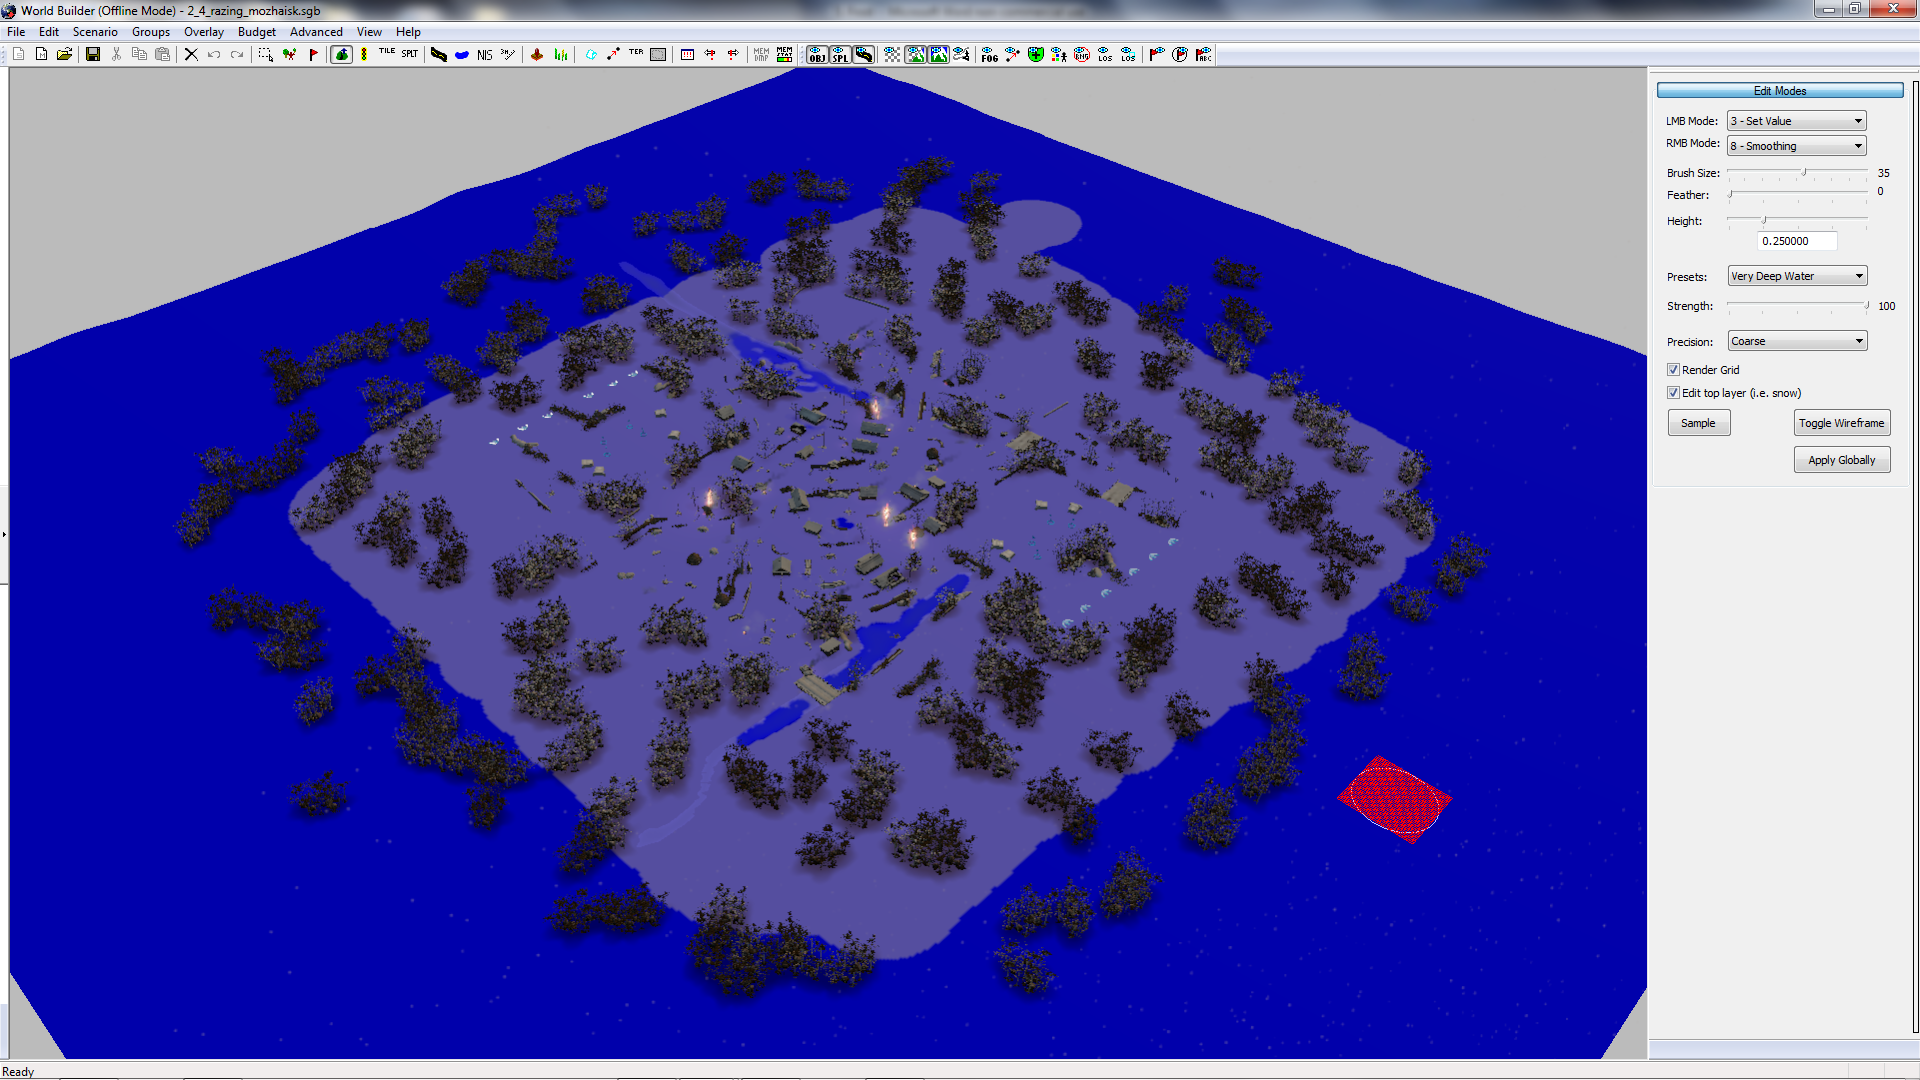
For this example, I want the entire map to be covered in a very thin layer of frost and snow speckles, with rooftops lightly covered too. So, as we move on, make sure that you have a clear area of your map, with a building nearby.
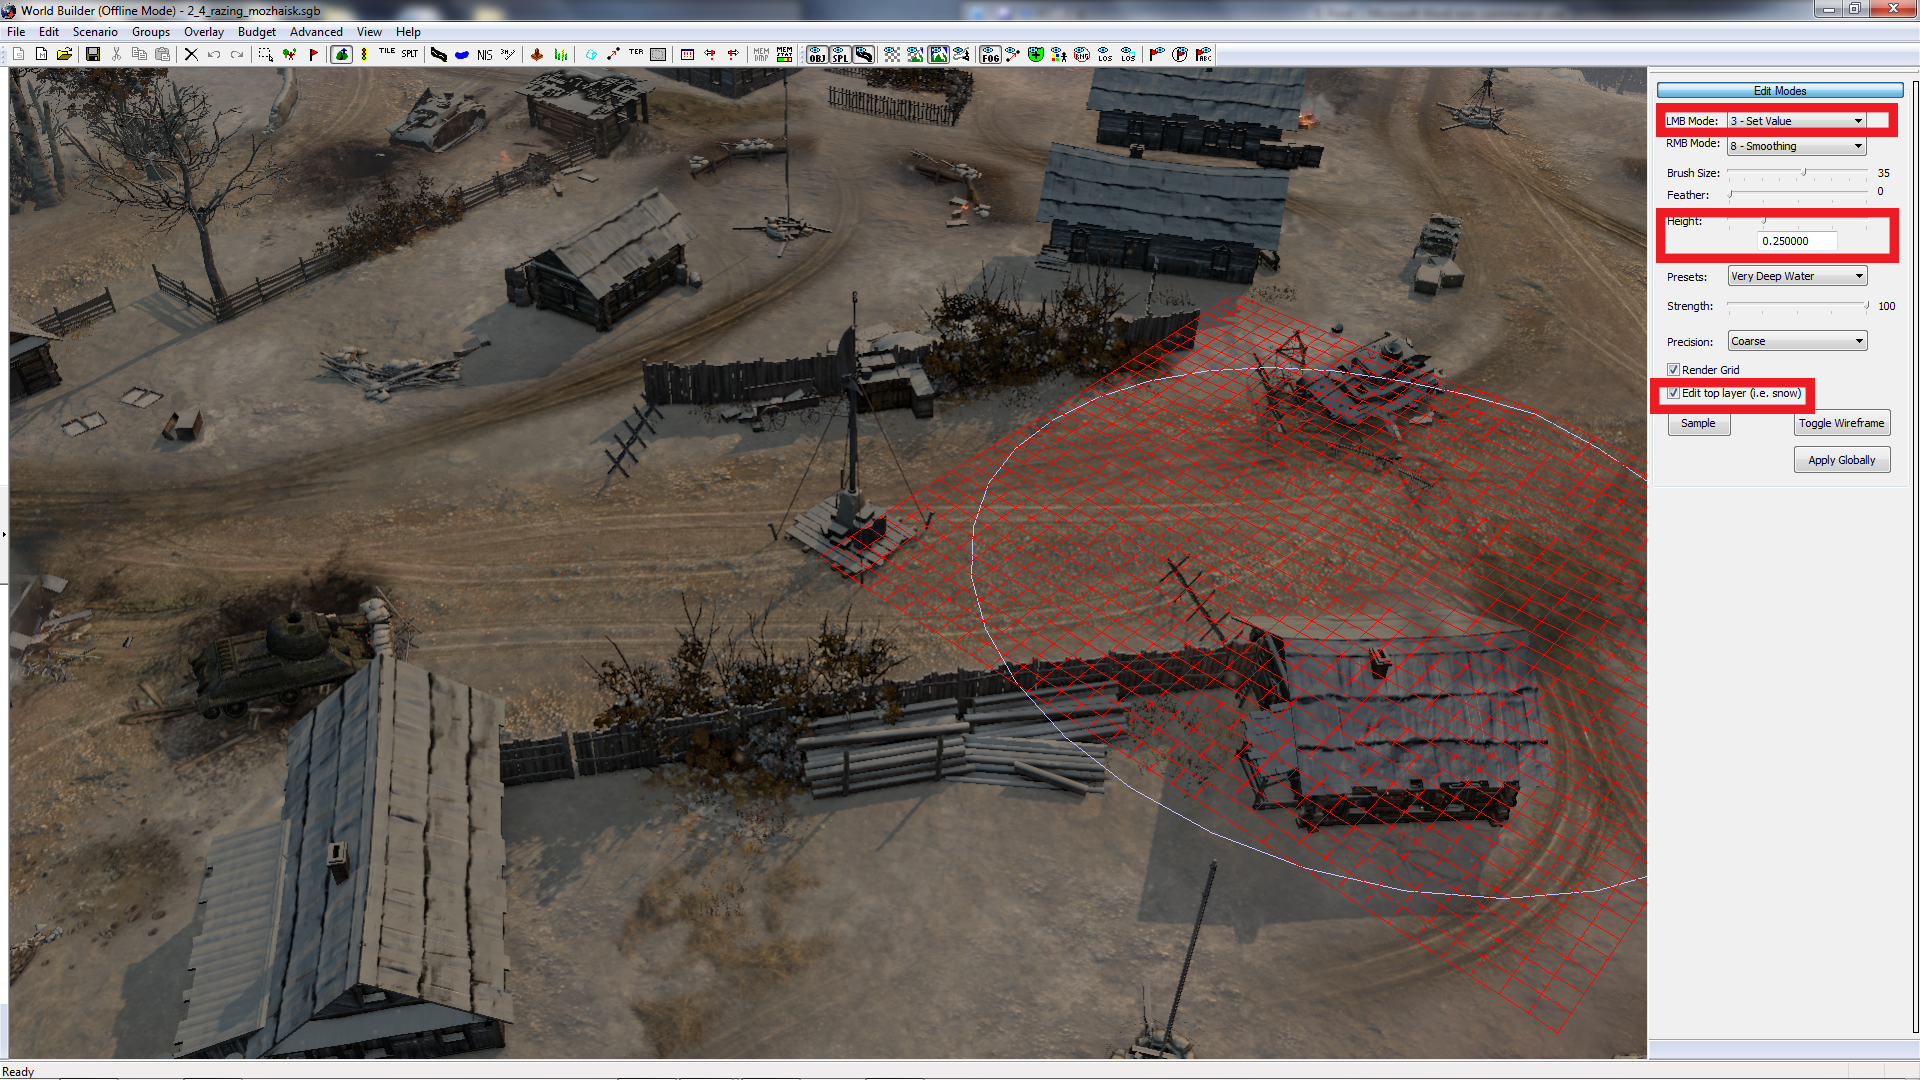
Using the Set Height setting on the Heightmap Editor, enter a value of around 0.25, to place snow that will be too thin to leave any deep tracks, and won’t register in-game as deep. With a large brush, you can easily cover the entire map in this layer, even if the thin snow doesn’t look like frost yet!
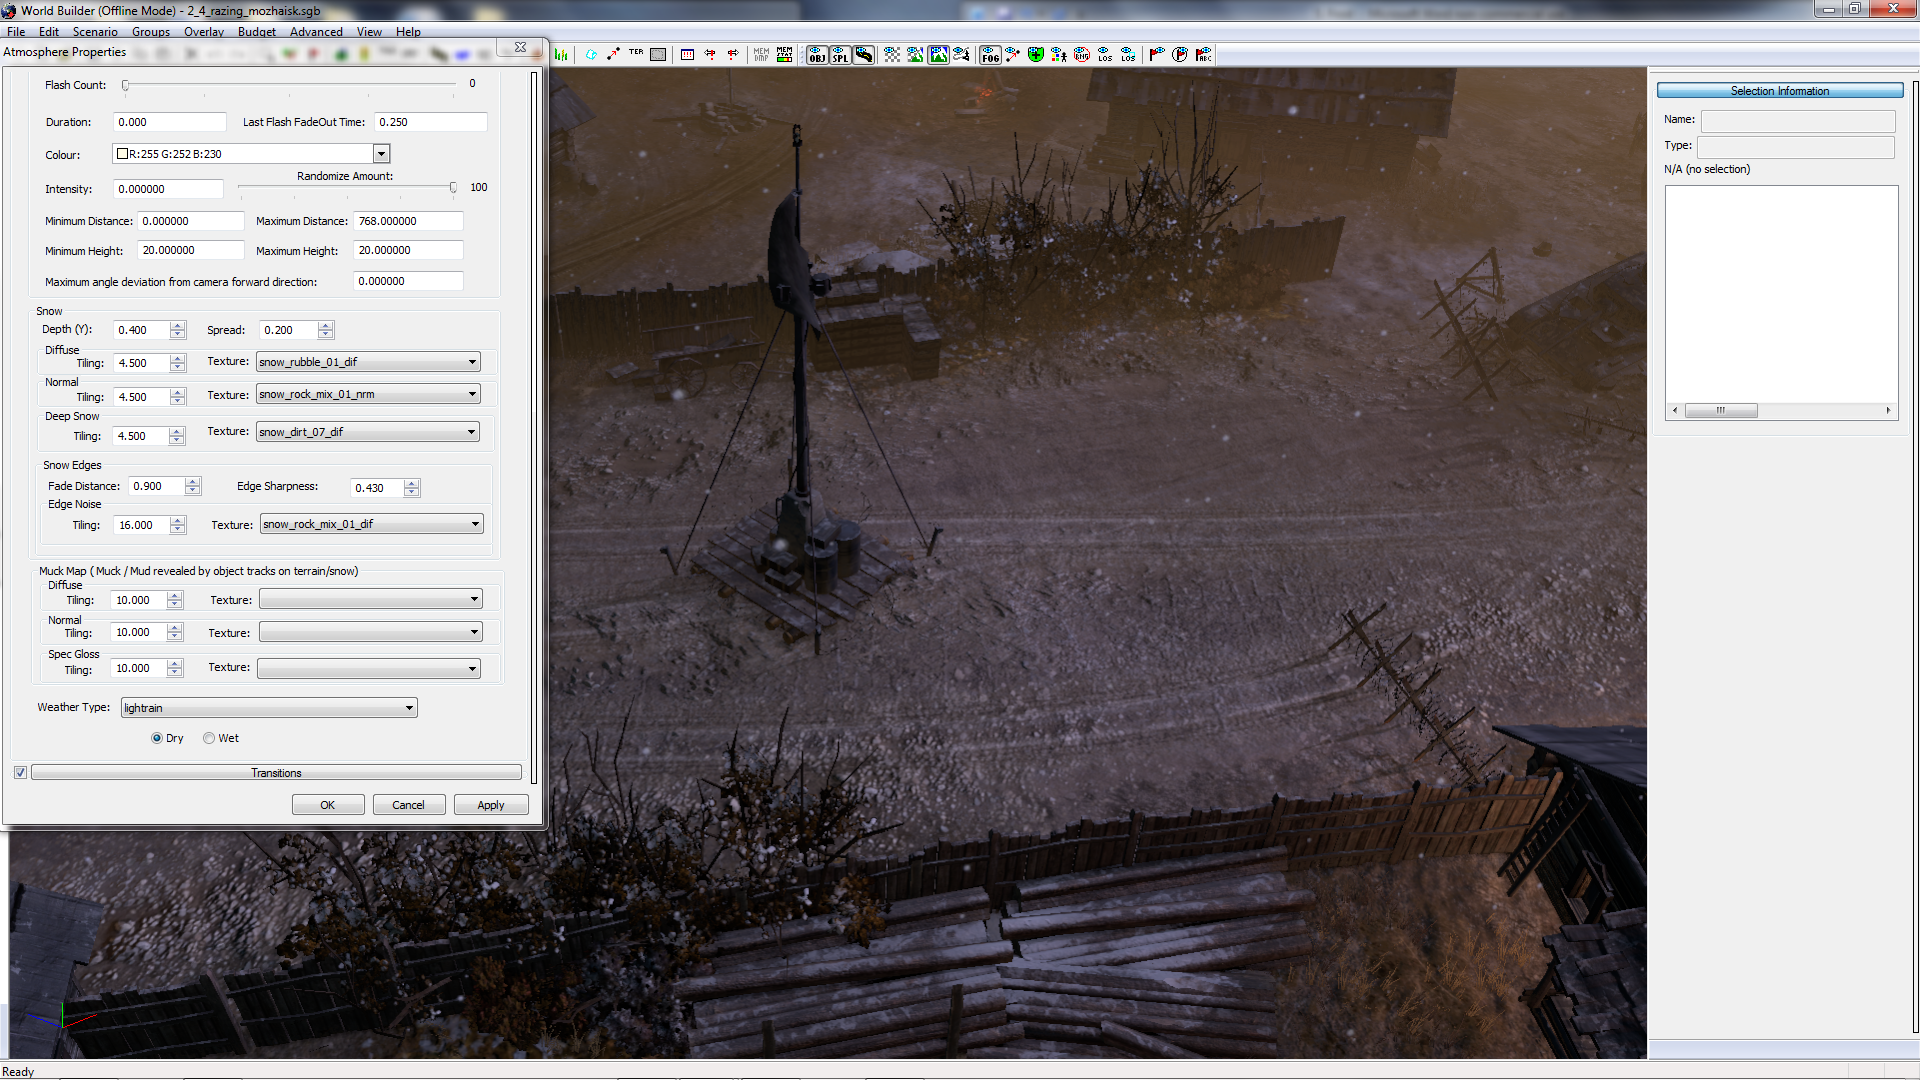
The next step is finding the texture that you want. Back in Atmosphere Settings, and under the Weather tab, you will see a category that says “Snow” and “Muck Map”. These are the two areas that you will need to change the texture of the snow you have placed, and to ensure that vehicles don’t leave tracks behind.
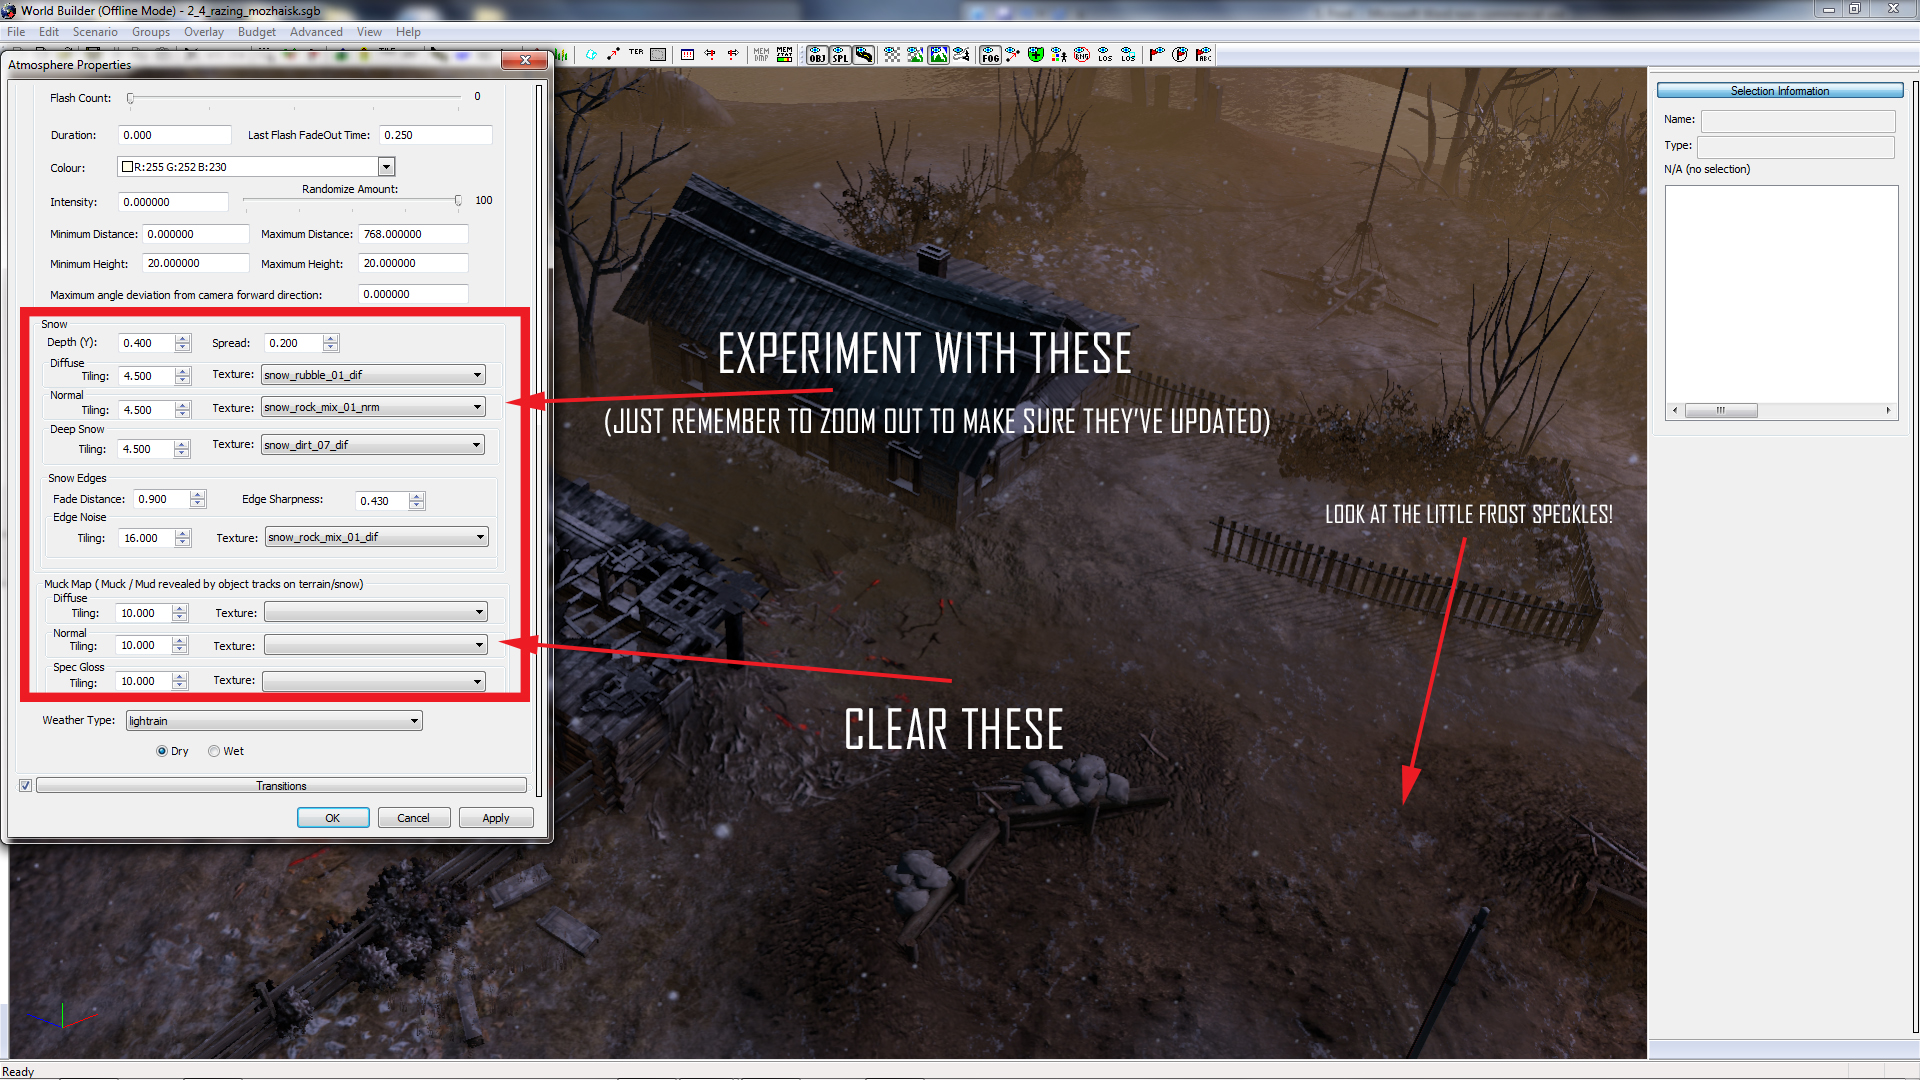
On the image above, I have set up my favourite frost settings. A few points should be noted, however:
Diffuse, Normal and Deep Snow all have different characteristics, and you should experiment with each of them, but only do so one at a time. I have found that personally on my system, even if I make changes and hit “Apply” nothing will change until I zoom out from my map.
Although this process is time consuming, the right combination can make an impressive display. Additionally, try changing the Tiling of each one, to see whether the size of the texture you have selected can be improved.
Three final notes!
1. Ensure that your Muck Map section is cleared! Otherwise vehicles will still leave tracks, even if you have no snow!
2. Use deeper snow under buildings, or key objects to increase the “Frost” effect.
3. When you come to save and play your map, open up your .OPTIONS file in your map folder, and flick the “Uses_Ice” category onto “true” to make your infantry and vehicles change to Winter Camouflage. For more info, check out Janne252’s tutorial here.
We hope this tip was helpful and you check back next week, when we will provide you with a new Worldbuilder TotW.
In this TotW we’re saying goodbye to the snow, and looking at, drum roll please, frost!... All the cold, without the deep snow to get in your way. However, in doing this, there are a number of steps that we must make sure we take!
Figure 1
So, if you fancy a light flurry on the ground and frosted rooftops on your buildings, without committing to a map covered with deep snow, follow these simple steps!
Figure 2
To get us started, we’ll have to import some weather settings from Relic’s roster. Open up the Atmosphere Settings window, and click Load under the Presets tab (See Figure 3). Personally, I find that “_mp_4p_moscow_outskirts” is the best starting point. Bear in mind that any weather setting that has snow configured will work, but I like this one for the light spattering of snow that is has in the air.
Figure 3
Figure 4
For this example, I want the entire map to be covered in a very thin layer of frost and snow speckles, with rooftops lightly covered too. So, as we move on, make sure that you have a clear area of your map, with a building nearby.
Figure 5
Using the Set Height setting on the Heightmap Editor, enter a value of around 0.25, to place snow that will be too thin to leave any deep tracks, and won’t register in-game as deep. With a large brush, you can easily cover the entire map in this layer, even if the thin snow doesn’t look like frost yet!
Figure 6
The next step is finding the texture that you want. Back in Atmosphere Settings, and under the Weather tab, you will see a category that says “Snow” and “Muck Map”. These are the two areas that you will need to change the texture of the snow you have placed, and to ensure that vehicles don’t leave tracks behind.
Figure 7
On the image above, I have set up my favourite frost settings. A few points should be noted, however:
Diffuse, Normal and Deep Snow all have different characteristics, and you should experiment with each of them, but only do so one at a time. I have found that personally on my system, even if I make changes and hit “Apply” nothing will change until I zoom out from my map.
Although this process is time consuming, the right combination can make an impressive display. Additionally, try changing the Tiling of each one, to see whether the size of the texture you have selected can be improved.
Figure 8
Three final notes!
1. Ensure that your Muck Map section is cleared! Otherwise vehicles will still leave tracks, even if you have no snow!
2. Use deeper snow under buildings, or key objects to increase the “Frost” effect.
3. When you come to save and play your map, open up your .OPTIONS file in your map folder, and flick the “Uses_Ice” category onto “true” to make your infantry and vehicles change to Winter Camouflage. For more info, check out Janne252’s tutorial here.
We hope this tip was helpful and you check back next week, when we will provide you with a new Worldbuilder TotW.
 MonolithicBacon
  OnkelSam
  IrishHugo