

This is the Official Guide for VonIvan's Unbeatable Soviet Strat. This is also known as "Stalingrad Blitz Tactics". VonIvan is a top tier Soviet Player, currently ranked #5 as the Soviets, ( Soviet 1v1 Ladder Link ) so this guide is meant for players either A. Wanting to get good. B. Wanting to try something new. or C. Wanting to win as the Soviets. I hope this helps solve your Ostheer OP problems. Lastly, this strategy is a great counter against HelpingHans's Fortified Armor Strategies.
Introduction/Preliminary Abilities
Introduction:
*IMPORTANT* -This strategy guide will be updated every time a patch is released if needed, and I shall also add more input over time that is needed, at the current time this is the basics of it. (Will be putting in more pictures at a later time)
-Highest Streak ever attained by this strategy is +47 by EXPERTSVonIvan.
Preliminary Abilties:
-Make sure to get as many army upgrades as possible increasing the accuracy, defense, and strength of the conscript squads, therefore they don't die as easily! Meaning get bulletins that improve the conscript squad, basically filling in all bulletin squares, if you don't have all 3 yet then the 3rd bulletin should be of your personal choice, I recommend a t-34 bulletin.
Commmanders
Now you have a choice of 3 commanders.
Here's what each one does:
-Guard Motor Coordination Tactics
-Guard Rifle Combined Arms Tactics
-Conscript Support Tactics (Special Commander)
99.9% of the time I personally go with the Guards Rifle Combined Arms Tactics Doctrine. The reason being is because I like having the option of using the Guards as anti tank before I get my tier 3 units out if the German player goes for a quick flamer halftrack. It also gives me the ability to have hit the dirt, which helps if the German has the 10% suppression bulletin, or is mg spamming. I also get the ppsh which helps against infantry. As well as I have the option to use IL-2 Sturmovik Attacks which are deadly against German infantry, basically it can clear a whole German army if they're blobbed up in one area.
Beginning of the Game (Fast Tier 3)[Advanced Players]
[For a fast tier 3]
*This is if you're using the "Guards Rifle Commander" if not then just adjust this strat to your liking with the Commander of your choosing as it can connect easily!*
1. Use your first combat engineer squad to cap the strat points leading up to your closest fuel and cap that fuel, if no engagements from the enemy, continue capping the rest of the map afterwards. If there is an engagement then fallback and cap the other side of the map as the enemy will most likely horde around that side. If he does this, ignore him at first.
2. Get out 4-5 conscript squads, 5 conscripts if large map or floating manpower, 4 if small map, make sure to avoid enemy action unless it is necessary or you have the advantage, however, after a couple seconds of the first engagement prepare to move to either run to a building or other green area as the Osteer player will most likely come up with an mg to support his gren or pio squad you're engaging.
-If the enemy is near your closest fuel then wait until you have 4 conscripts out and molotovs upgraded to engage him. If the enemy is not near your closest fuel then send the rest of your conscript squads to either A. Cap the rest of the map or B. Support your first conscript squad you sent to cap the far fuel on the map. I recommend splitting your conscripts up by having two cap the side of the map your combat engineer is capping, and having the other 2-3 cap the other side of the map, that way if one side fails, or is overrun by the enemy, the other is most likely guaranteed to be under your control.
3. Once you have successfully set up a good flank from all sides using most of your conscripts squads to force the enemy to retreat from the fuel closest to him or on the side of the map he is on, take full advantage and try and hide behind as much cover as possible, especially on maps that allow you to hide yourself behind bushes so that way the enemy cannot see you or suppress you with his mg and you can use the Oorah ability the conscripts has to rush the enemy.
-Plan B. If for some reason you failed to get him off his closest fuel and you took some major casualties then you need to go on the defensive and let the enemy rush you so you can flank him and take him out. By this time he may have the flamer halftrack out as you cannot stop the build for it as it takes a very short amount of fuel to get t2 up. (Please note however if you can cap most of the map, especially the muni points that can delay his halftrack from getting the flamenwerfer[120 munitions]) By this time you should have 1 CP to call out your Guards Rifle Squad.
4. Once you have your guards rifle squad out to oppose the flamenwerfer halftrack make sure to use his prt anti-tank rifles to the best of your ability. You can do this in a simple, but effective way.
-First: Set up all or most of your conscript squads to flank the enemys mgs, use the guards rifles at a distance to ward the halftrack away as one hit from Guards does a considerable amount of damage as long as it doesn't miss hitting the halftrack. This should cause your opponent to use his halftrack less in fear of losing it.(Please note that it is important not to get this squad suppressed as it cannot shoot when pinned which then allows the halftrack to ♥♥♥♥ your other infantry.
5. Once you have the fuel make your t1 barracks, which is cheaper then the t2 building, don't make anything from it because you need the fuel for tier 3. Once tier 1 is complete make your t3 building.
Beginning of the Game(Safe Tier 3)[Beginners/average]
[Safe Tier 3]
*This is if you're using the "Guards Rifle Commander" if not then just adjust this strat to your liking with the Commander of your choosing as it can connect easily!*
1. Use your first combat engineer squad to cap the strat points leading up to your closest fuel and cap that fuel, if no engagements from the enemy, continue capping the rest of the map afterwards. If there is an engagement then fallback and cap the other side of the map as the enemy will most likely horde around that side. If he does this, ignore him at first.
2. Get out 4-5 conscript squads, 5 conscripts if large map or floating manpower, 4 if small map, make sure to avoid enemy action unless it is necessary or you have the advantage, however, after a couple seconds of the first engagement prepare to move to either run to a building or other green area as the Osteer player will most likely come up with an mg to support his gren or pio squad you're engaging.
-If the enemy is near your closest fuel then wait until you have 4 conscripts out and molotovs upgraded to engage him. If the enemy is not near your closest fuel then send the rest of your conscript squads to either A. Cap the rest of the map or B. Support your first conscript squad you sent to cap the far fuel on the map. I recommend splitting your conscripts up by having two cap the side of the map your combat engineer is capping, and having the other 2-3 cap the other side of the map, that way if one side fails, or is overrun by the enemy, the other is most likely guaranteed to be under your control.
3. Once you have successfully set up a good flank from all sides using most of your conscripts squads to force the enemy to retreat from the fuel closest to him or on the side of the map he is on, take full advantage and try and hide behind as much cover as possible, especially on maps that allow you to hide yourself behind bushes so that way the enemy cannot see you or suppress you with his mg and you can use the Oorah ability the conscripts has to rush the enemy.
-Plan B. If for some reason you failed to get him off his closest fuel and you took some major casualties then you need to go on the defensive and let the enemy rush you so you can flank him and take him out. By this time he may have the flamer halftrack out as you cannot stop the build for it as it takes a very short amount of fuel to get t2 up. (Please note however if you can cap most of the map, especially the muni points that can delay his halftrack from getting the flamenwerfer[120 munitions]) By this time you should have 1 CP to call out your Guards Rifle Squad.
4. Once you have your guards rifle squad out to oppose the flamenwerfer halftrack make sure to use his prt anti-tank rifles to the best of your ability. You can do this in a simple, but effective way.
-First: Set up all or most of your conscript squads to flank the enemys mgs, (upgrade to at nades if possible too, that helps slow the halftrack), if you can get an at nade on the halftrack great, however if you can't then just use the guards rifles at a distance to ward the halftrack away as one hit from Guards does a considerable amount of damage as long as it doesn't miss hitting the halftrack. This should cause your opponent to use his halftrack less in fear of losing it.(Please note that it is important not to get this squad suppressed as it cannot shoot when pinned which then allows the halftrack to ♥♥♥♥ your other infantry.
5. Once you have the fuel make your t2 barracks for at guns and maxims(maxim if need/floating).
5. By this time you should have enough fuel to get t2 up, which is the Support Weapons Kamp, now once this is up, it all depends on your situation, here are the two possible outcomes.
A. If you are being pushed back by the enemy and he's effectively stopping your flanks then you must get 1-2 at-guns out and an mg out if possible to be able to defend yourself against armor attacks and the flamer halftrack, make sure the at guns are well guarded(make sure to put mines down around them if you have the extra munis, as it causes any armor rush to become obsolete, as you can lead the at gun behind the mine or have the halftrack or w/e vehicle hit the mine when flanking the at-gun) and behind your infantry as you do not want them to get sniped by Grens, Panzergrens, or other german infantry or armor. Slowly push up with your at-guns and infantry to be able to push back the enemy.(Note if you have extra ammo use it to upgrade the Guards Riflemen and use the artillery ability the at-guns have to ward of the enemy, especially if he blobs.
Middle/Late Game(Fast Tier 3)[Advanced Players]
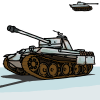
-Now once you have the fuel here comes the fun part of the strat, make your t3 building which is the Tankoviy Battallion Command and pump out 1-3 T-70s(depending on fuel income/situation)(Do not use t-70s unless you're really pushed back and it's an emergency!), now if the Osteer player doesn't have his t3 up or any p4 or stug on the field it is safe to say your T-70s can go and base ♥♥♥♥ him or basically take out at least half his army on the field.
-THE T-70'S ABILITIES-Now the T-70 is essentially like the GodHound in CoH1 except for having weaker armor and no mg gun on top. Now with the T-70 you can do several things, snipe paks with ease, counter light german armor/flamer halftrack, and basically take out german infantry without worry. Now, it should be noted that the T-70 does have some weaknesses which are as follows: Any mine laid by the Osteer player easily takes out the T-70 at full health, yes, full health
 , however it is essential when you use the T-70s to try and keep off the main road or paths on the map, as that decreases the likelyhood of getting hit by a mine. The next weakness is that any armor from t3 to t4 can easily take out the T-70 in 2-3 shots, except for the stug, if the stug is unguarded you should be able to circle it with your t-70s to easily take it out as it does not have a rotating turret(FUN FACT: T-70 can penetrate side and back armor of p4 and stug, inflicting damage between 7-15% to the tank).
-Upgrade to at-nades if you get the chance-
7. By mid to late-game the Osteer player should be able to get either t3 or t4 tanks out on the field, by the time he has his first tank you must never use your T-70s aggressively as they can easily be followed in speed by the p4 or stug and taken out, so use them conservatively unless the chance arrises where you can either A. lead the heavy tanks into a trap. OR B. Weakened the heavy tanks well enough with your at-nades or Guards to allow the T-70s to finish them off on retreat.
8. So for the mid to late-game I like to just keep my 3 T-70s alive if possible, if you can't, do not, I REPEAT, DO NOT, replace them as that will be a waste of fuel now that he can get heavy tanks on the field, so the best thing to do is to ward him off with a combination of your Guards, At-nades, and with the fuel you're getting begin making t-34s. Use T-34s as your main anti-tank/anti-infantry deterrent/armor killer.
Now the T-34 is a great anti-tank weapon, but if you go head to head with a p4, both being full health 8/10 your t-34 will die so always support it with guards or conscript's at-nades if you're going to make a push against a p4 or p4s.
Use the t-34s to ram the armor once you have the chance, move up with guards/T-70s/another t-34 to finish it off, have conscripts throw at-nades if possible to damage the engine of the vehicle(s), and use the Guards Rifles to button the vehicles from escaping retreat.
Middle/Late Game(Safe Tier 3)[Beginners/Average]
-Now once you have the fuel here comes the fun part of the strat, make your t3 building which is the Tankoviy Battallion Command and pump out 3 T-70s(Do not use t-70s unless you're really pushed back and it's an emergency!), now if the Osteer player doesn't have his t3 up or any p4 or stug on the field it is safe to say your T-70s can go and base ♥♥♥♥ him or basically take out at least half his army on the field.
-THE T-70'S ABILITIES-Now the T-70 is essentially like the GodHound in CoH1 except for having weaker armor and no mg gun on top. Now with the T-70 you can do several things, snipe paks with ease, counter light german armor/flamer halftrack, and basically take out german infantry without worry. Now, it should be noted that the T-70 does have some weaknesses which are as follows: Any mine laid by the Osteer player easily takes out the T-70 at full health, yes, full health
, however it is essential when you use the T-70s to try and keep off the main road or paths on the map, as that decreases the likelyhood of getting hit by a mine. The next weakness is that any armor from t3 to t4 can easily take out the T-70 in 2-3 shots, except for the stug, if the stug is unguarded you should be able to circle it with your t-70s to easily take it out as it does not have a rotating turret(FUN FACT: T-70 can penetrate side and back armor of p4 and stug, inflicting damage between 7-15% to the tank).7. By mid to late-game the Osteer player should be able to get either t3 or t4 tanks out on the field, by the time he has his first tank you must never use your T-70s aggresively as they can easily be followed in speed by the p4 or stug and taken out, so use them conservatively unless the chance arrises where you can either A. lead the heavy tanks into a trap. OR B. Weakened the heavy tanks well enough with your at-guns or Guards to allow the T-70s to finish them off on retreat.
8. So for the mid to late-game I like to just keep my 3 T-70s alive if possible, if you can't, do not, I REPEAT, DO NOT, replace them as that will be a waste of fuel now that he can get heavy tanks on the field, so the best thing to do is to ward him off with a combination of your Guards, At-guns, and with the fuel your getting begin making t-34s, use the t-34s to ram the armor once you have the chance, move up supported at-guns to finish it off, have conscripts throw at-nades if possible to damage the engine of the vehicle(s), and use the Guards Rifles to button the vehicles from escaping retreat.
-Upgrade to at-nades if you get the chance-
7. By mid to late-game the Osteer player should be able to get either t3 or t4 tanks out on the field, by the time he has his first tank you must never use your T-70s aggressively as they can easily be followed in speed by the p4 or stug and taken out, so use them conservatively unless the chance arrises where you can either A. lead the heavy tanks into a trap. OR B. Weakened the heavy tanks well enough with your at-guns or Guards to allow the T-70s to finish them off on retreat.
8. So for the mid to late-game I like to just keep my 3 T-70s alive if possible, if you can't, do not, I REPEAT, DO NOT, replace them as that will be a waste of fuel now that he can get heavy tanks on the field, so the best thing to do is to ward him off with a combination of your Guards, At-nades, and with the fuel you're getting begin making t-34s. Use T-34s as your main anti-tank/anti-infantry deterrent/armor killer.
Now the T-34 is a great anti-tank weapon, but if you go head to head with a p4, both being full health 8/10 your t-34 will die so always support it with guards, at-guns or conscript's at-nades if you're going to make a push against a p4 or p4s.
Use the t-34s to ram the armor once you have the chance, move up with guards/T-70s/at-guns/another t-34 to finish it off, have conscripts throw at-nades if possible to damage the engine of the vehicle(s), and use the Guards Rifles to button the vehicles from escaping retreat.
Conclusion
So by the end of the game you should be able to successfully beat the Ostheer player if all goes according to plan!
Any Questions? Leave em' in the comments section below and I'd be glad to answer them as soon as I possibly can!


 cblanco ★
  보드카 중대
  VonManteuffel
  Heartless Jäger