

Mechanics I've used here are a result of messing around and testing. I find this way to be the easiest and fastest way of creating a tactical map in GIMP. If you have better ideas feel free to post them (especially for water).
I highly recommend you to watch the video and read up OnkelSam's tutorial how this is done in Photoshop before you start:
http://www.coh2.org/topic/10407/how-to-create-tactical-map-images
Getting started
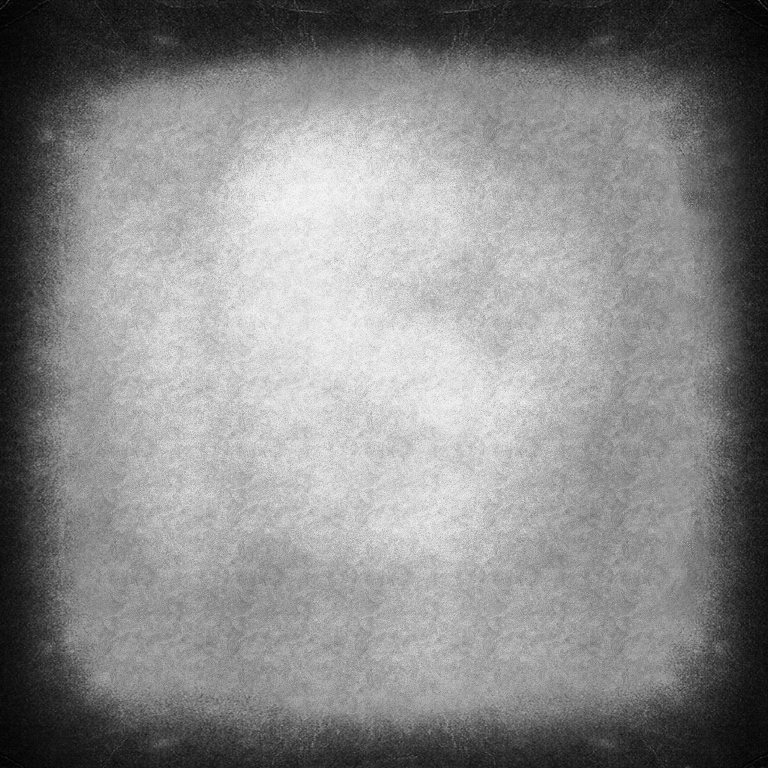
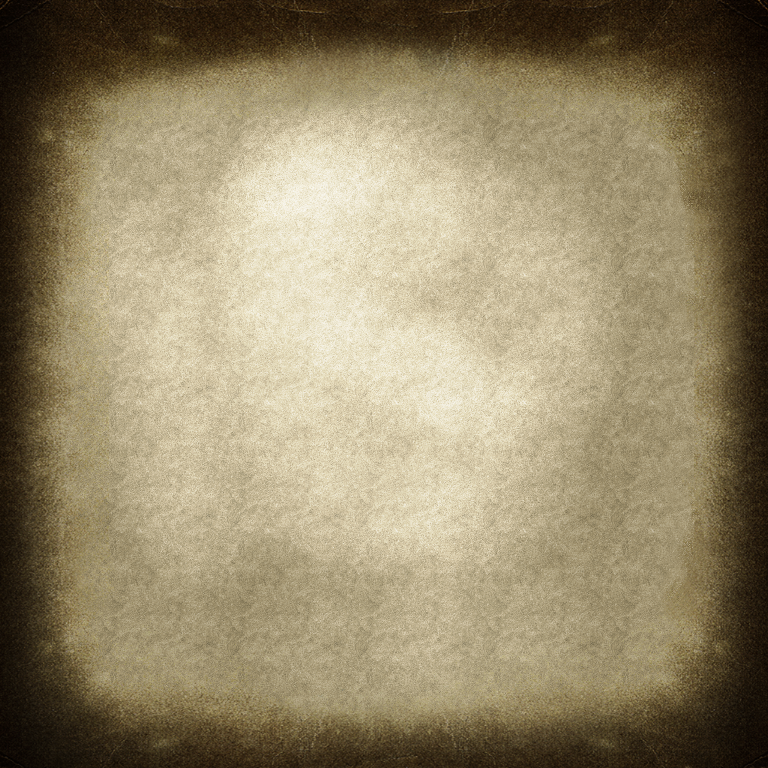
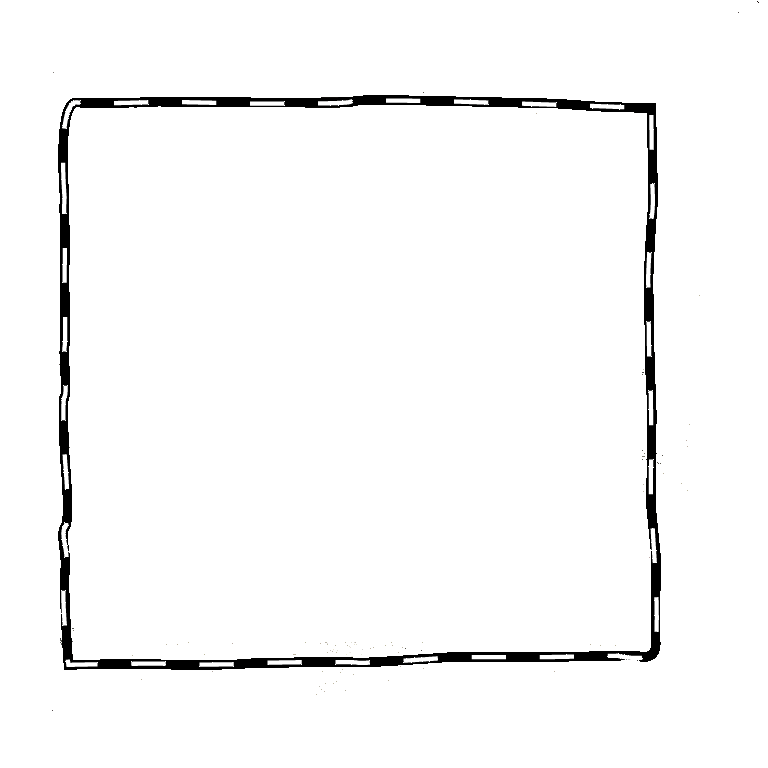
I've created some PNG files which you'll need to download. I've created summer and winter variations of the background and the borders for square maps. I've also created a palette image which you can use for painting the various layers.
Files can be downloaded here:
http://www.coh2.org/file/3461/backgroundwinter.png
http://www.coh2.org/file/3460/backgroundsummer.png
http://www.coh2.org/file/3459/borders.png
http://www.coh2.org/file/3458/palette.png
So let's get started:
- Save your overhead map in Worldbuilder and open it up in GIMP (map_mm.tga)
- Open layers view in GIMP:

- Create new layer for Borders

- Open up Borders.png in GIMP and copy and paste it into the Borders layer.
- If you need to scale the borders use GIMP's scaling tool

- Here's how your image should look now:

Roads
- Use color picker tool and pick the road color from palette.png

- Now create new layer for roads in between borders and background layer.
- We're gonna use GIMP's Path tool for painting the roads. Make sure you have Road layer selected and road color picked.
- Using Path tool takes a bit of practise to make smooth curves for the roads.
- Here's an example of one of my Paths:

- To paint the road, click on Stroke Path button.
- Dialog appears in which you'll select the width of your road. I'm using 12 pixels for mainroads and 8 for smaller roads.

- Click Stroke to paint the road.

- Rinse and repeat for every road you have on your map. The final outcome of mine is:

Road outlines
- Now we need to make those darker edges for roads, Use Fuzzy select tool to select all the roads.

- With all the roads selected. Go to top Select menu and click Grow.

- Dialog appears asking you how many pixels you want to grow the selection, 3 or 2 pixels is adequate
- Now make a new layer between background and roads layer
- Go to palette.png and pick road outline color

- Now use Bucket fill tool to fill the current selection with outline color. Notice that the road outline layer must be below the roads layer.
- Here's the result so far:

Buildings
- Use Color Picker tool to pick the building color from palette.png

- Create new layer for buildings.
- Use Rectangular select tool to select buildings and Bucket fill them with the building color.
- Result should look something like this:

- For diagonal buildings you will need to fill a rectangle and then use Rotate tool to align the building block properly.
Water
NOTE: You can use water map or Freeselect tool to select all water parts from the map. I personally think results look better with Freeselect. Here's how to do it with watermap anyway:
- Create new layer for water in your map image.
- Use Export Water map in Worldbuilder and open the exported Tga in GIMP. My map only has a little bit of water.
- In your watermap, select all the black with Fuzzy select tool and hit delete, this makes adjusting water map easier.
- Hit CTRL+A to select the whole water map image, copy it and paste it into your newly created waterlayer.
- This one is a bit tricky, use scaling tool to adjust the white parts with the water in your map. Mine looks like this:

- Click Scale to finish the scaling.
- Now go to palette.png again and pick the watercolor

- Select all the water with Fuzzy select tool and fill them with Bucket fill tool.
- Now select Dodge/Burn tool, check Burn, use soft brush and paint little soft darkened edges around the water splats:

- Unselect the water selection. We want to soften the edges a bit so go to Filters>Blur>Gaussian Blur.
- Adjust the blur values 3px Horizontal and 3x Vertical is fine for me.
- Next we want to get some texture on the water, go to Filters menu>Noise>HSV Noise. Adjust the values as you like but don't go over the top.

- Hit OK to apply the noise.
Finishing it up
- Now only thing we need to do is to apply the background and clean up the image a bit. I've only made square summer/winter so far. Open it up in GIMP.
- Hit CTRL+A to select the whole background and Copy it.
- Go to your map image and create new layer above the original background.
- Paste the background into the layer.

- The road outlines and buildings look a bit jagged atm. Use Filters>Blur>Gaussian blur to soften these layers up a bit.

- Looks much better.
- Now we want to make the objects fade into the borders of the map.
- Use Eraser tool and pick softest brush you can find. Increase the size to something like 150-200 and start erasing all the layers from the edge of the image:

- That's it! Go to File>Export and select TGA as a filetype.
- Here's the final product:
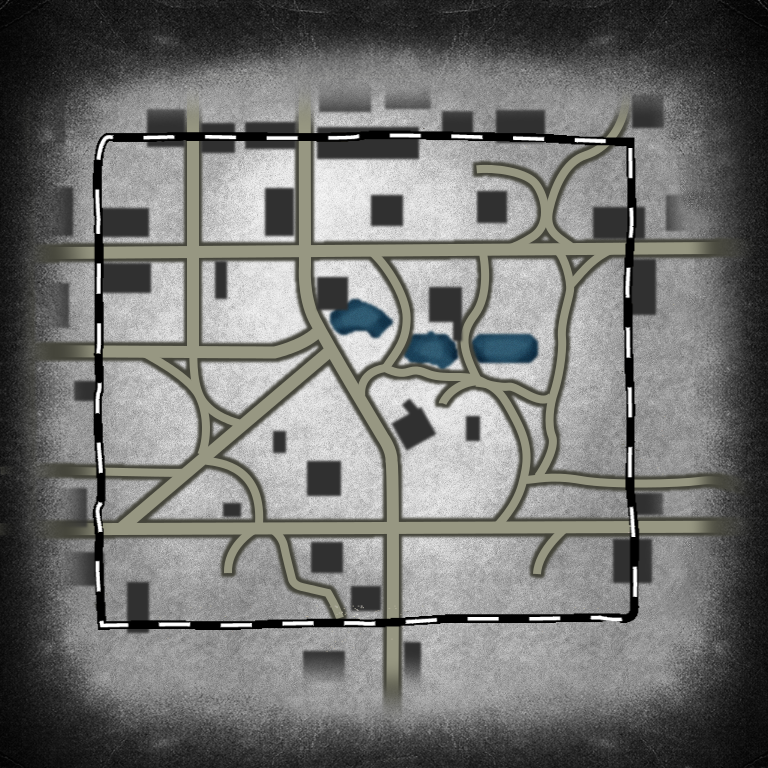
- Not perfect, but will do
")


 cblanco ★
  보드카 중대
  VonManteuffel
  Heartless Jäger
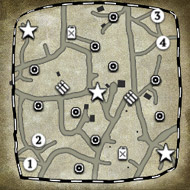